How to Connect a Custom Domain to Your Custom Website
You will connect a domain you already own, or buy a new one, for your Cohart custom website.
Part A — Connect a domain you already own
1. Sign in
Open https://staging.cohdev.co/auth/login?authType=password.
Enter your email in Enter email address and your password in Enter password.
Click SIGN IN.
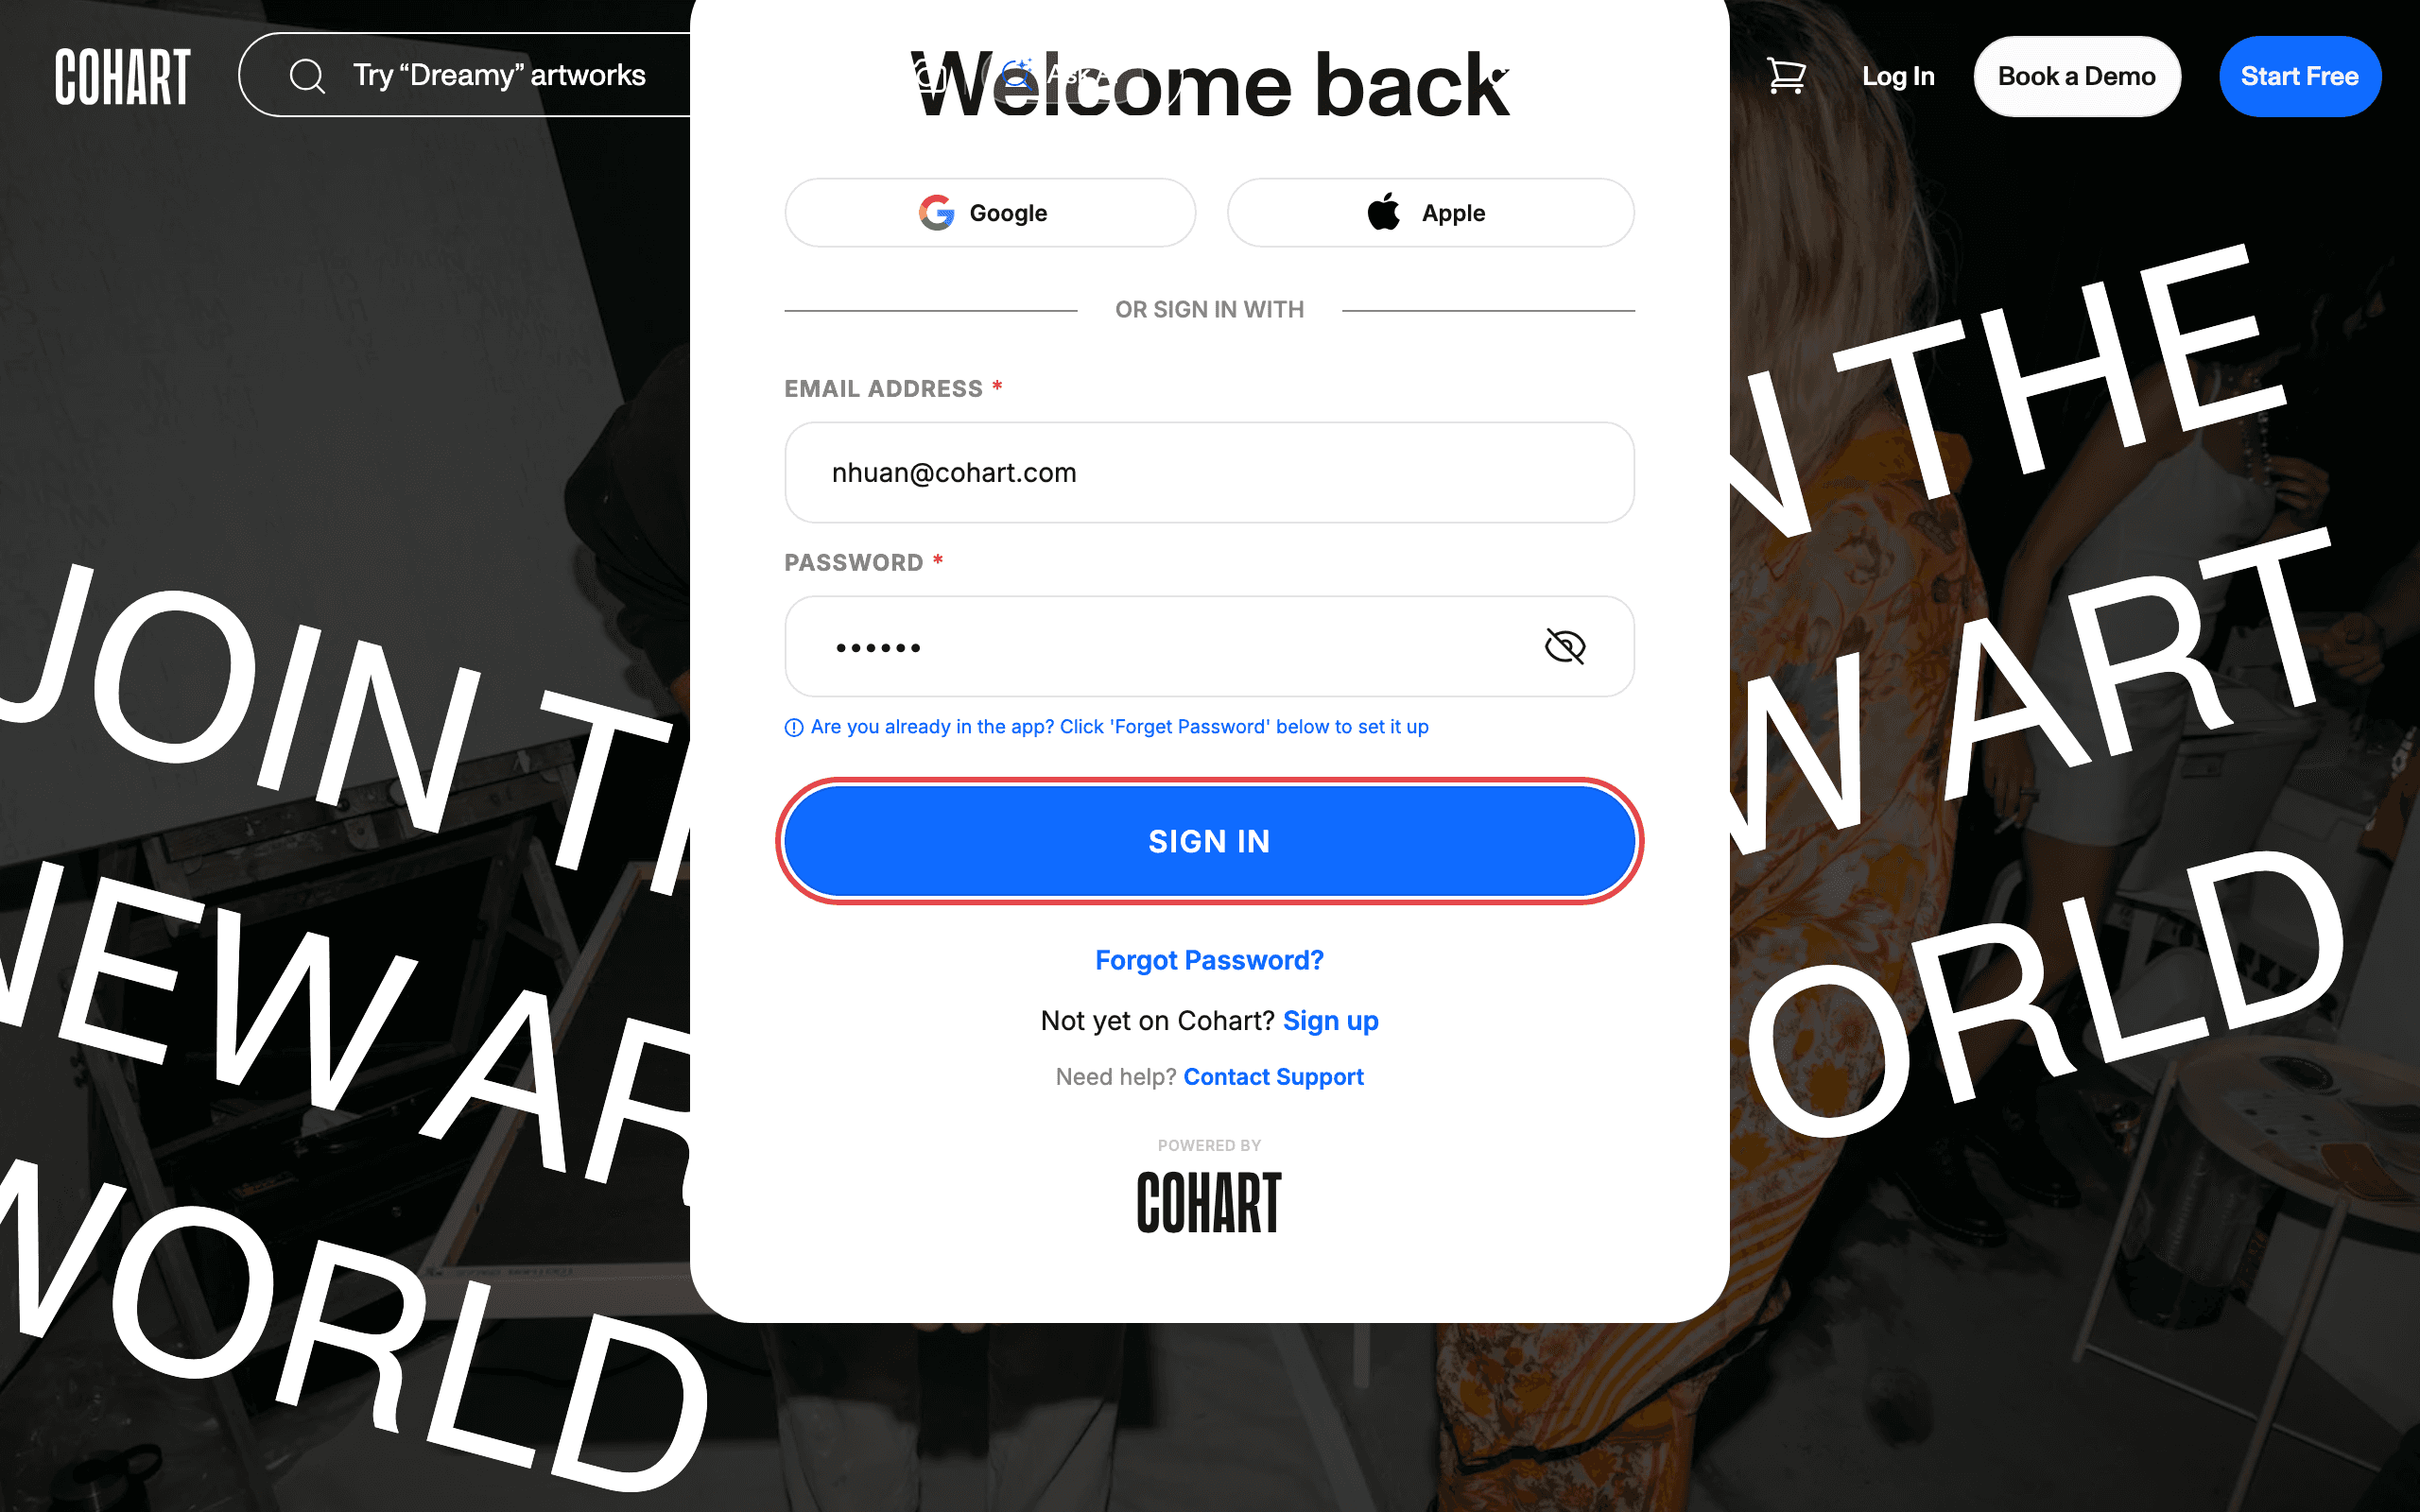
You can also sign in with Google or Apple. If you cannot sign in, use Forgot Password? or Contact Support. New to Cohart? Use the Sign up link.
2. Open Custom Website
Click Custom Website in the left sidebar.
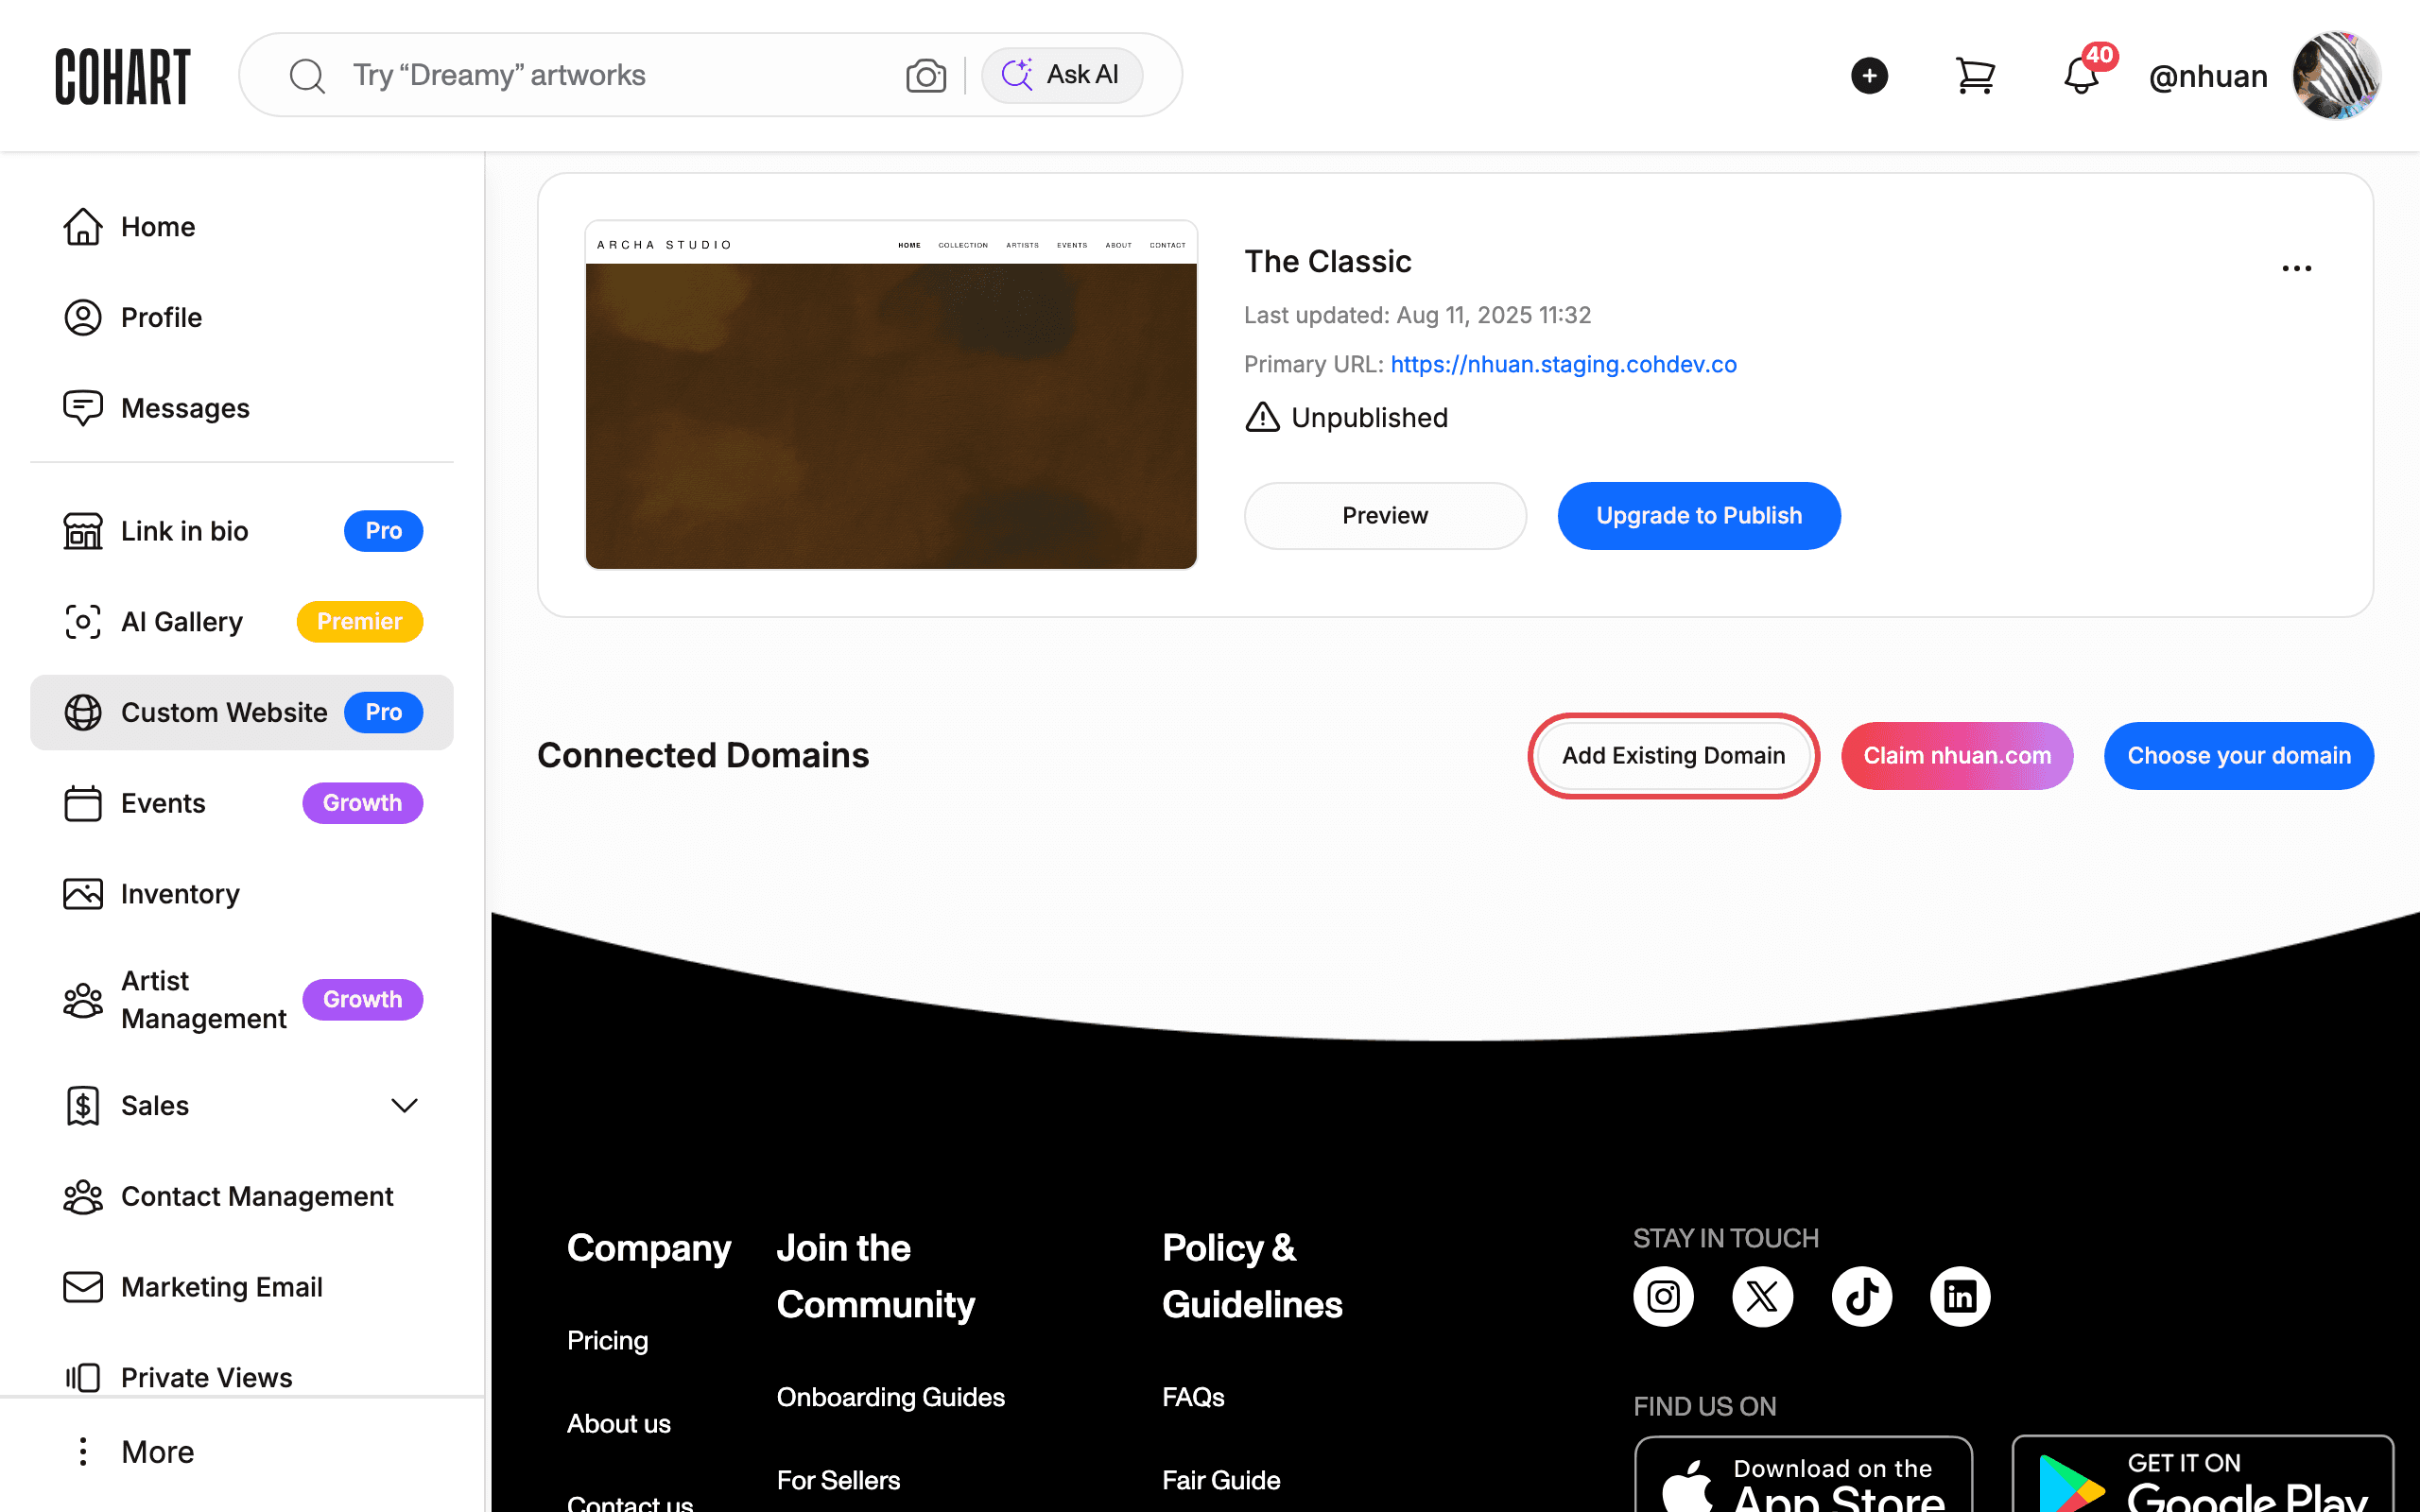
The page shows your template (The Classic), its Primary URL, and the Unpublished status. It also shows the Connected Domains section with three buttons: Add Existing Domain, Claim nhuan.com, and Choose your domain. (Claim nhuan.com shows your own account name.) Use Preview to view your site. Publishing requires Upgrade to Pro and Upgrade to Publish.
3. Click Add Existing Domain
Click Add Existing Domain.
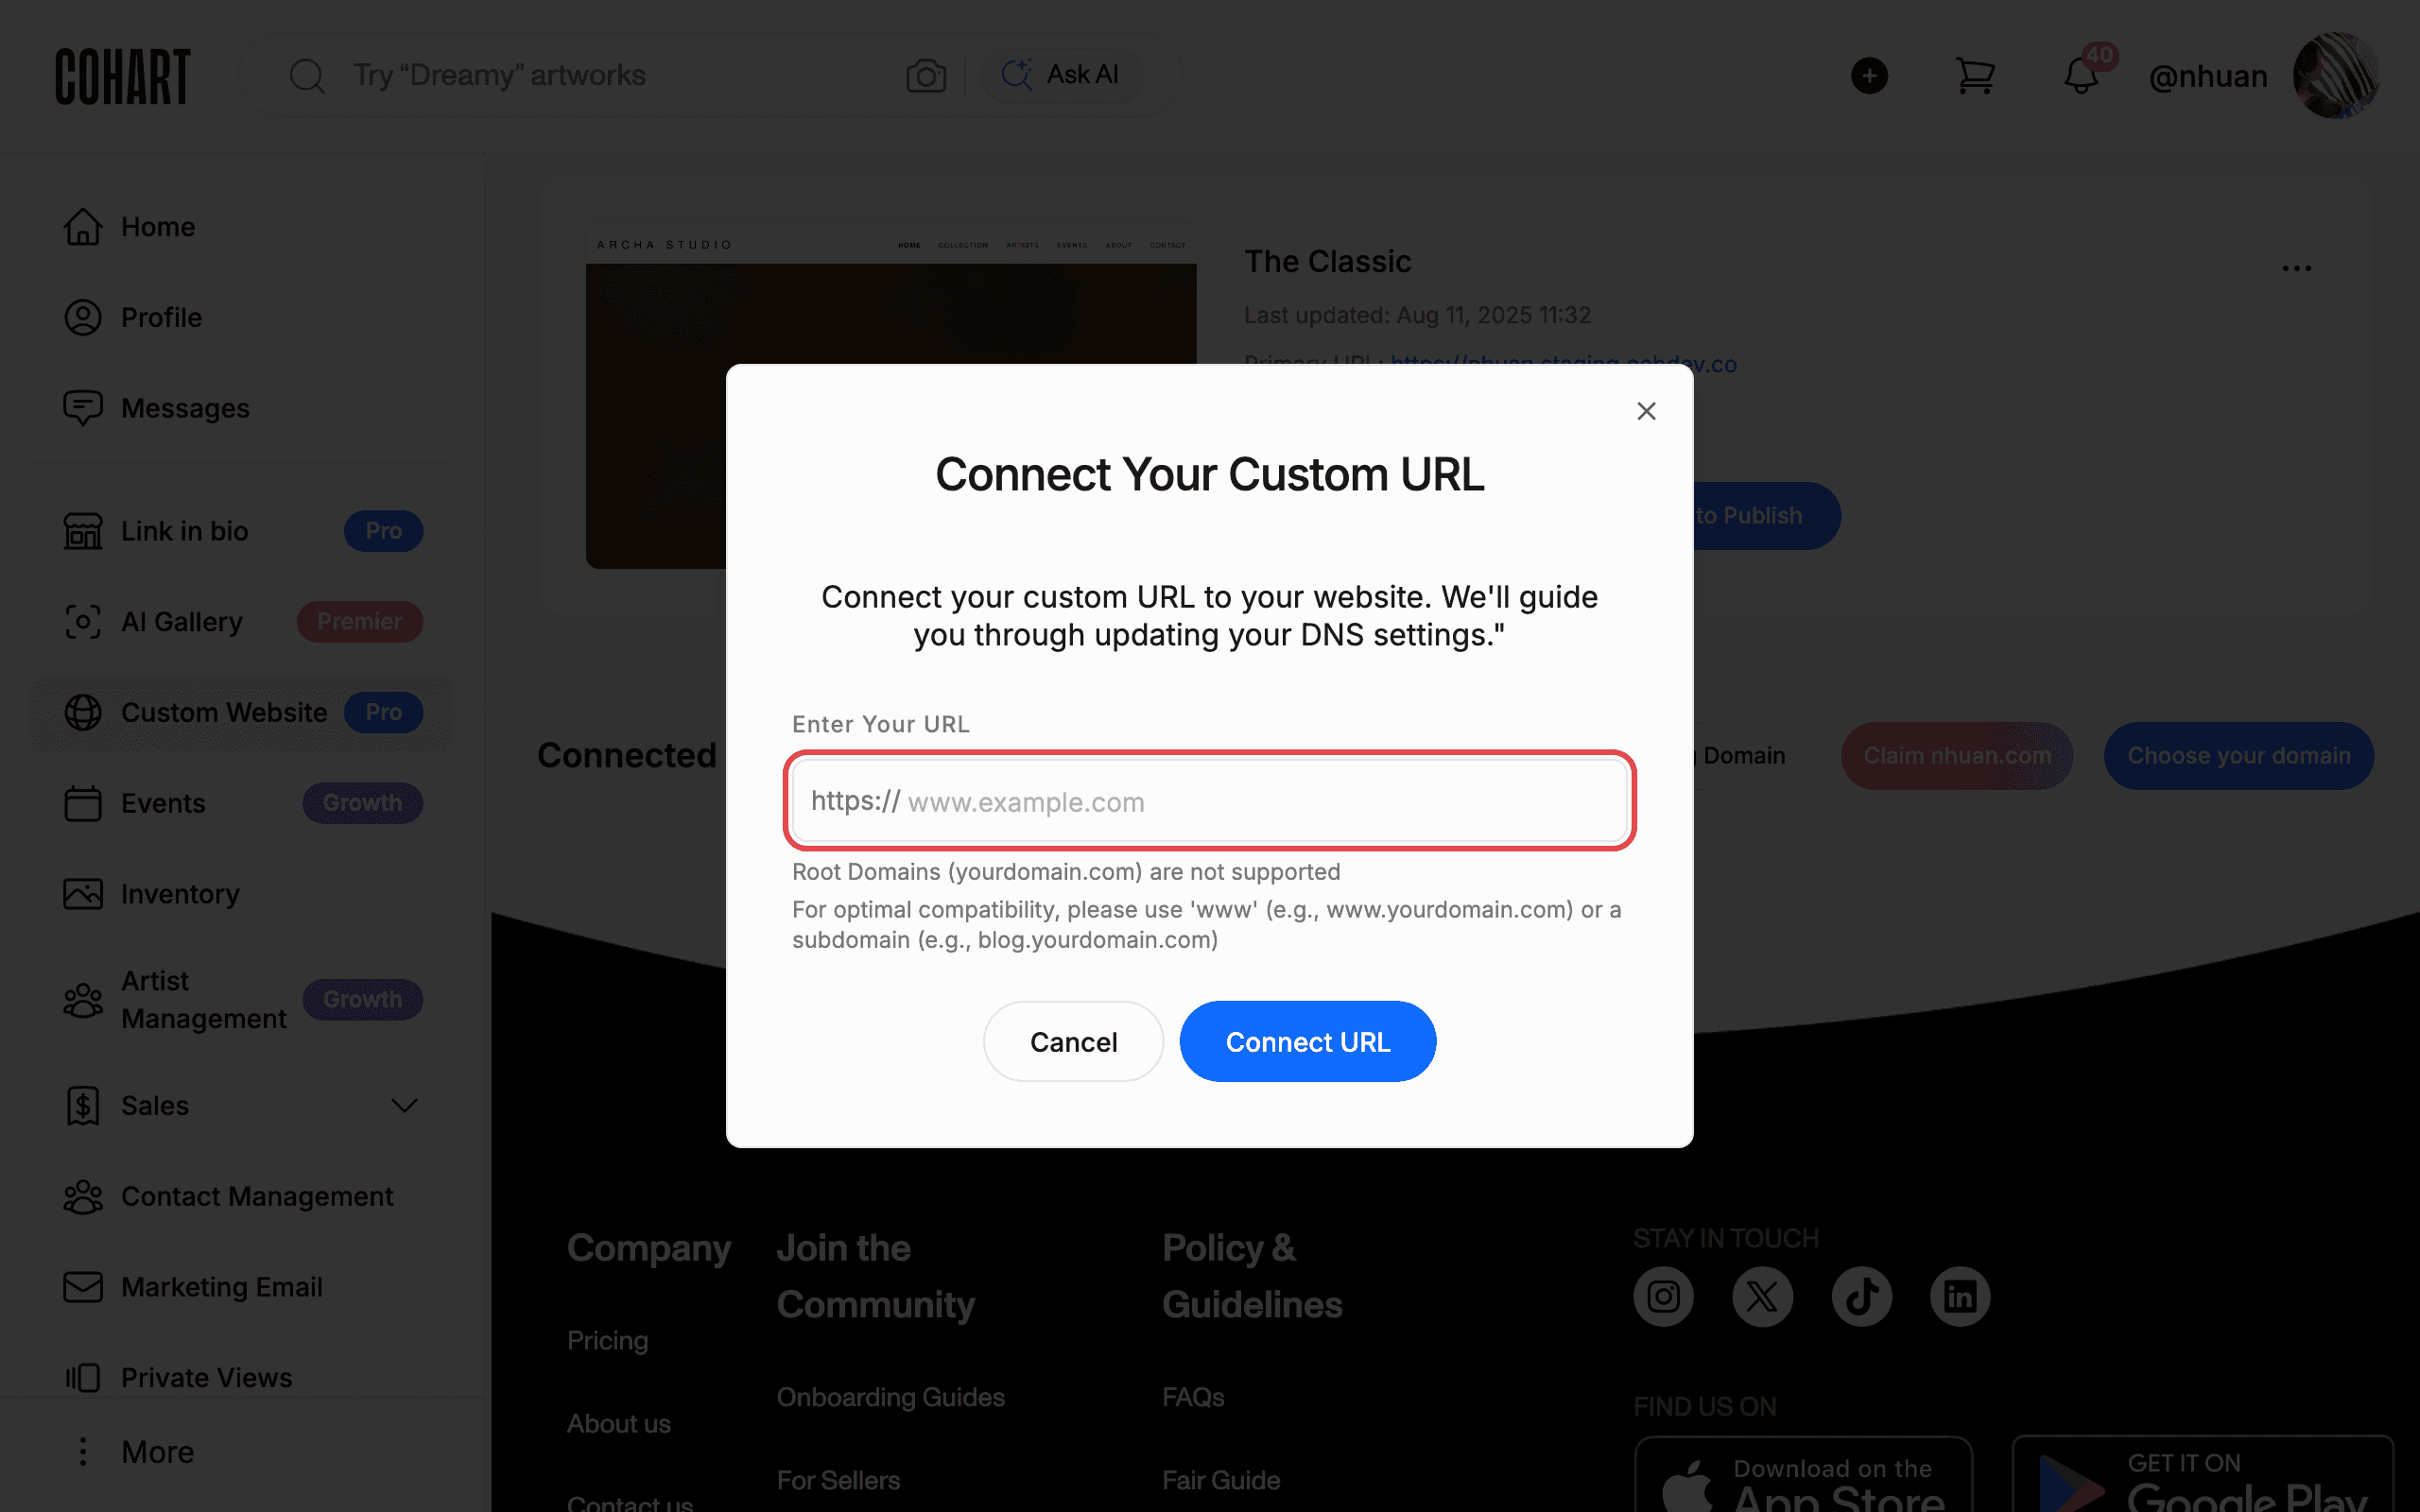
The Connect Your Custom URL dialog opens. It says: “Connect your custom URL to your website. We’ll guide you through updating your DNS settings.”
4. Enter your URL and click Connect URL
Type your domain in the Enter Your URL field (placeholder www.example.com ).
Click Connect URL.
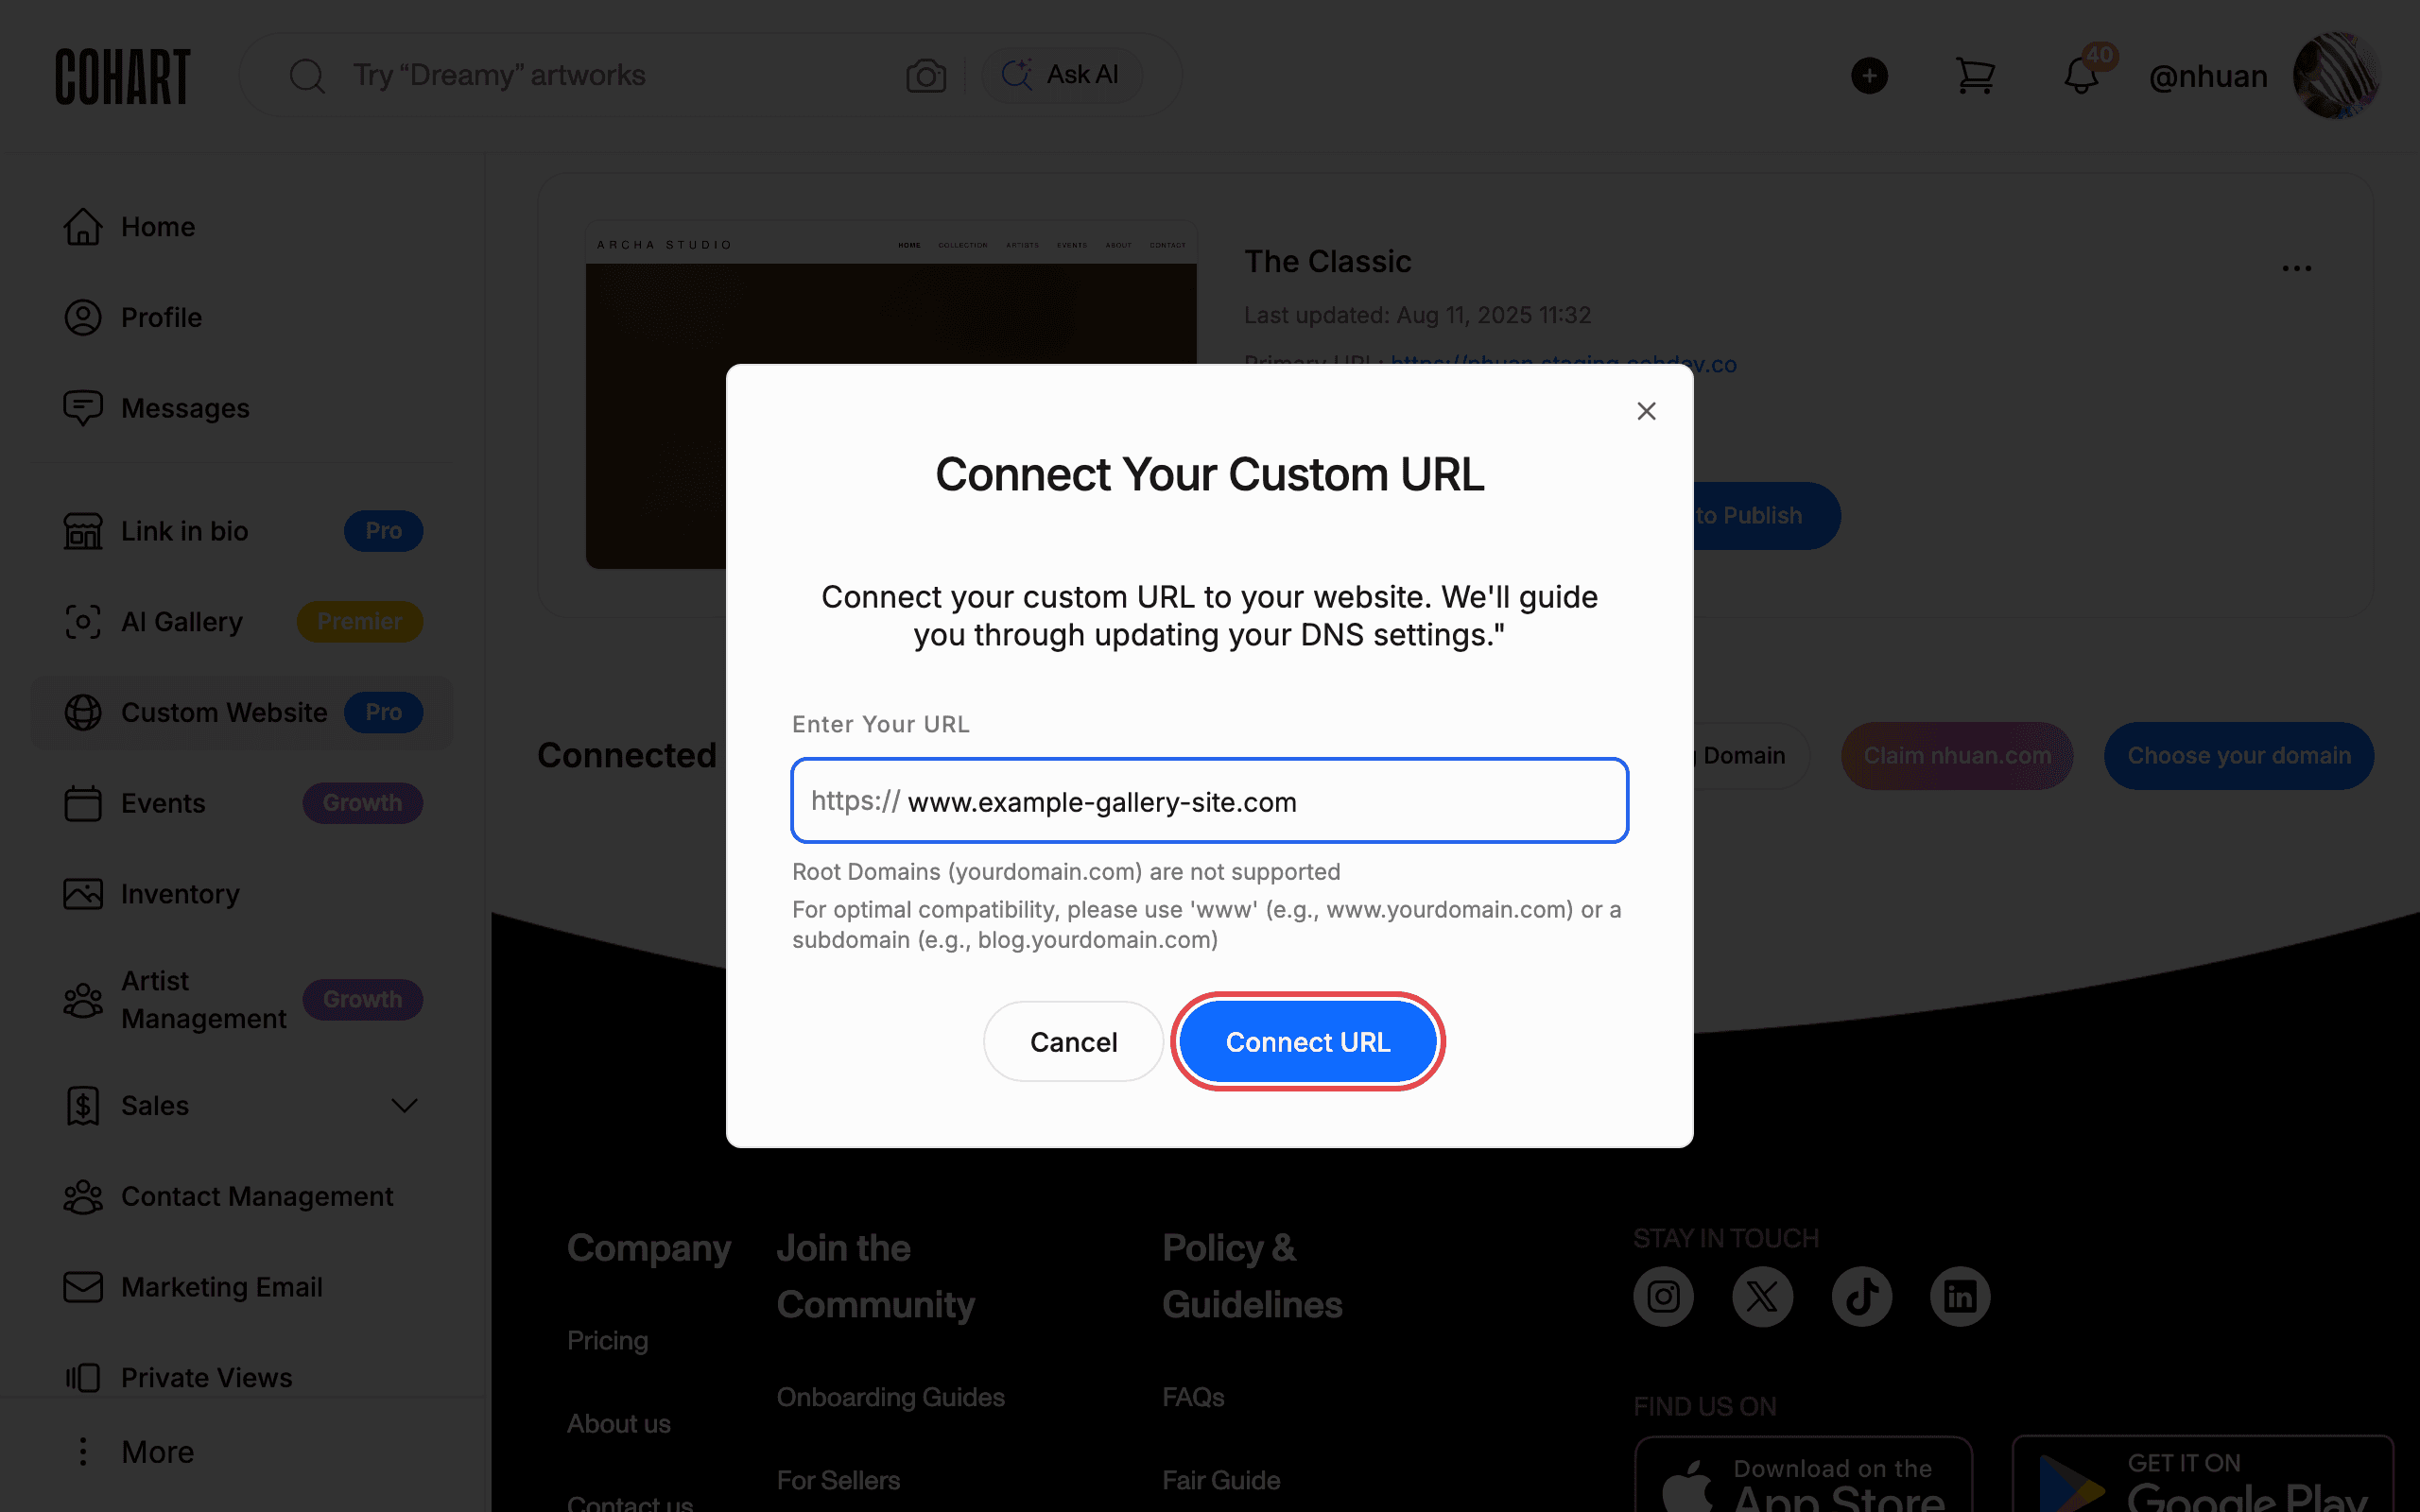
Use a www address (for example www.yourdomain.com) or a subdomain (for example blog.yourdomain.com). Root domains (yourdomain.com) are not supported. Click Cancel or Close to leave without connecting.
5. Add the DNS records at your domain provider
After connecting, your domain appears with the status Invalid Configuration. Click Learn more to expand the instructions.
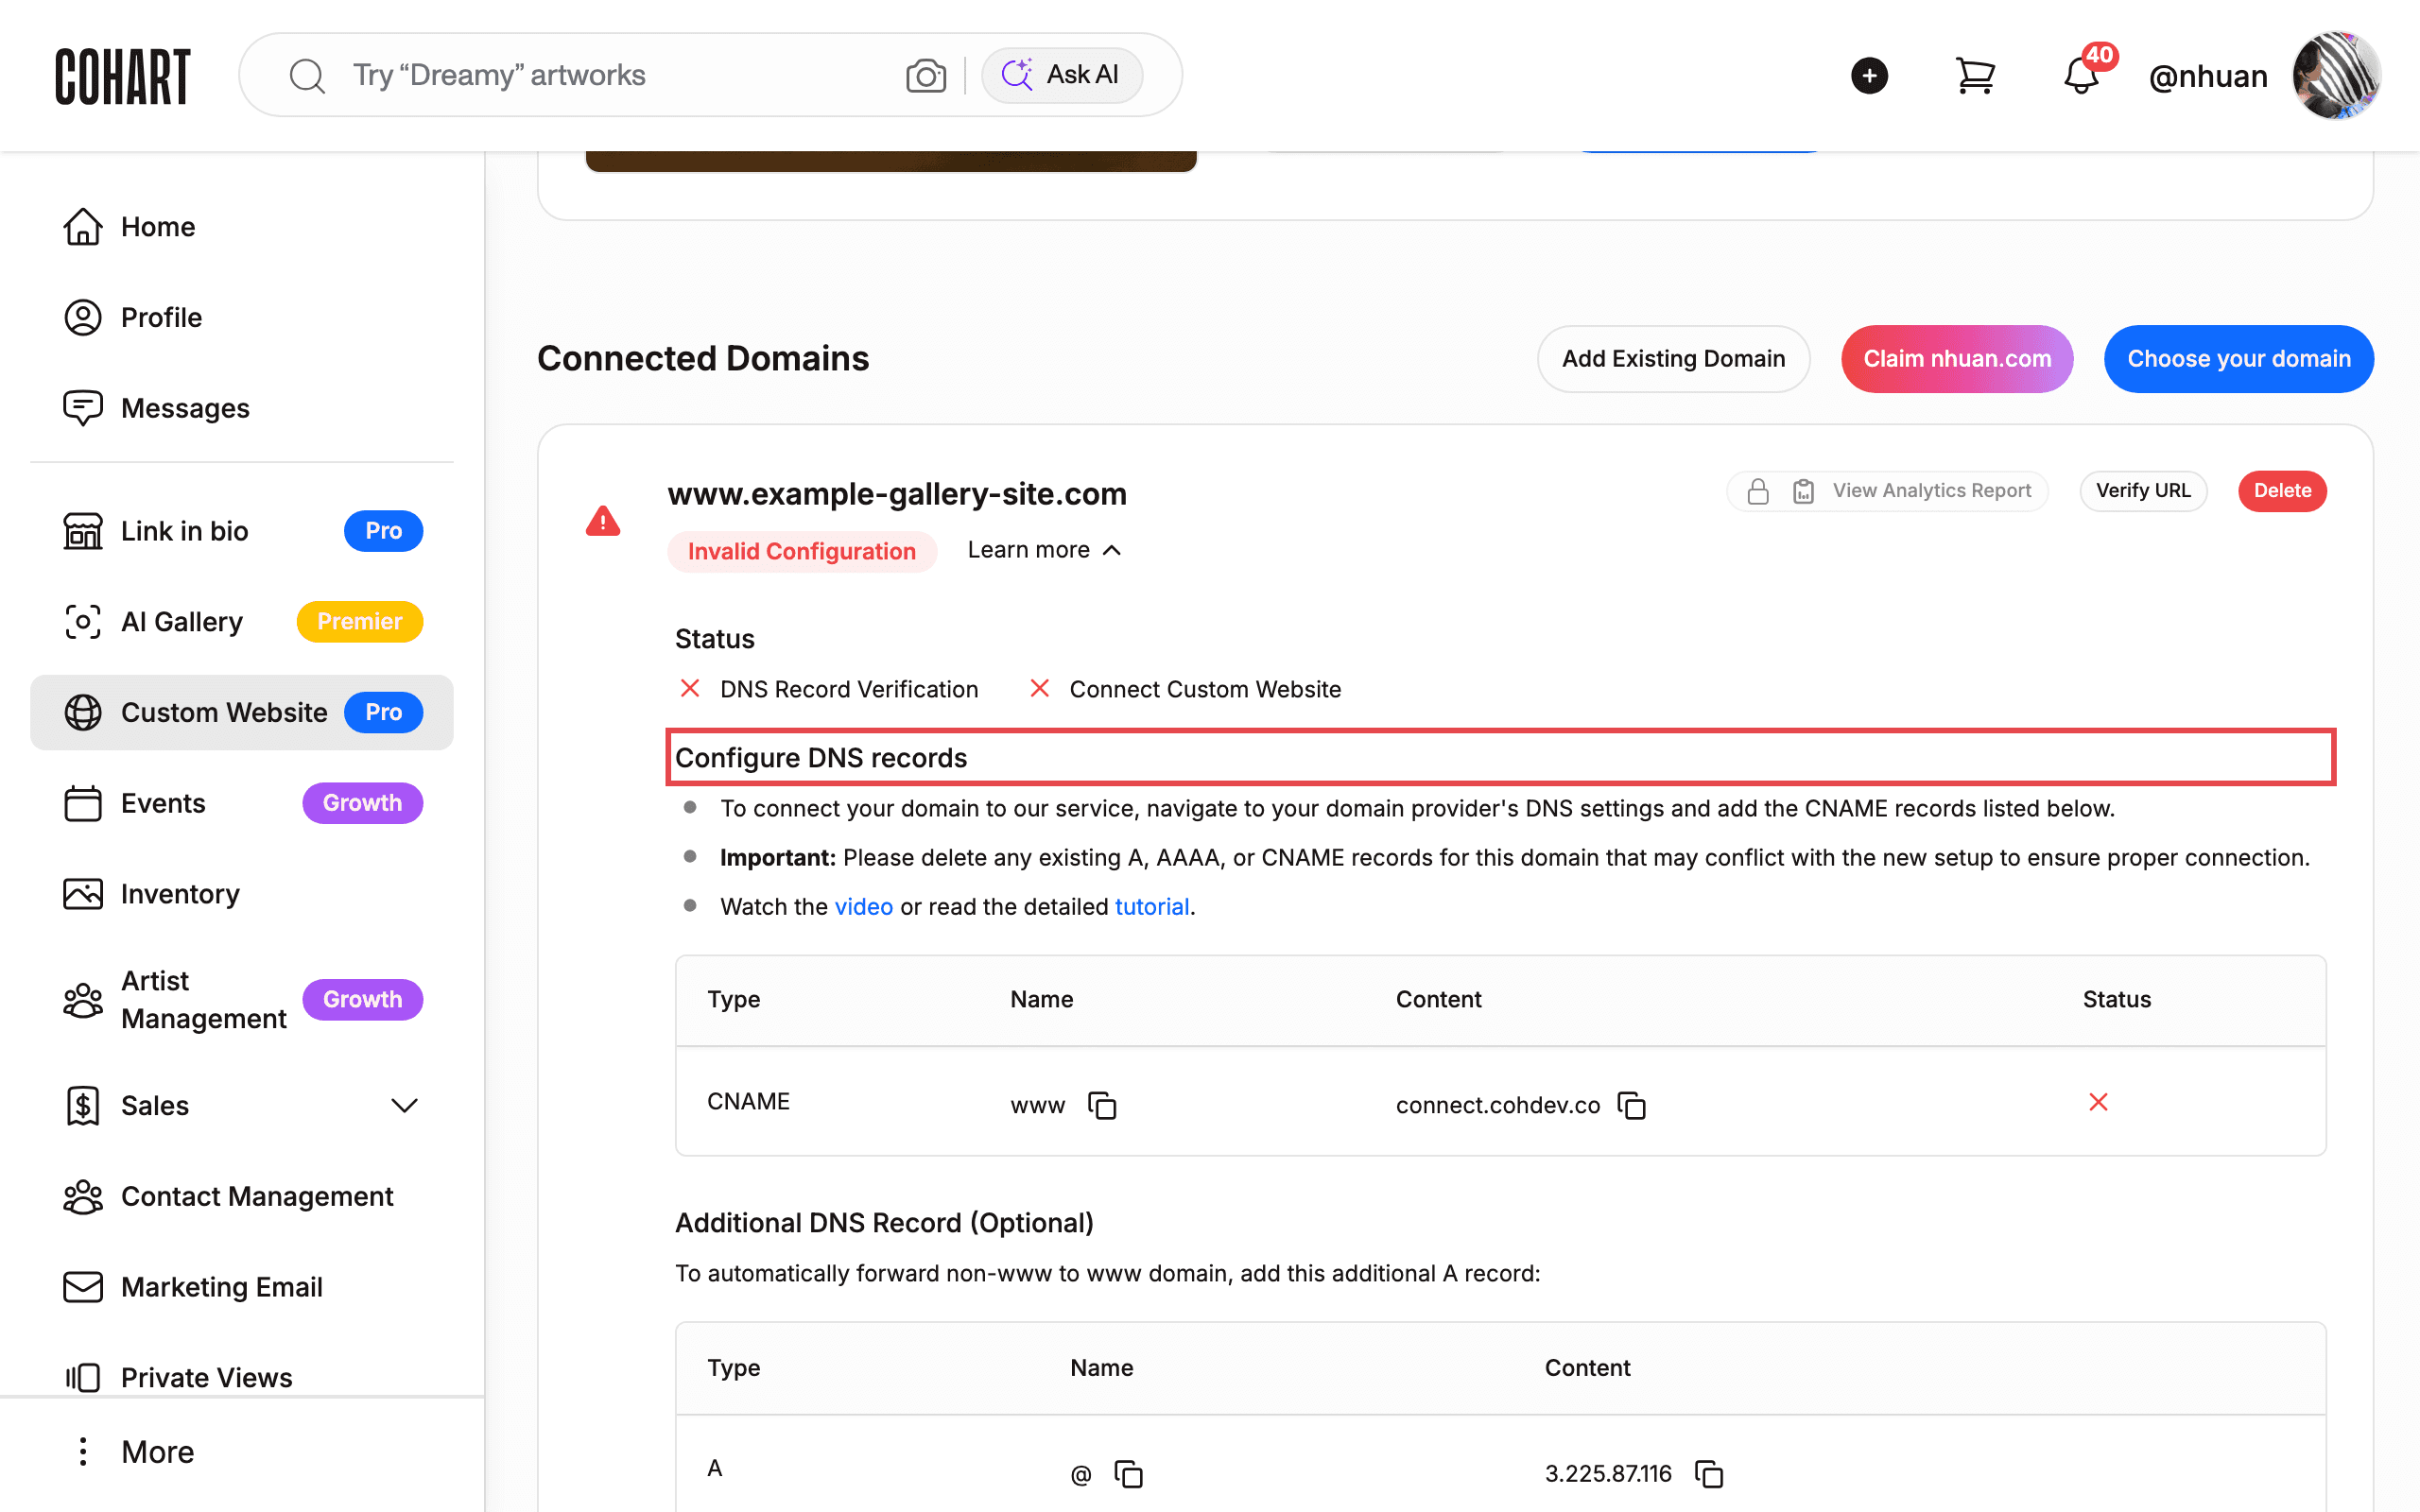
Go to your domain provider’s DNS settings and add this record:
| Type | Name | Content |
|---|---|---|
| CNAME | www | connect.cohdev.co |
Delete any existing A, AAAA, or CNAME records for this domain that may conflict with the new setup.
To forward the non-www address to the www address, add this optional record:
| Type | Name | Content |
|---|---|---|
| A | @ | 3.225.87.116 |
Watch the video or read the detailed tutorial linked in the panel for provider-specific help.
6. Click Verify URL after updating DNS
Click Verify URL to re-check your DNS.
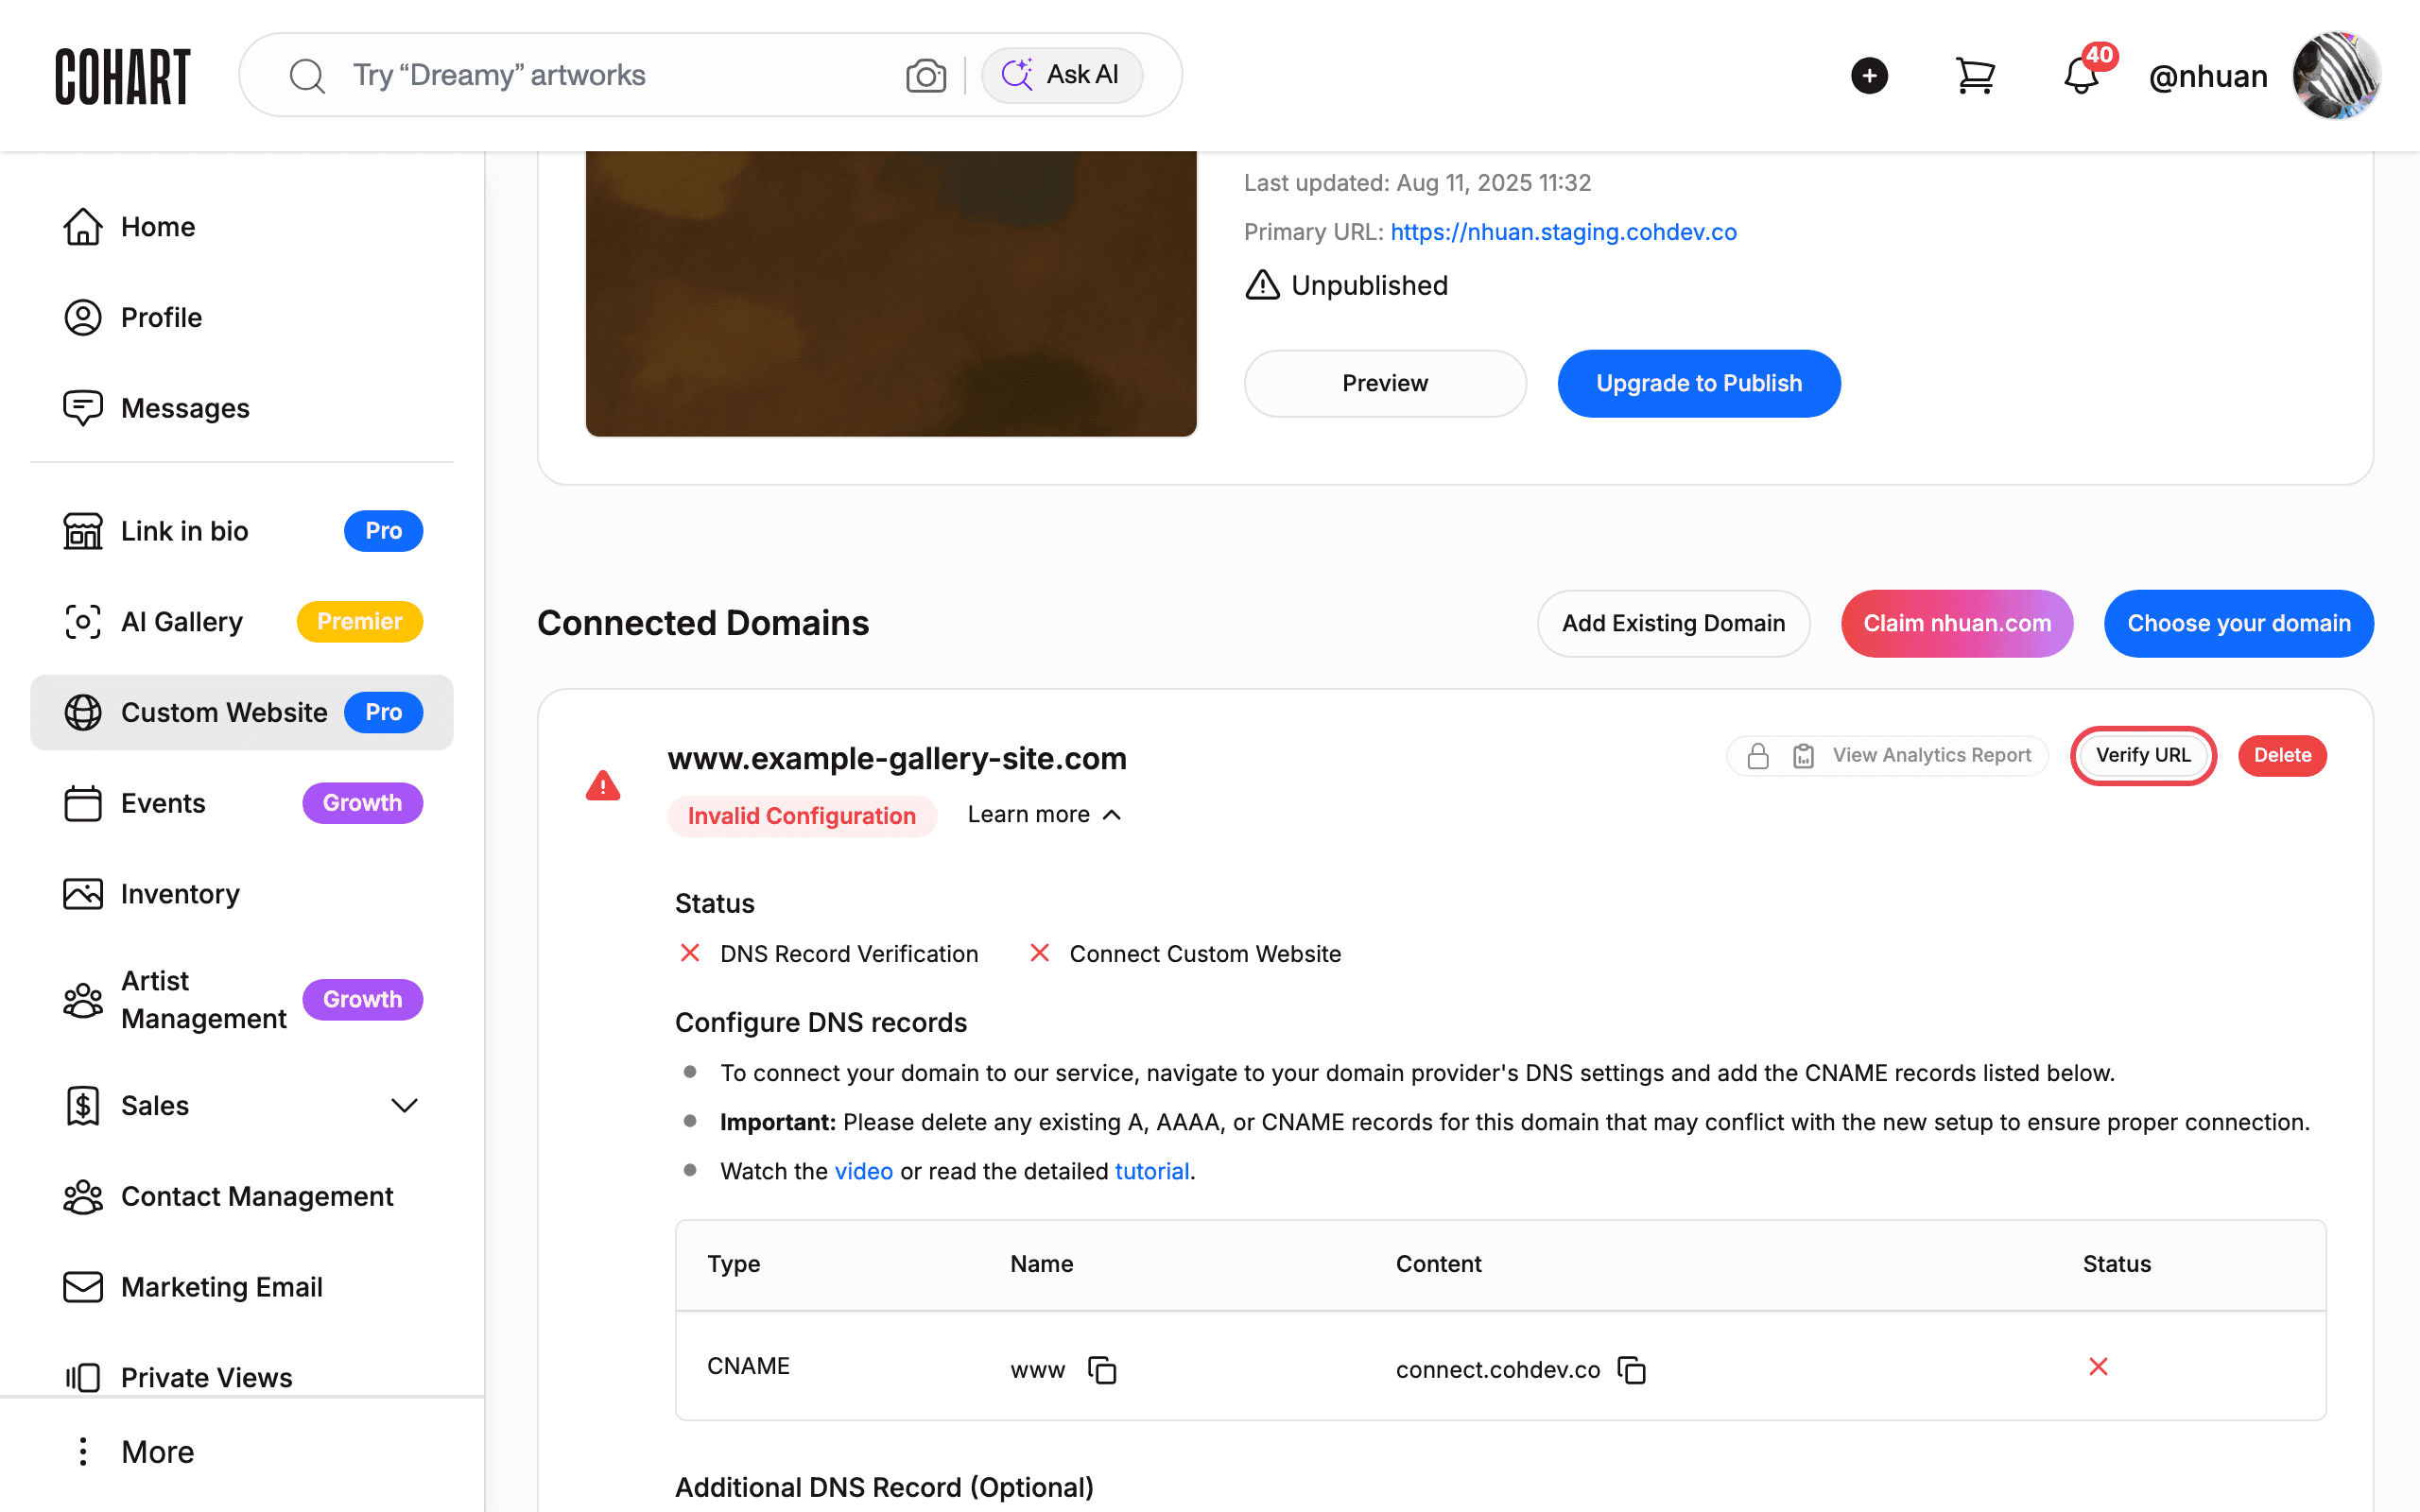
The Status area shows DNS Record Verification and Connect Custom Website. Both show a red cross until verification passes. DNS changes can take anywhere from a few minutes to 24 hours to propagate. Click Verify URL again later if the status is still Invalid Configuration. View Analytics Report stays locked until the domain verifies. To remove a domain, click Delete, then confirm in the DELETE URL dialog (“Do you want to delete this url?”) with Delete, or keep it with Cancel.
Part B — Buy a new domain through Cohart
7. Open Choose your domain
Click Choose your domain.
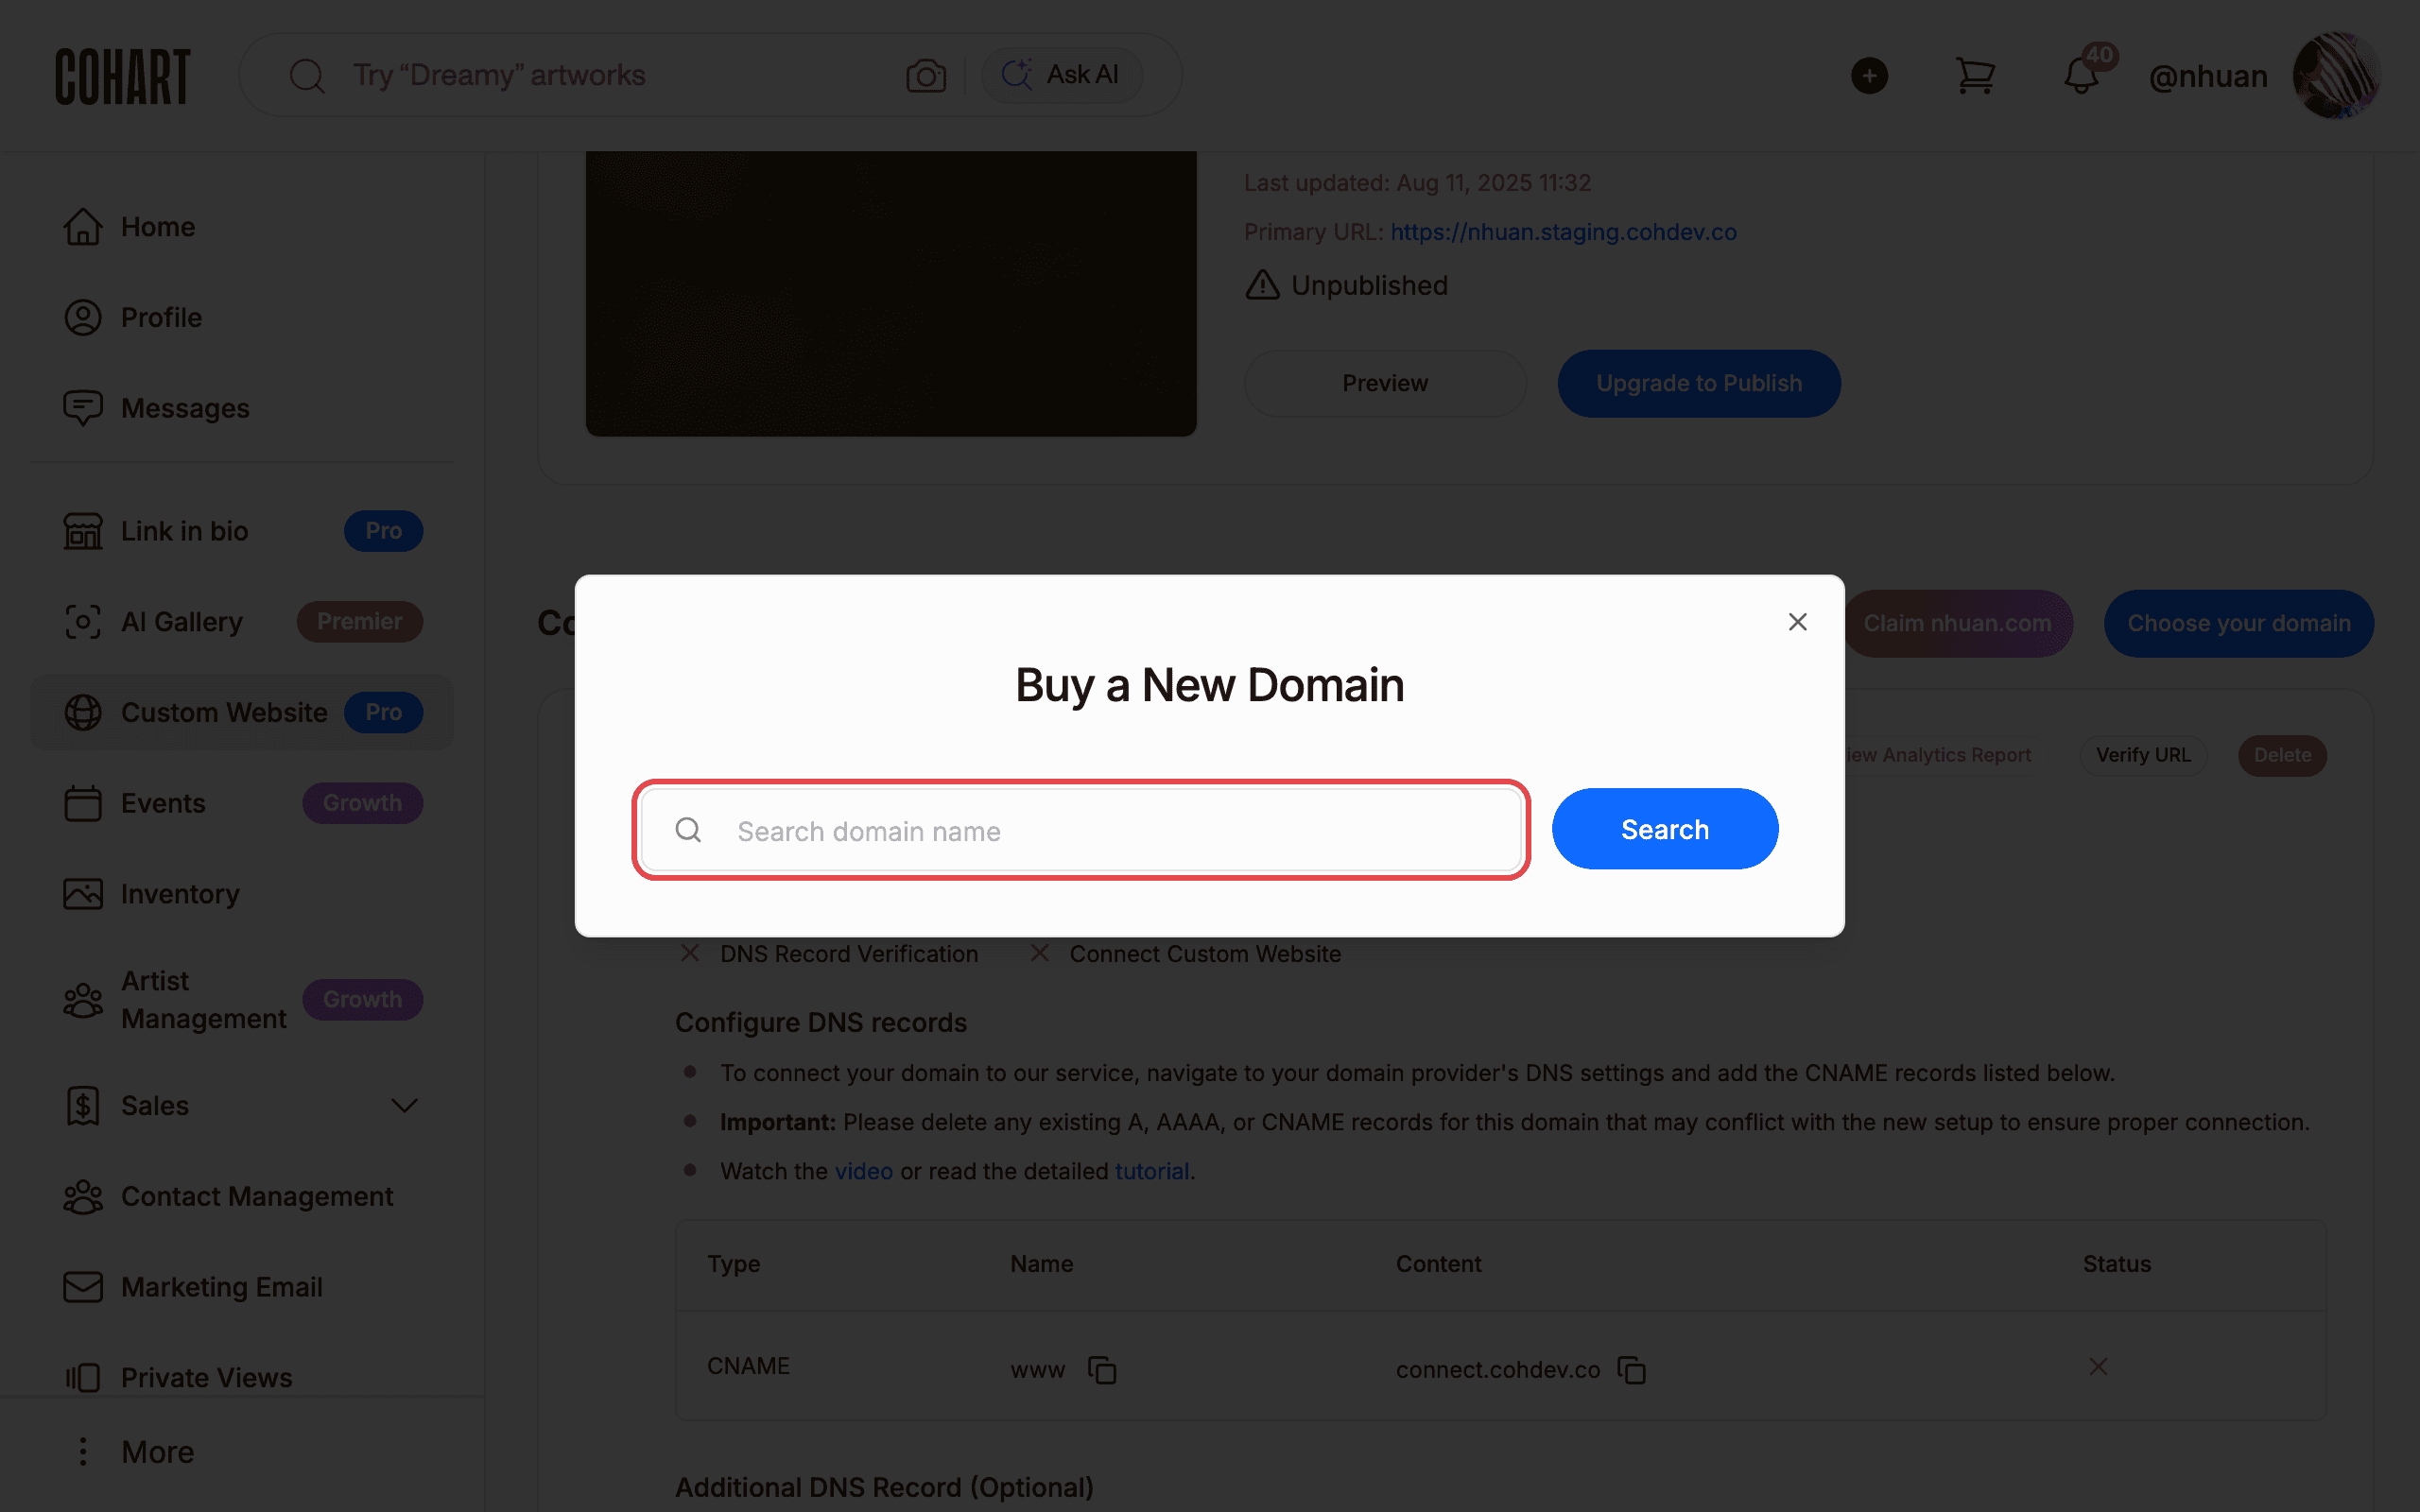
The Buy a New Domain dialog opens with a Search domain name field and a Search button. (Claim nhuan.com opens the same dialog with your account name pre-filled.)
8. Search for an available domain and review prices
Type a full domain with its extension (for example myexamplegallery12345.com) and click Search.
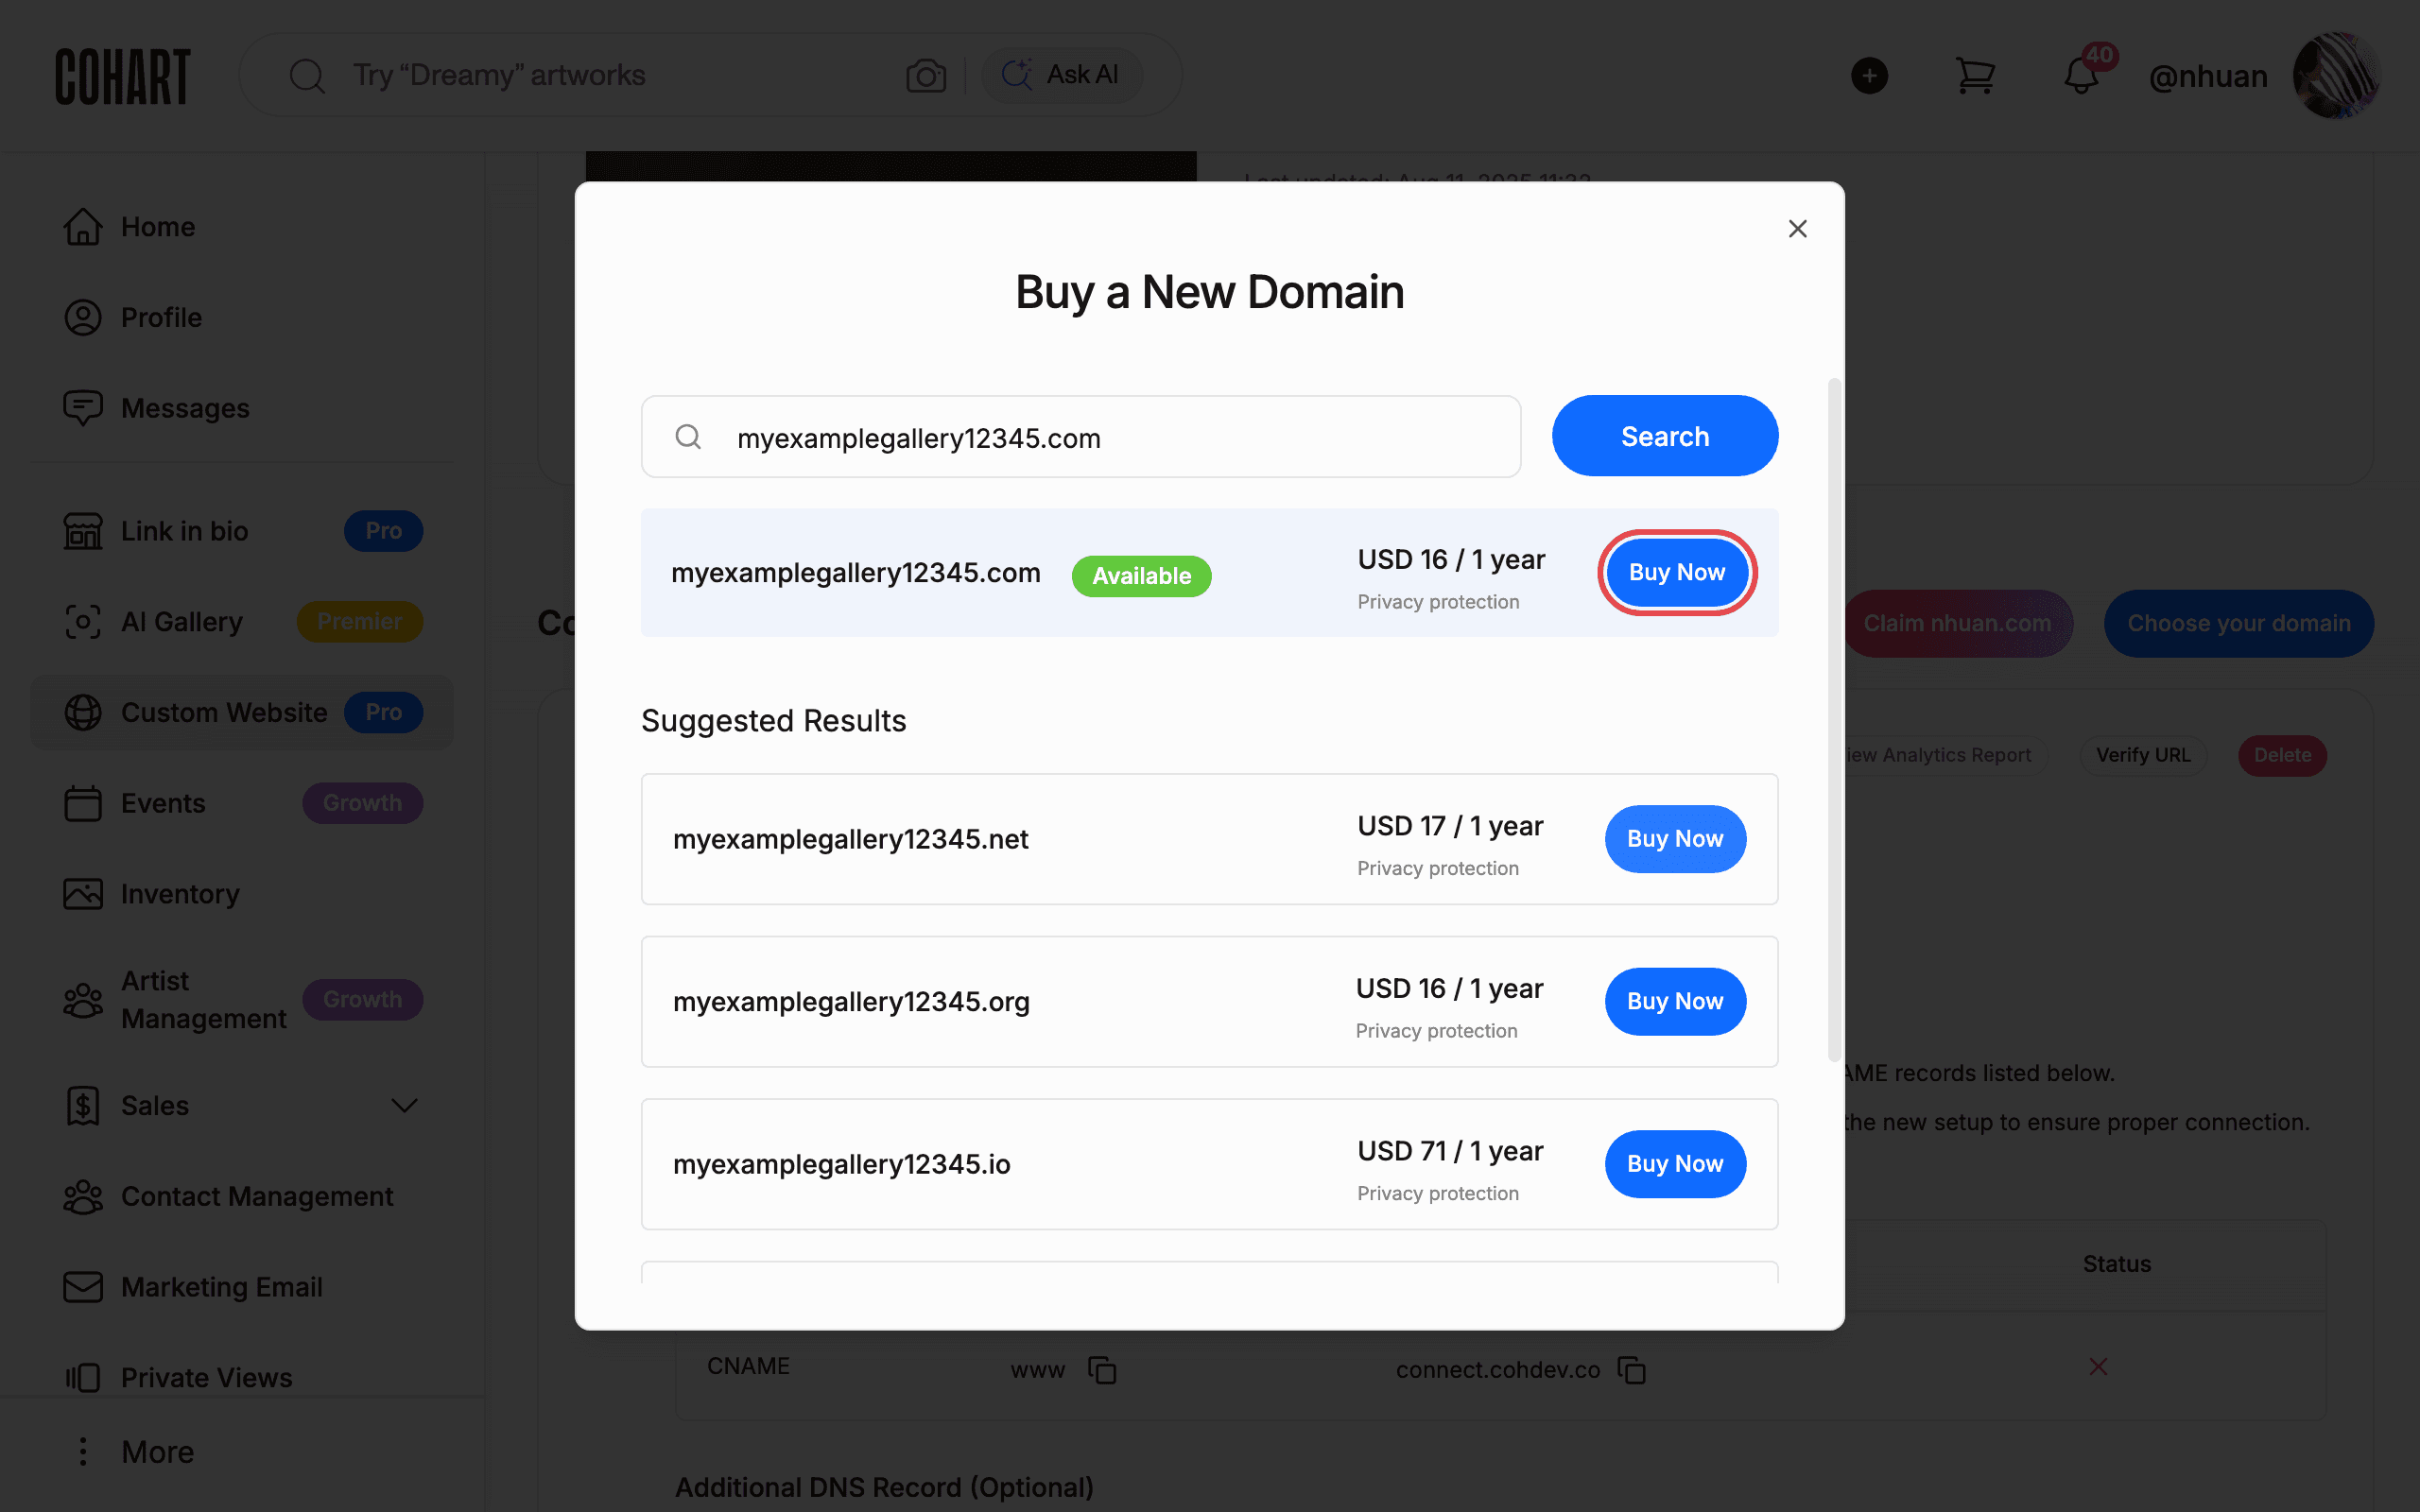
Available domains show an Available badge, a price such as USD 16 / 1 year, and Privacy protection. More options appear under Suggested Results (for example .net at USD 17 / 1 year, .org at USD 16 / 1 year, .io at USD 71 / 1 year, .co at USD 38 / 1 year). Click Buy Now next to the domain you want. Taken names show Not Available with suggestions instead. Searching without an extension shows Domain is invalid.
Completing the purchase itself is [UNVERIFIED — check manually]. On staging, clicking Buy Now showed an “Expired API Key provided” error, so the checkout step could not be verified. Do not retry payment on staging. Close the dialog with Close (the × button) when you are done searching.
Tips and troubleshooting
- Root domains are not supported. Enter the
wwwversion or a subdomain. - Invalid Configuration is expected at first. It means your DNS change has not propagated yet. Wait, then click Verify URL again.
- Conflicting records block verification. Delete old A, AAAA, or CNAME records for the same name at your provider.
- The
@name field. If your provider (for example Wix) does not accept@, leave the Name field blank. Some providers use*instead. - Search needs a full domain. Type the extension (
.com,.org). A bare word shows Domain is invalid. - Analytics is locked until verification. View Analytics Report shows a lock icon while the status is Invalid Configuration.
- Publishing needs Pro. Your site stays Unpublished until you use Upgrade to Pro and Upgrade to Publish.
- Buy checkout failed on staging. Clicking Buy Now showed “Expired API Key provided”. This looks like a staging configuration bug. Report it rather than retrying payment.
Screenshots are regenerated automatically from the live site. Last captured: 2026-09-03.