How to Manage and Share Private Views
You will open Private Views, edit a view’s details and artworks, preview it, and invite collectors by email.
1. Sign in to your account
- Go to the login page.
- Enter your email in Enter email address and your password in Enter password.
- Click SIGN IN.
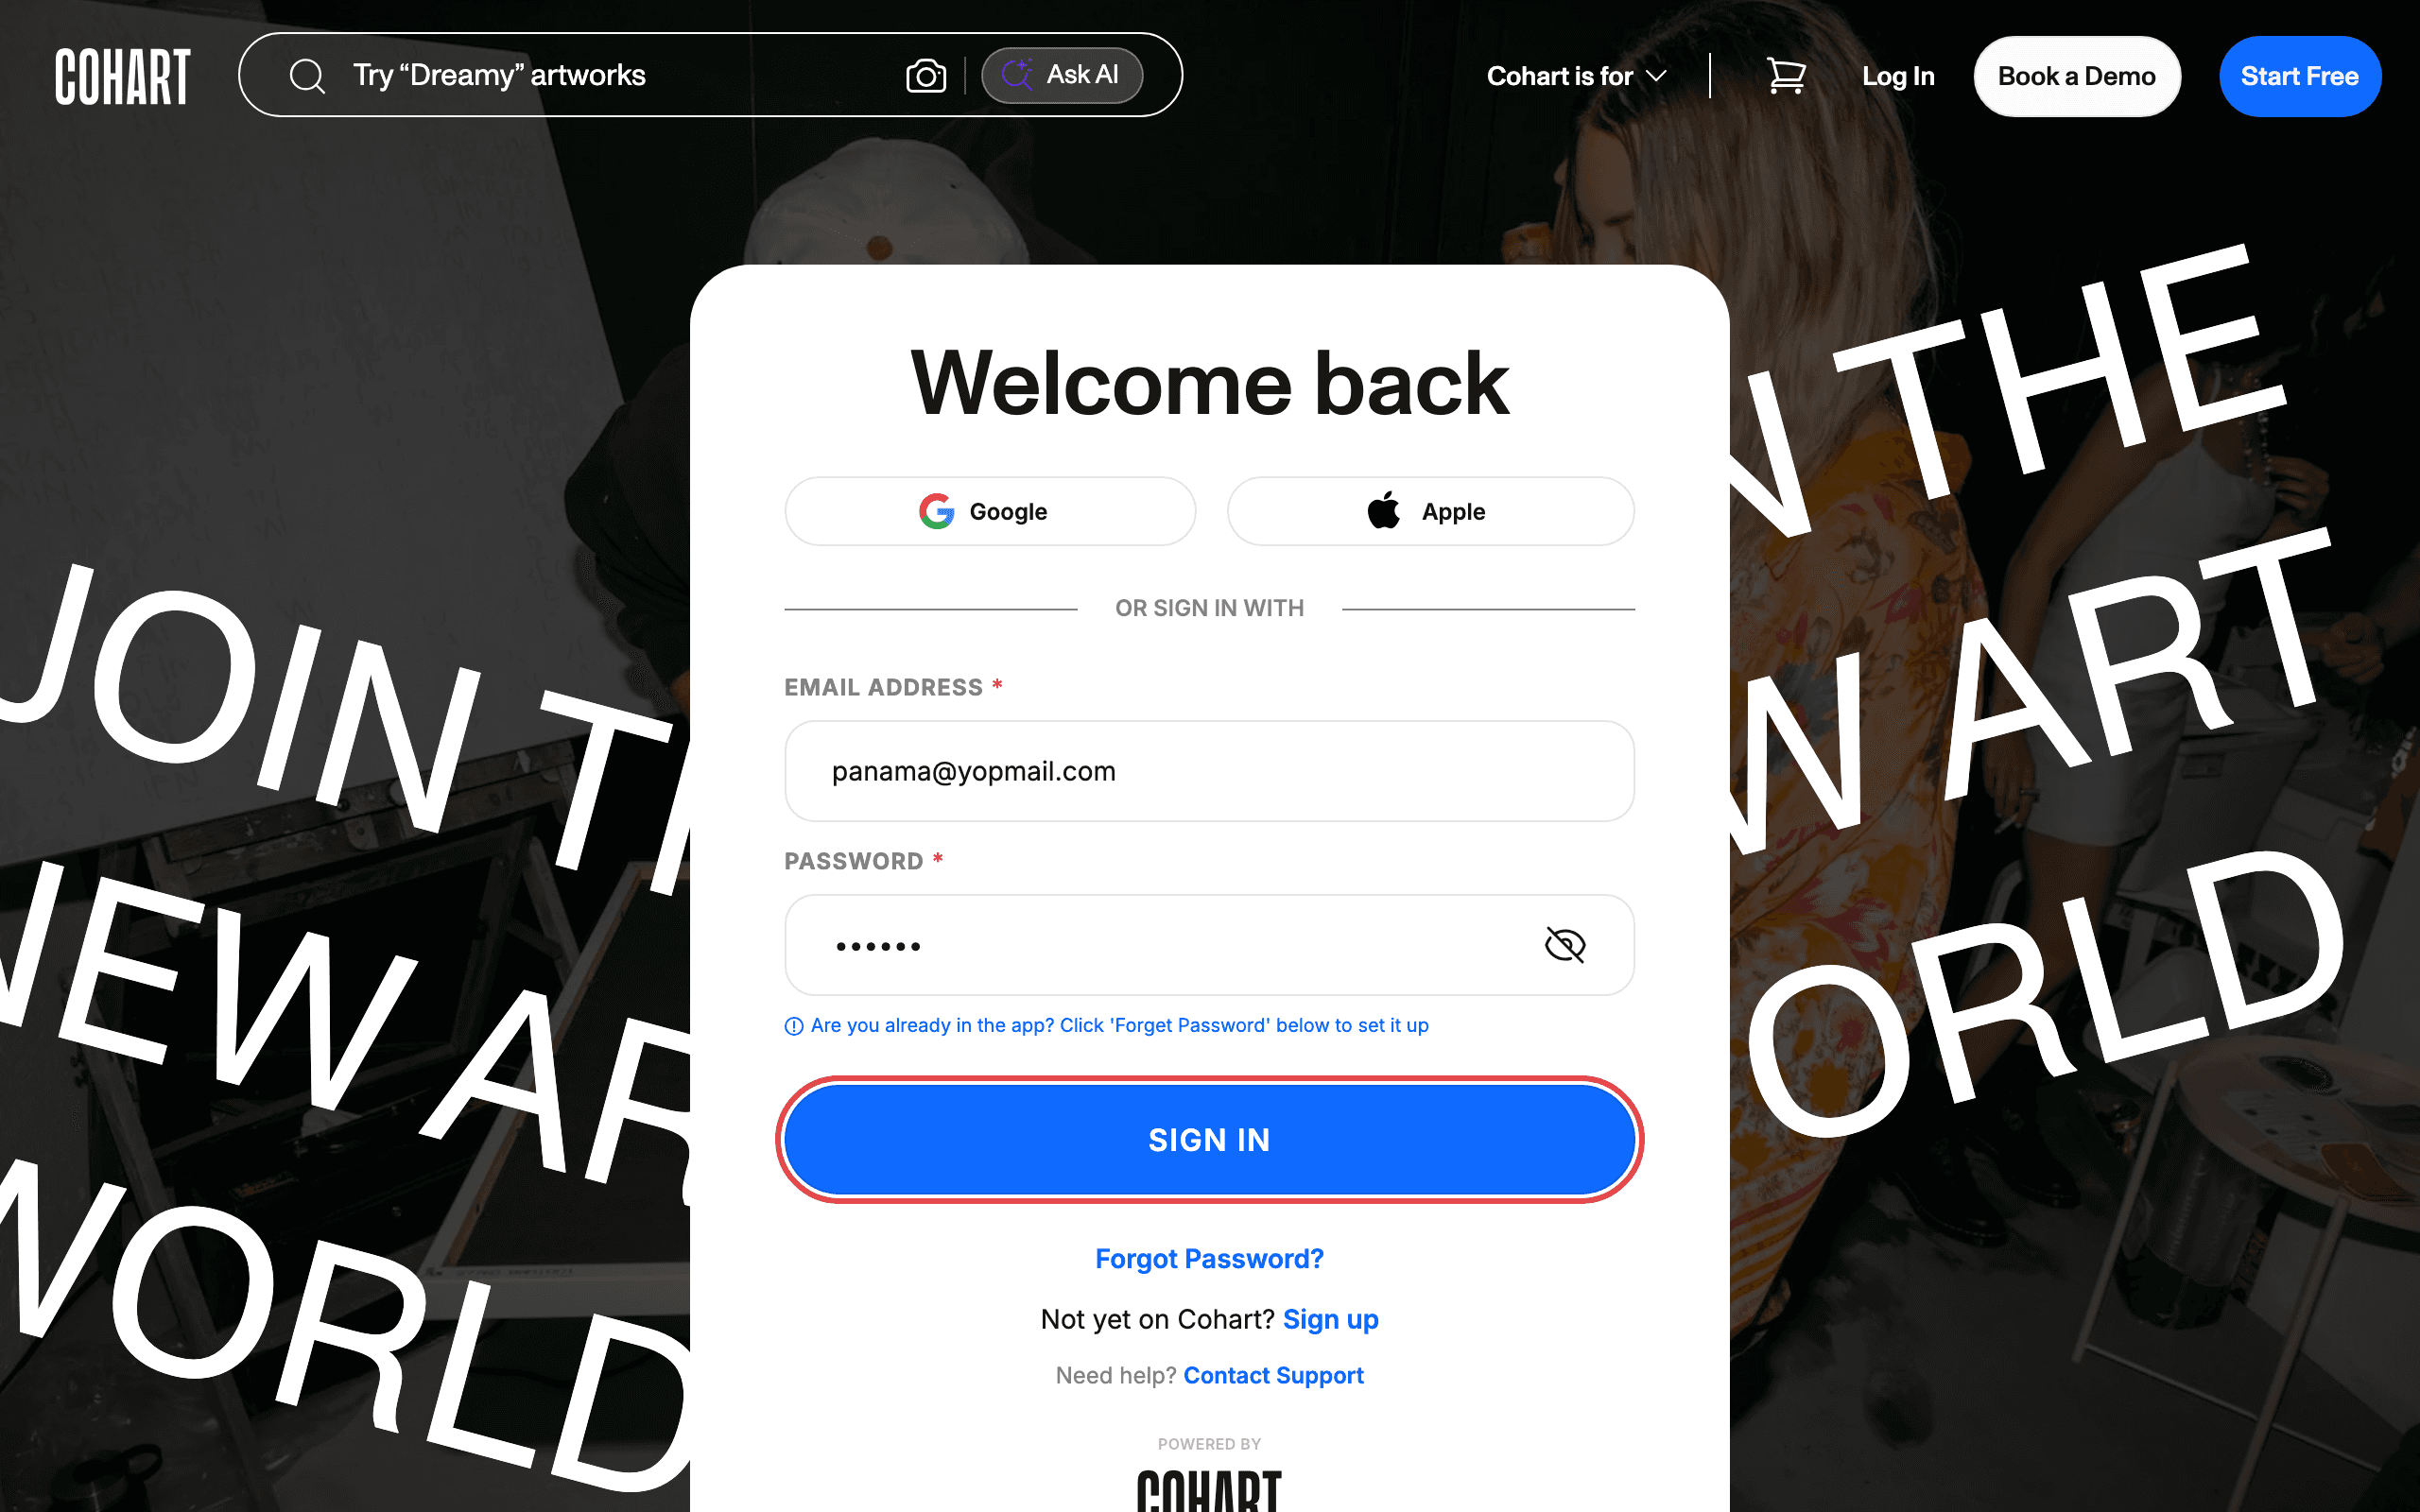
You can also sign in with Google or Apple using the buttons above the email field. If you forget your password, click Forgot Password?. If you do not have an account yet, click Sign up. If you need help, click Contact Support.
2. Open Private Views from the sidebar
- After signing in, you land on Inventory.
- In the left sidebar, click Private Views.
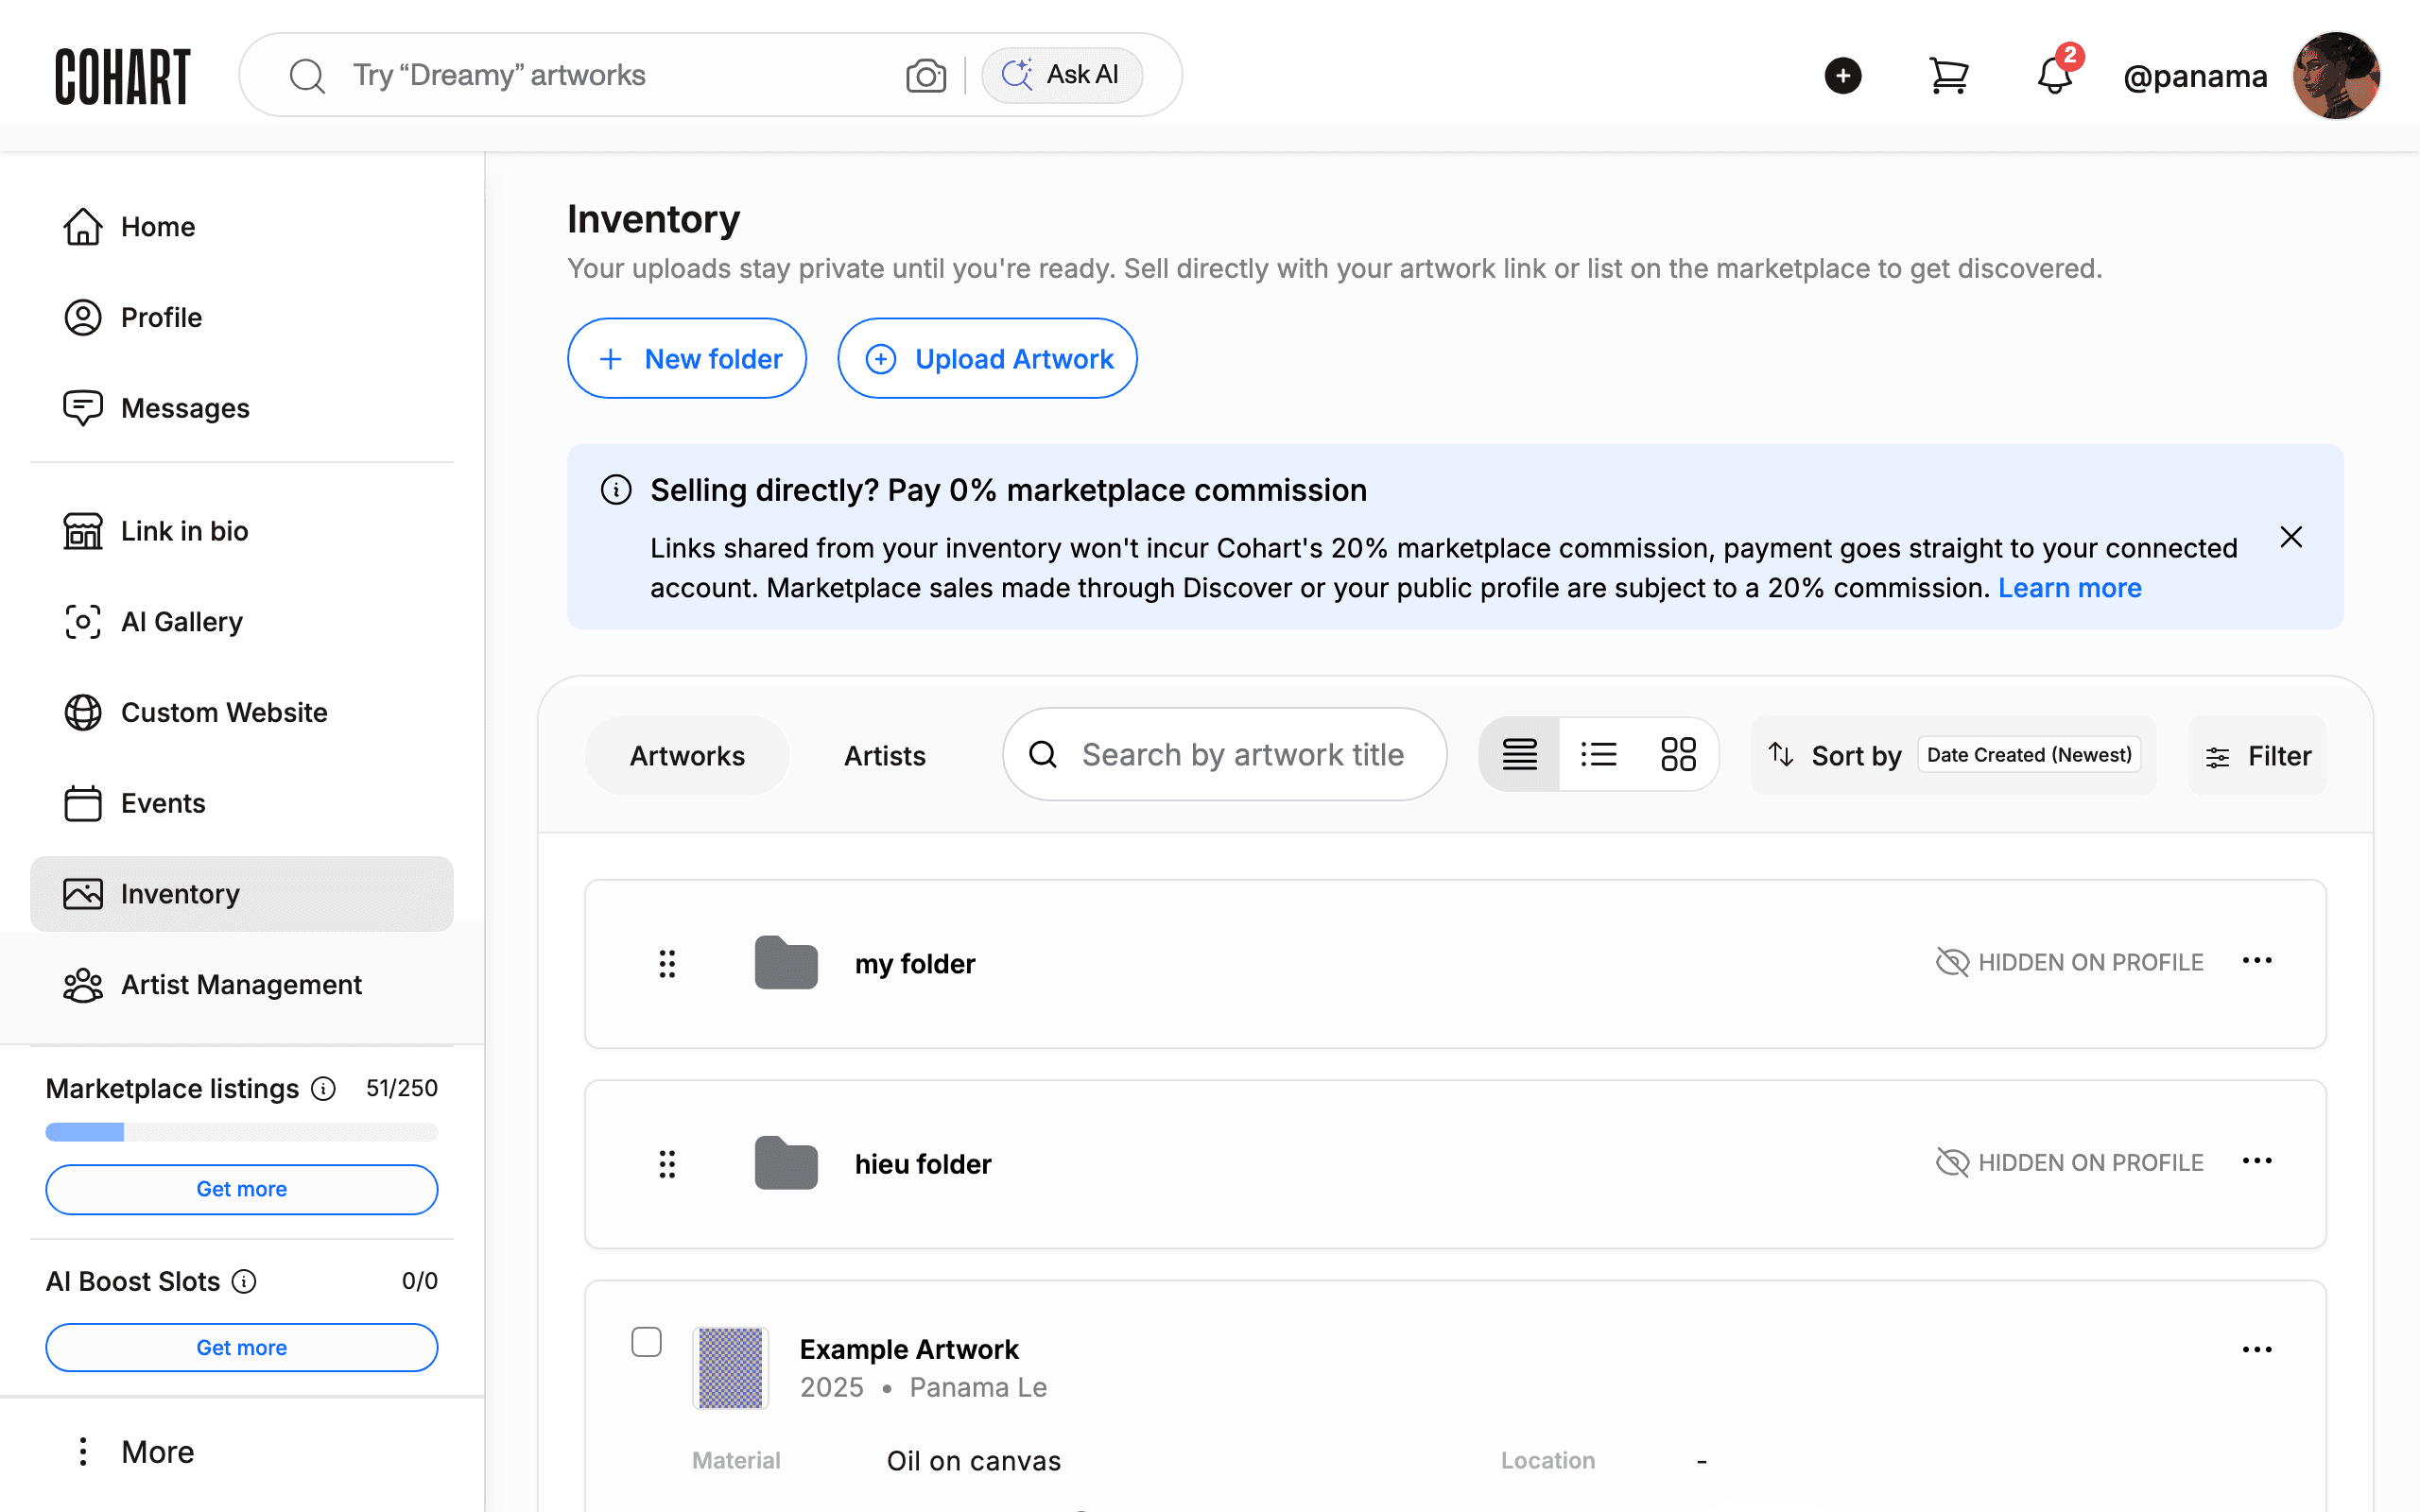
The sidebar also offers Home, Profile, Messages, Link in bio, AI Gallery, Custom Website, Events, Artist Management, Contact Management, Marketing Email, Promotions, Refer & earn, Artwork Views, Manage Plan, and Financial Accounts.
3. Review My Private Views
- Read the Private Views page.
- Stay on My Private Views with ACTIVE selected.
- Each card shows Date created and # of Artworks.
- Find the view you want to manage.
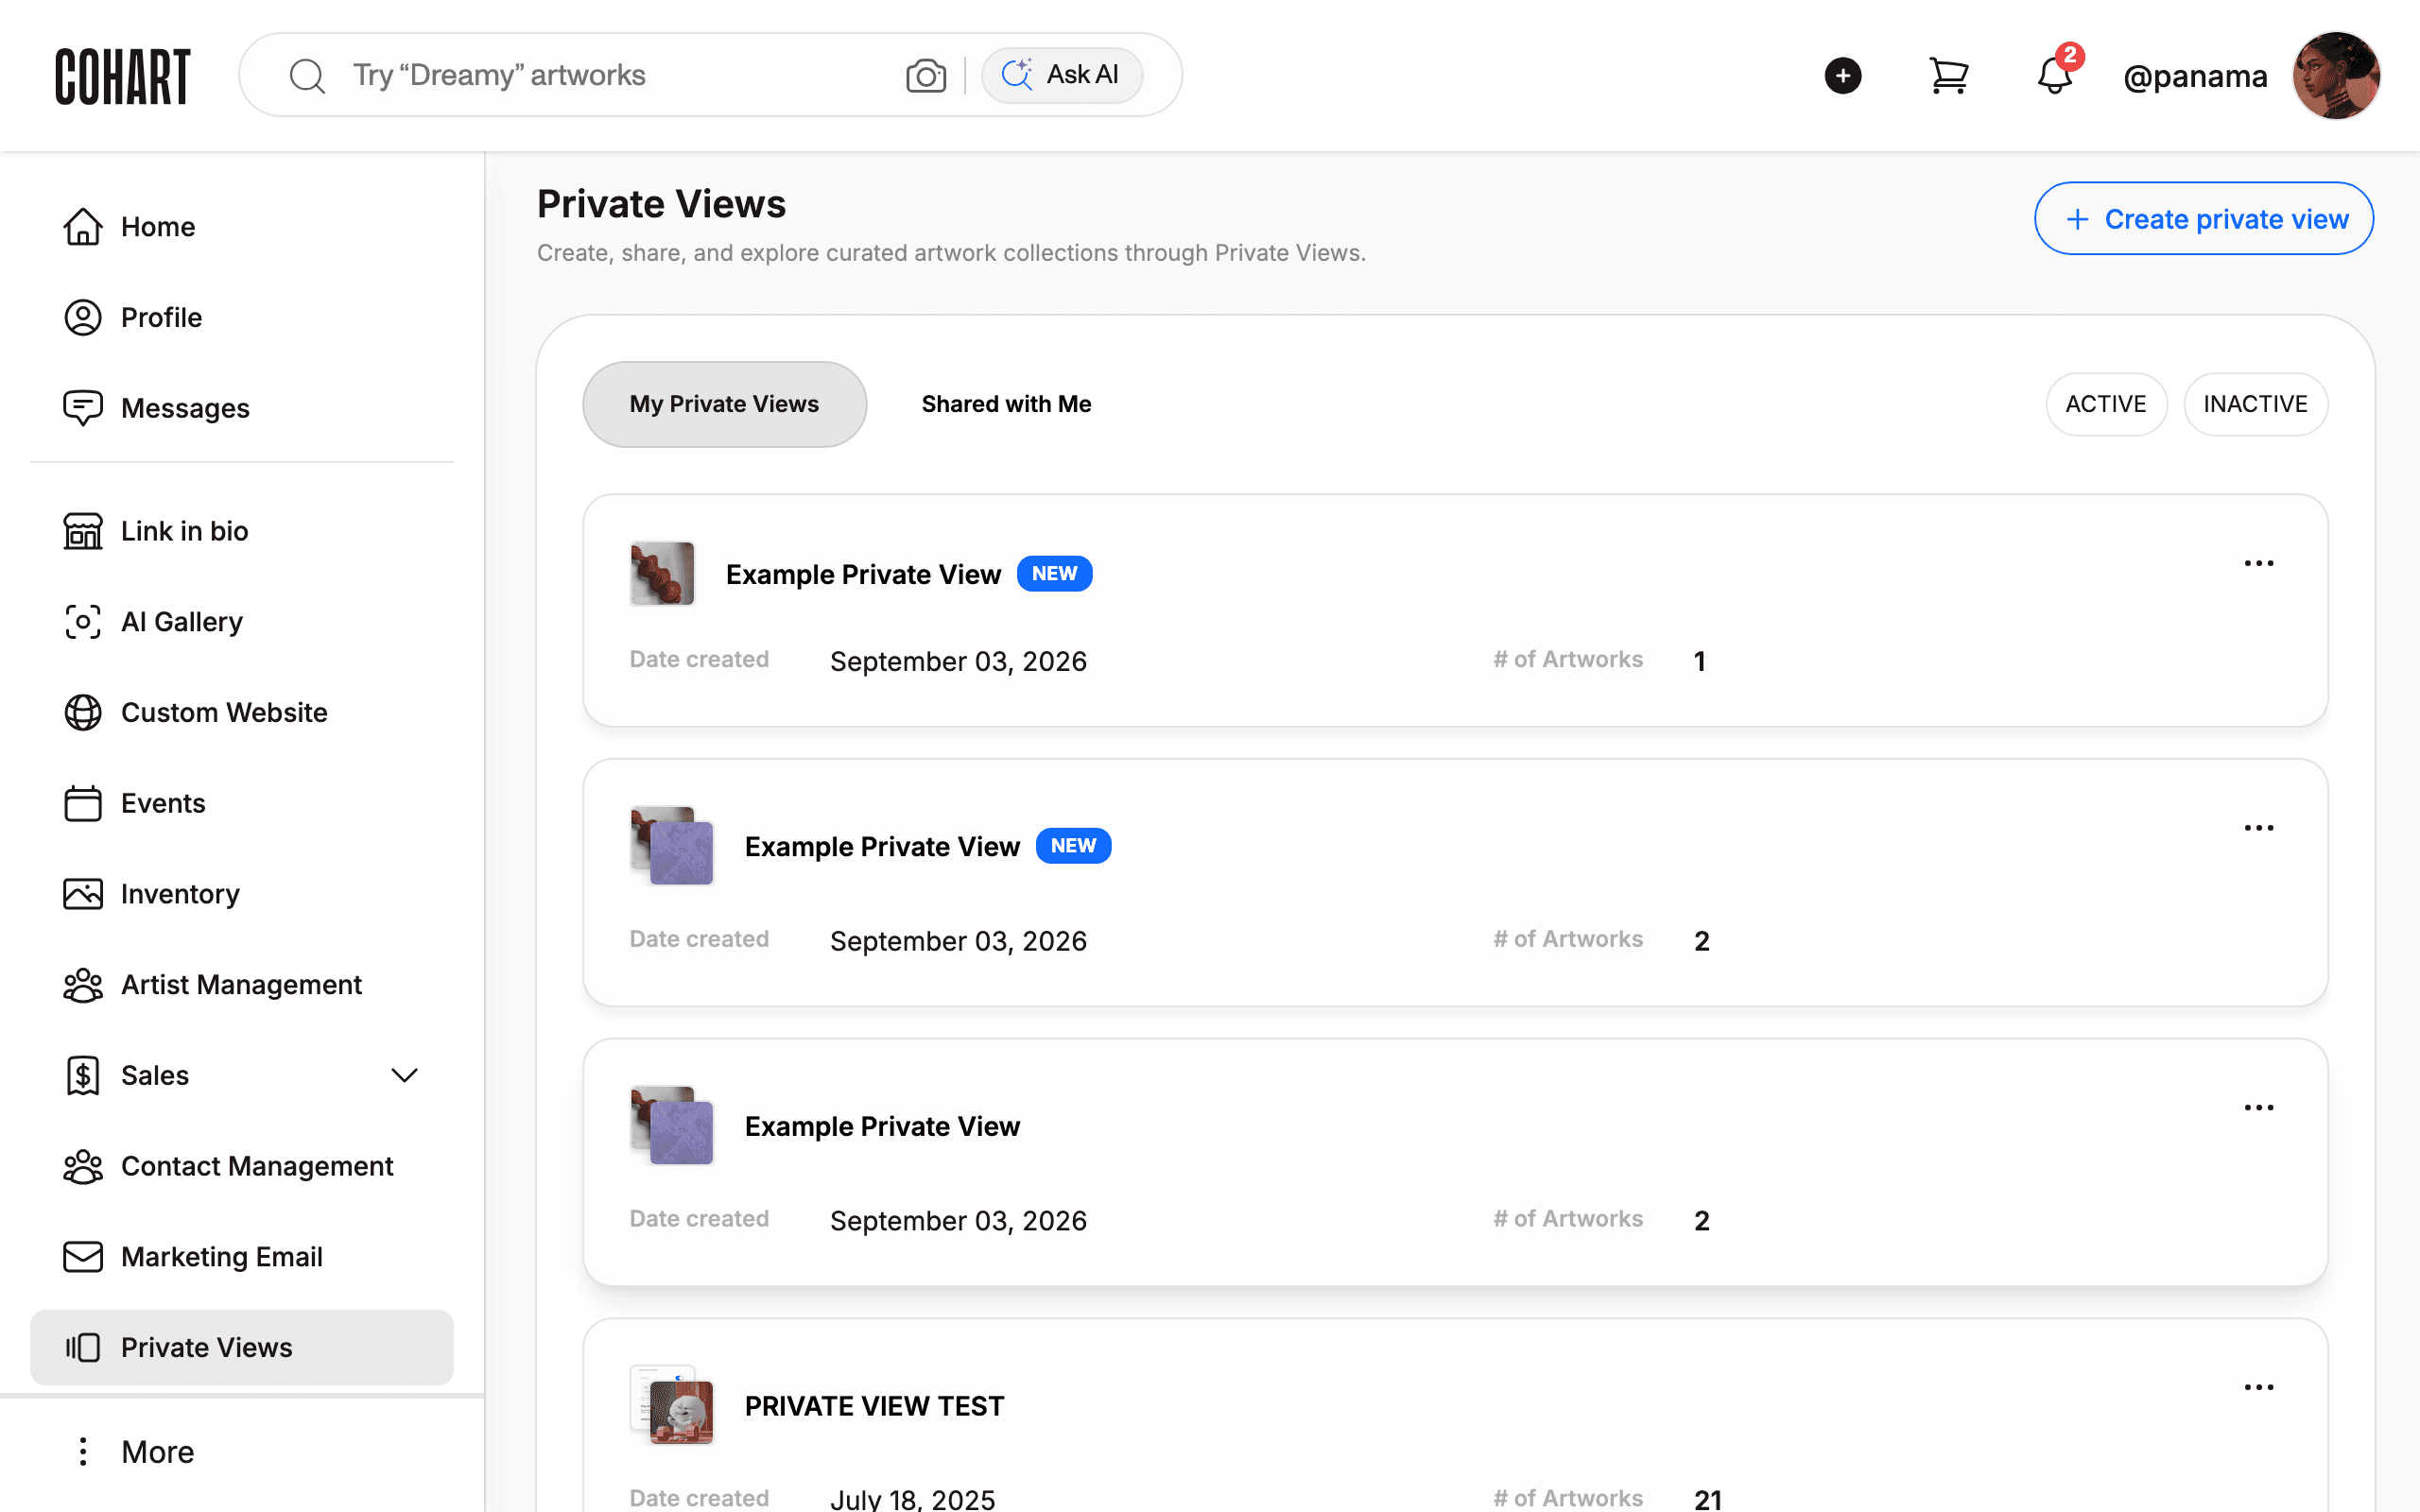
The page says Create, share, and explore curated artwork collections through Private Views. To start a new view, click Create private view. Use ACTIVE and INACTIVE to filter by status. Click Shared with Me to see views others sent you. Use the page numbers at the bottom to browse more views.
4. Open the manage menu and choose Edit private view
- Click the three-dot menu on the view’s card.
- Click Edit private view.
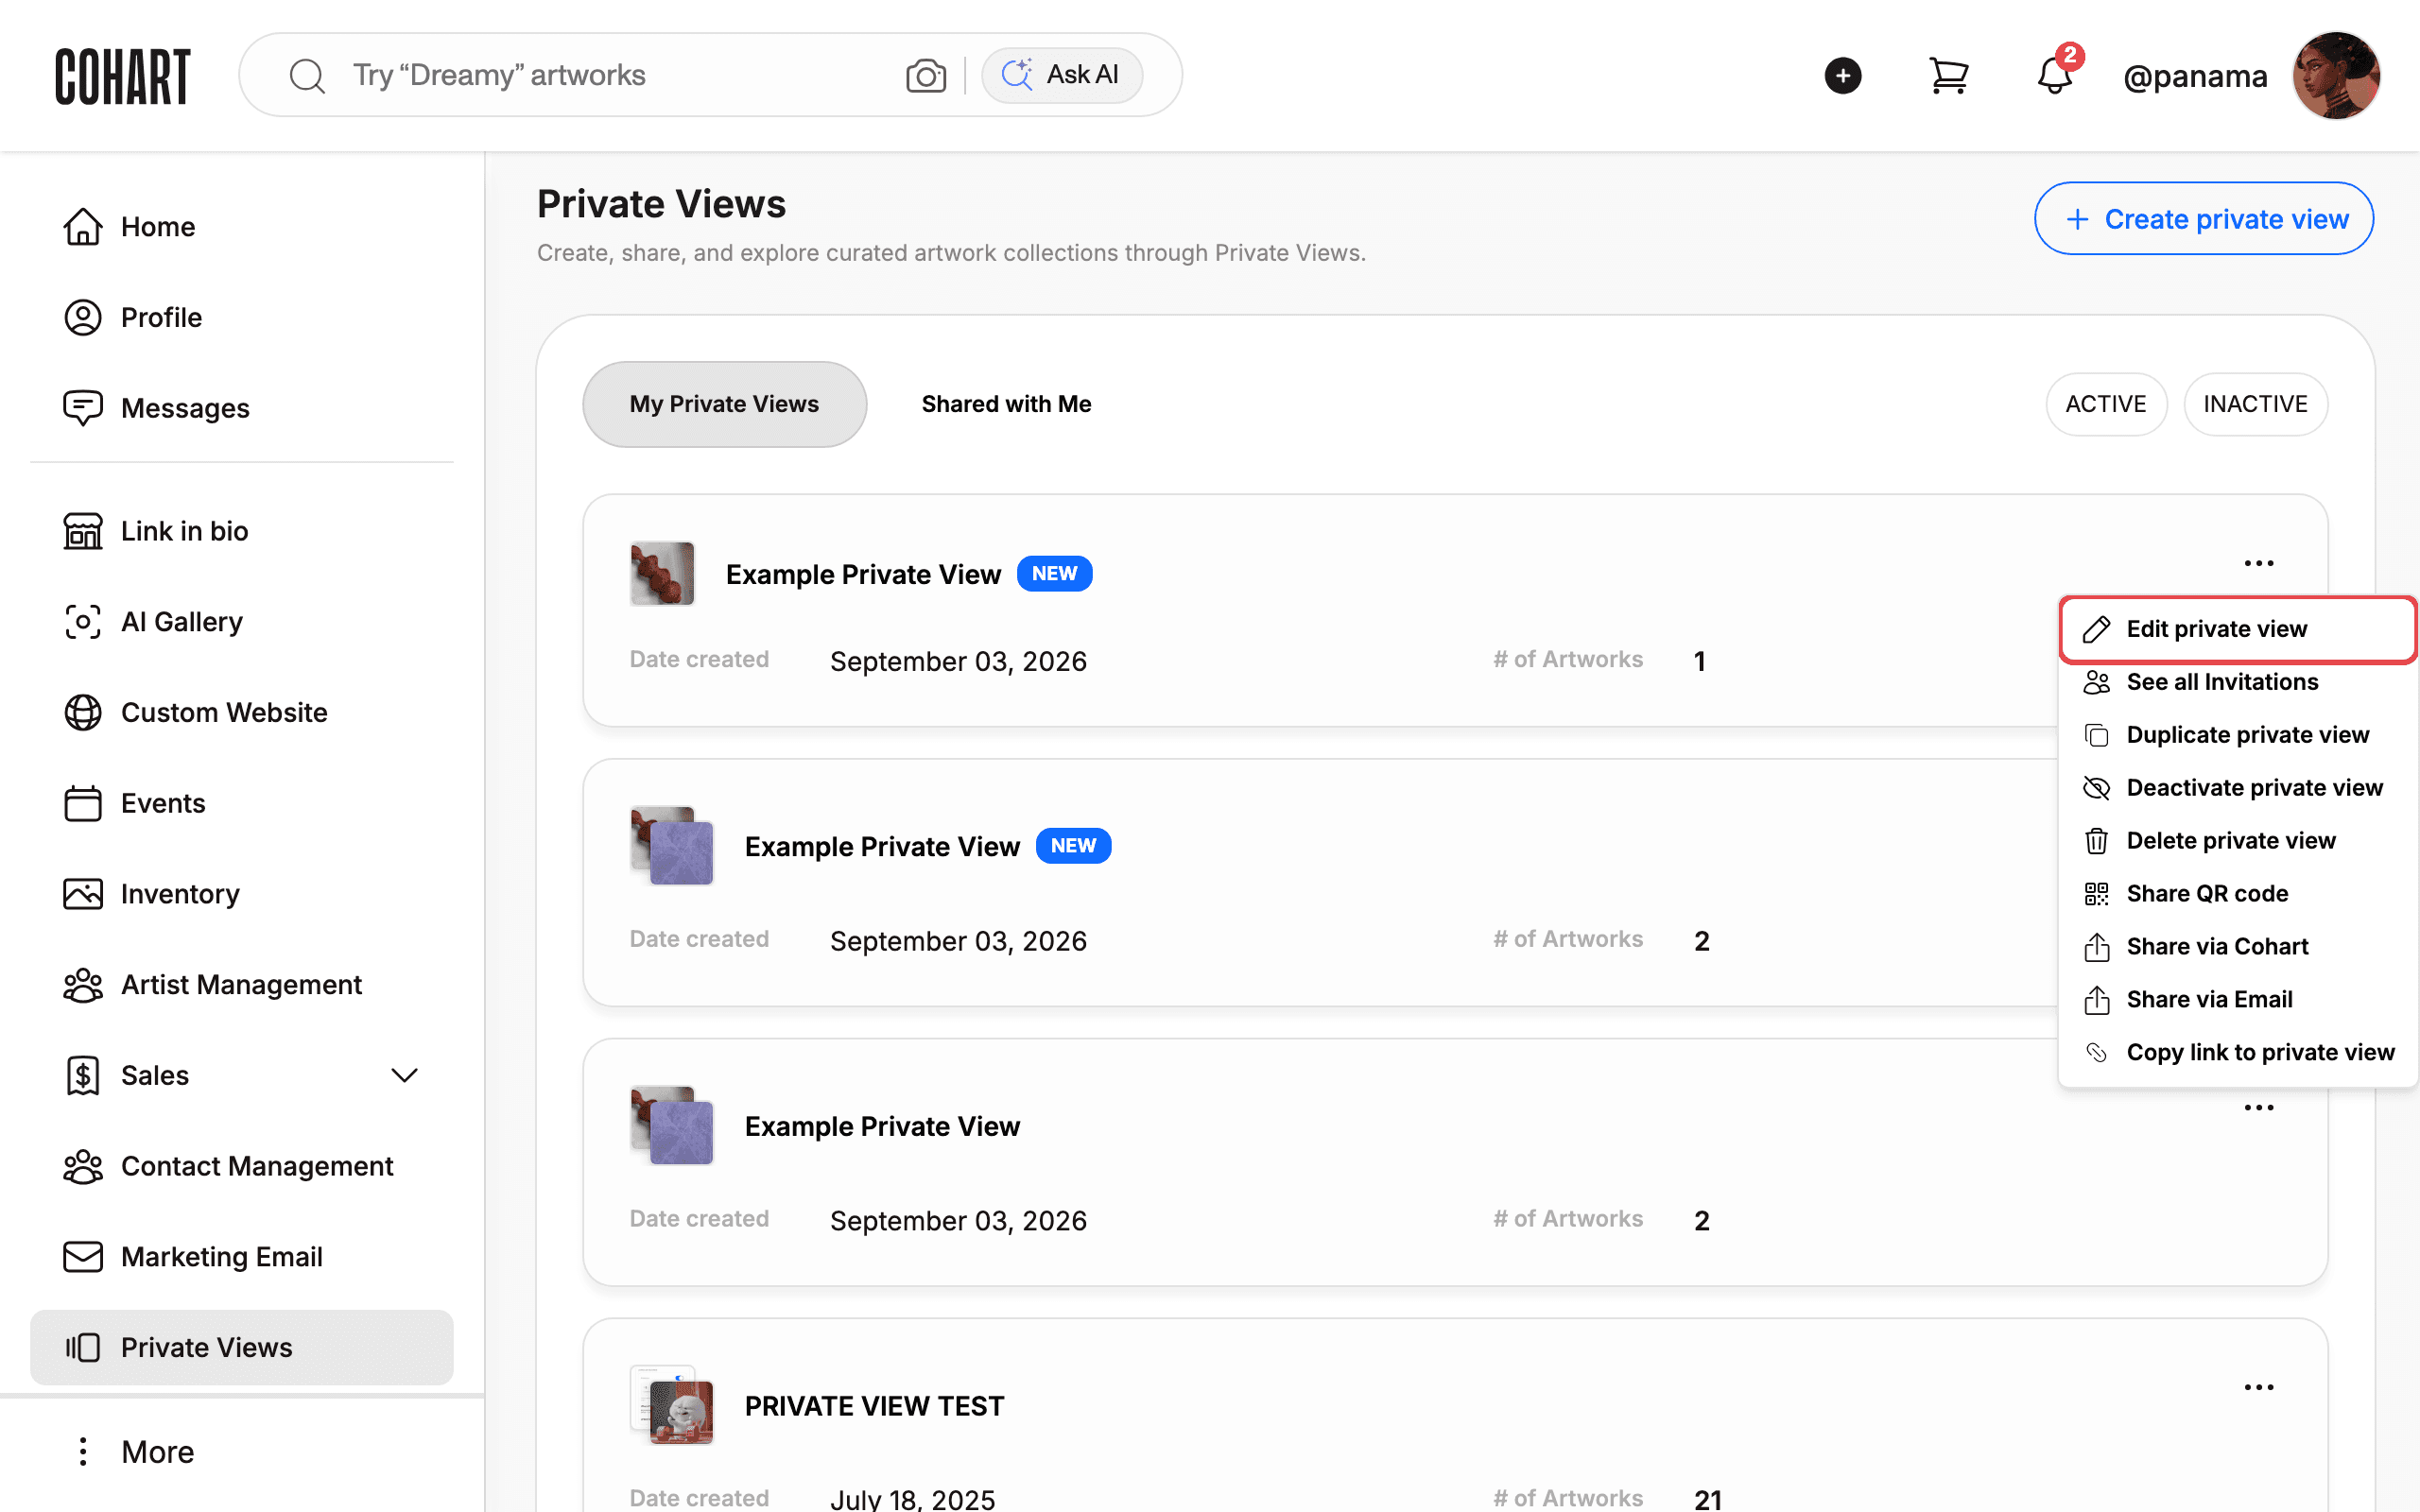
The menu also offers See all Invitations, Duplicate private view, Deactivate private view, Delete private view, Share QR code, Share via Cohart, Share via Email, and Copy link to private view. Do not click Delete private view unless you want to permanently remove the view.
5. Edit the view name, description, and status
- Read the Edit Private View heading.
- Edit the text in PRIVATE VIEW NAME*.
- Edit the text in DESCRIPTION.
- Use the Active toggle at the top to activate or deactivate the view.
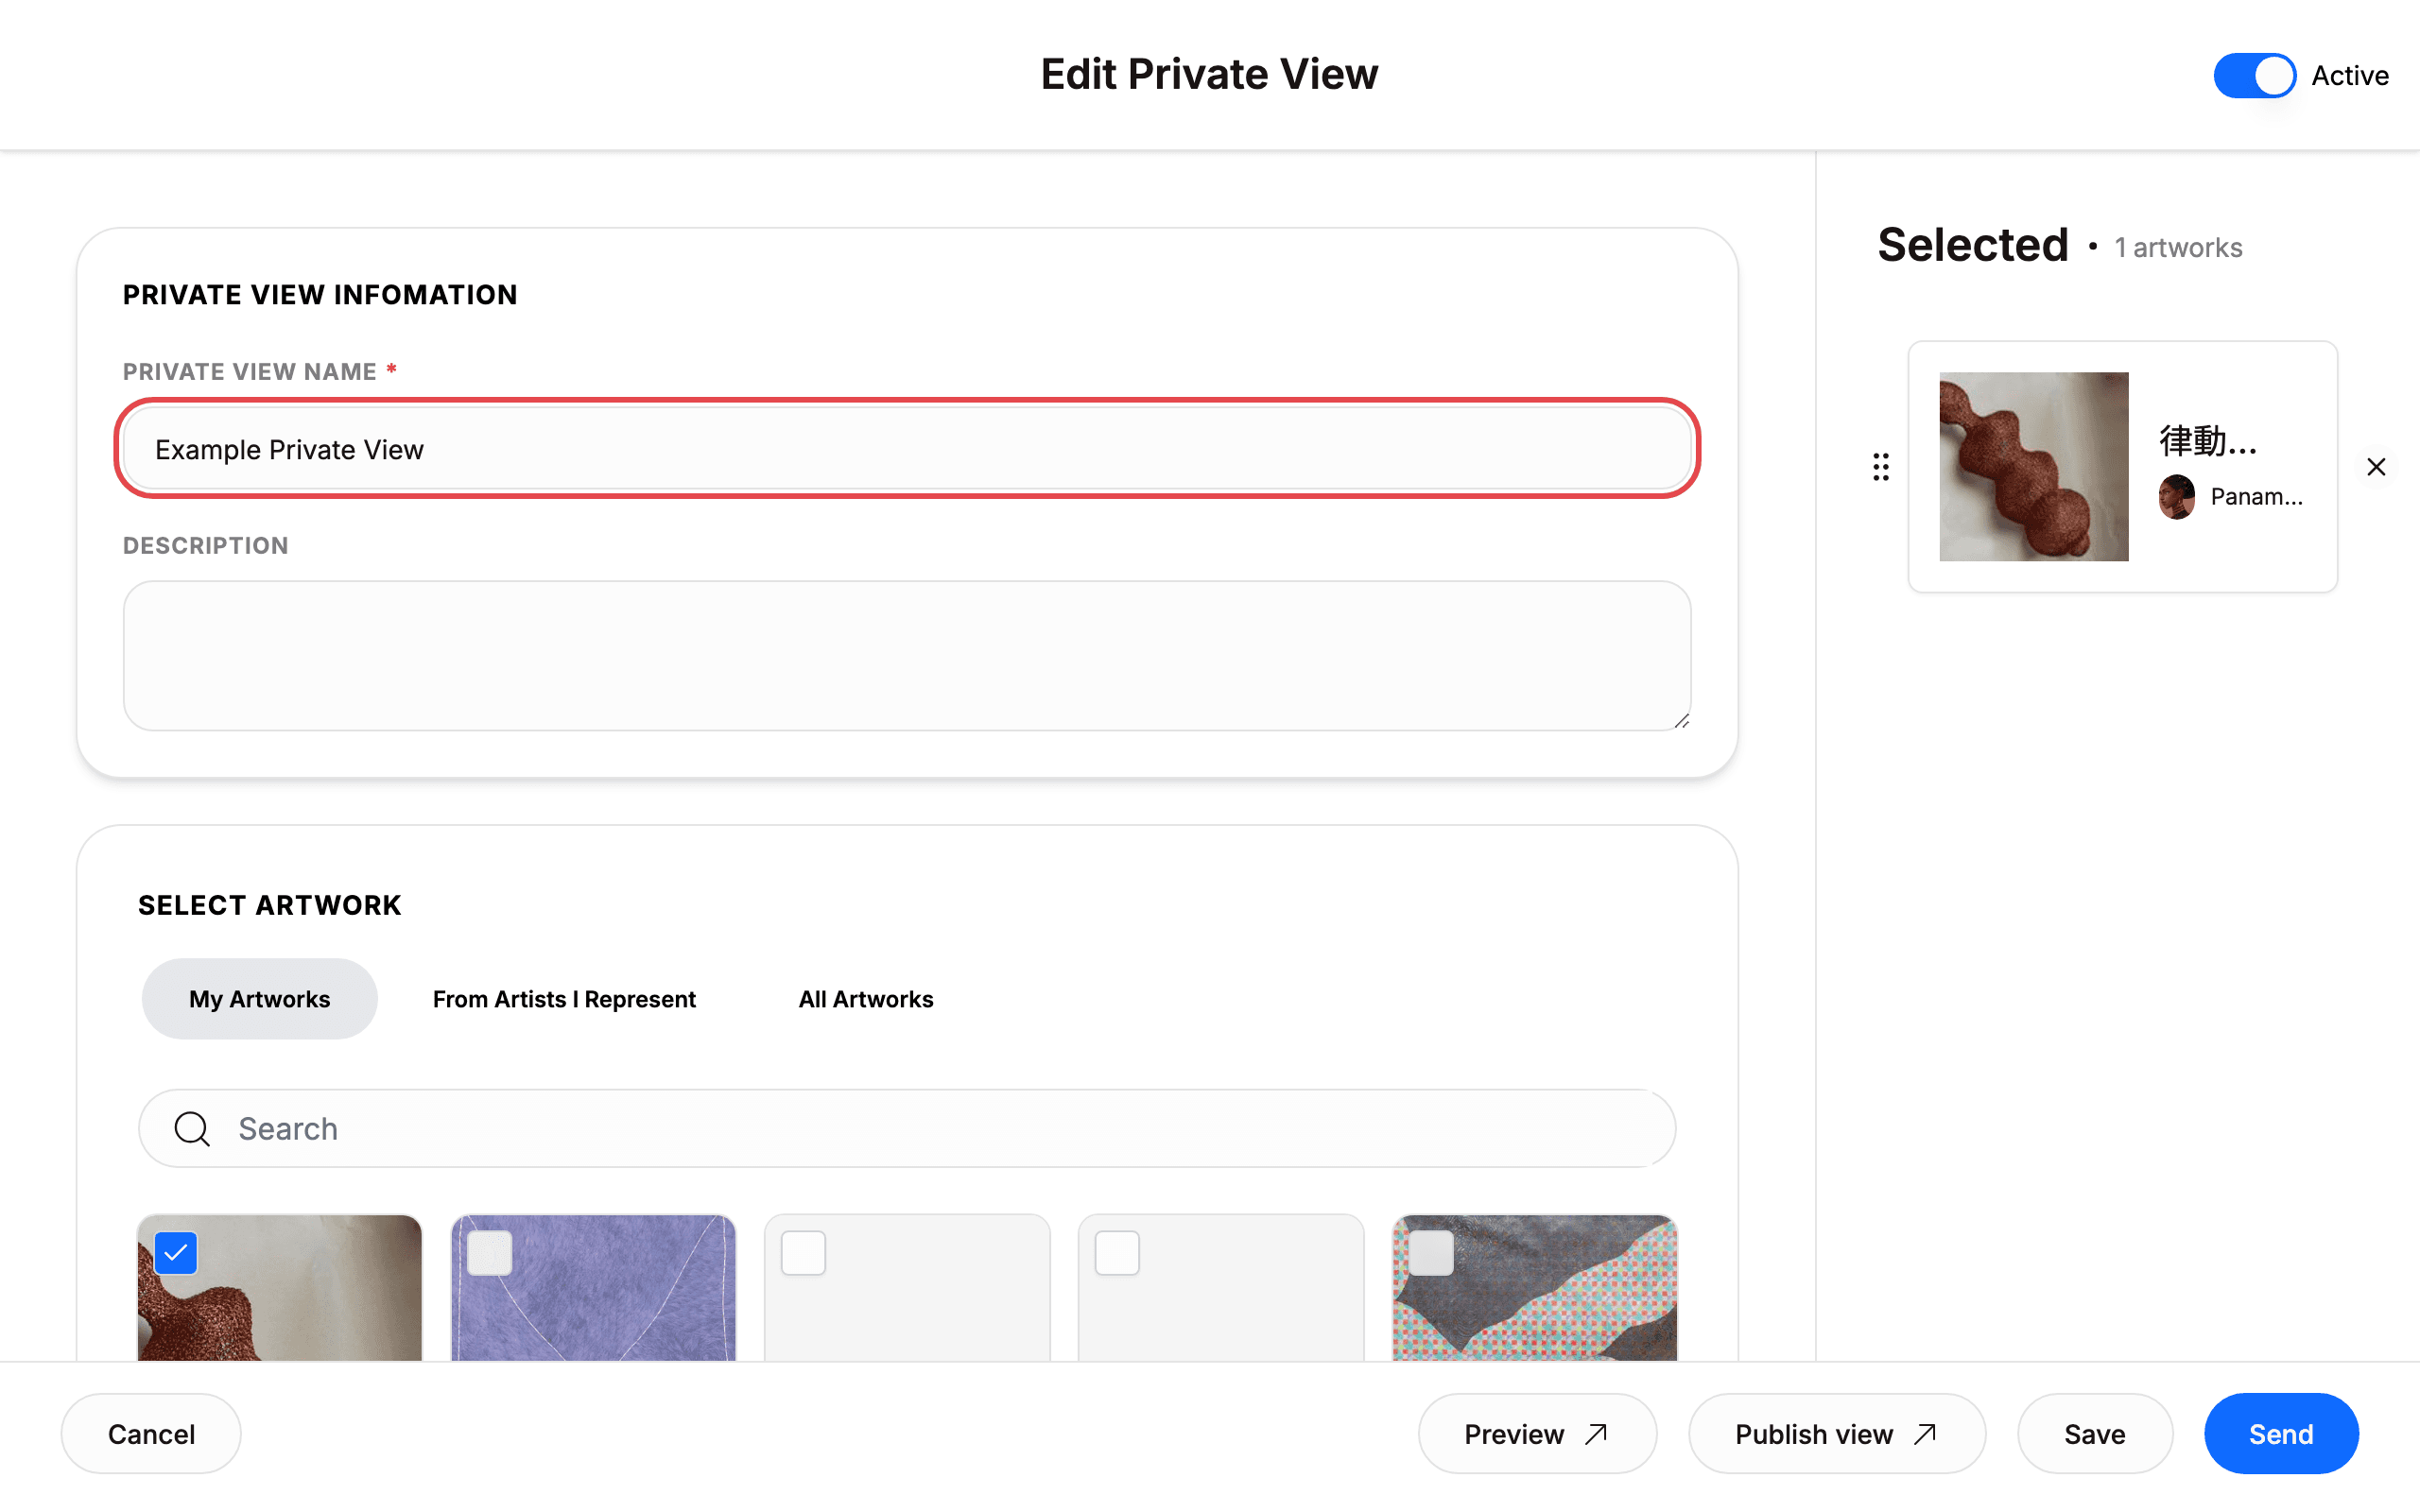
The section heading reads PRIVATE VIEW INFOMATION on the page. Do not click Save or Publish view until you have reviewed all changes.
6. Choose artworks under SELECT ARTWORK
- Scroll to SELECT ARTWORK.
- Click My Artworks, From Artists I Represent, or All Artworks to change the source list.
- Type in Search to find an artwork by title.
- Check the Selected panel to see how many artworks are in the view (for example 1 artworks).
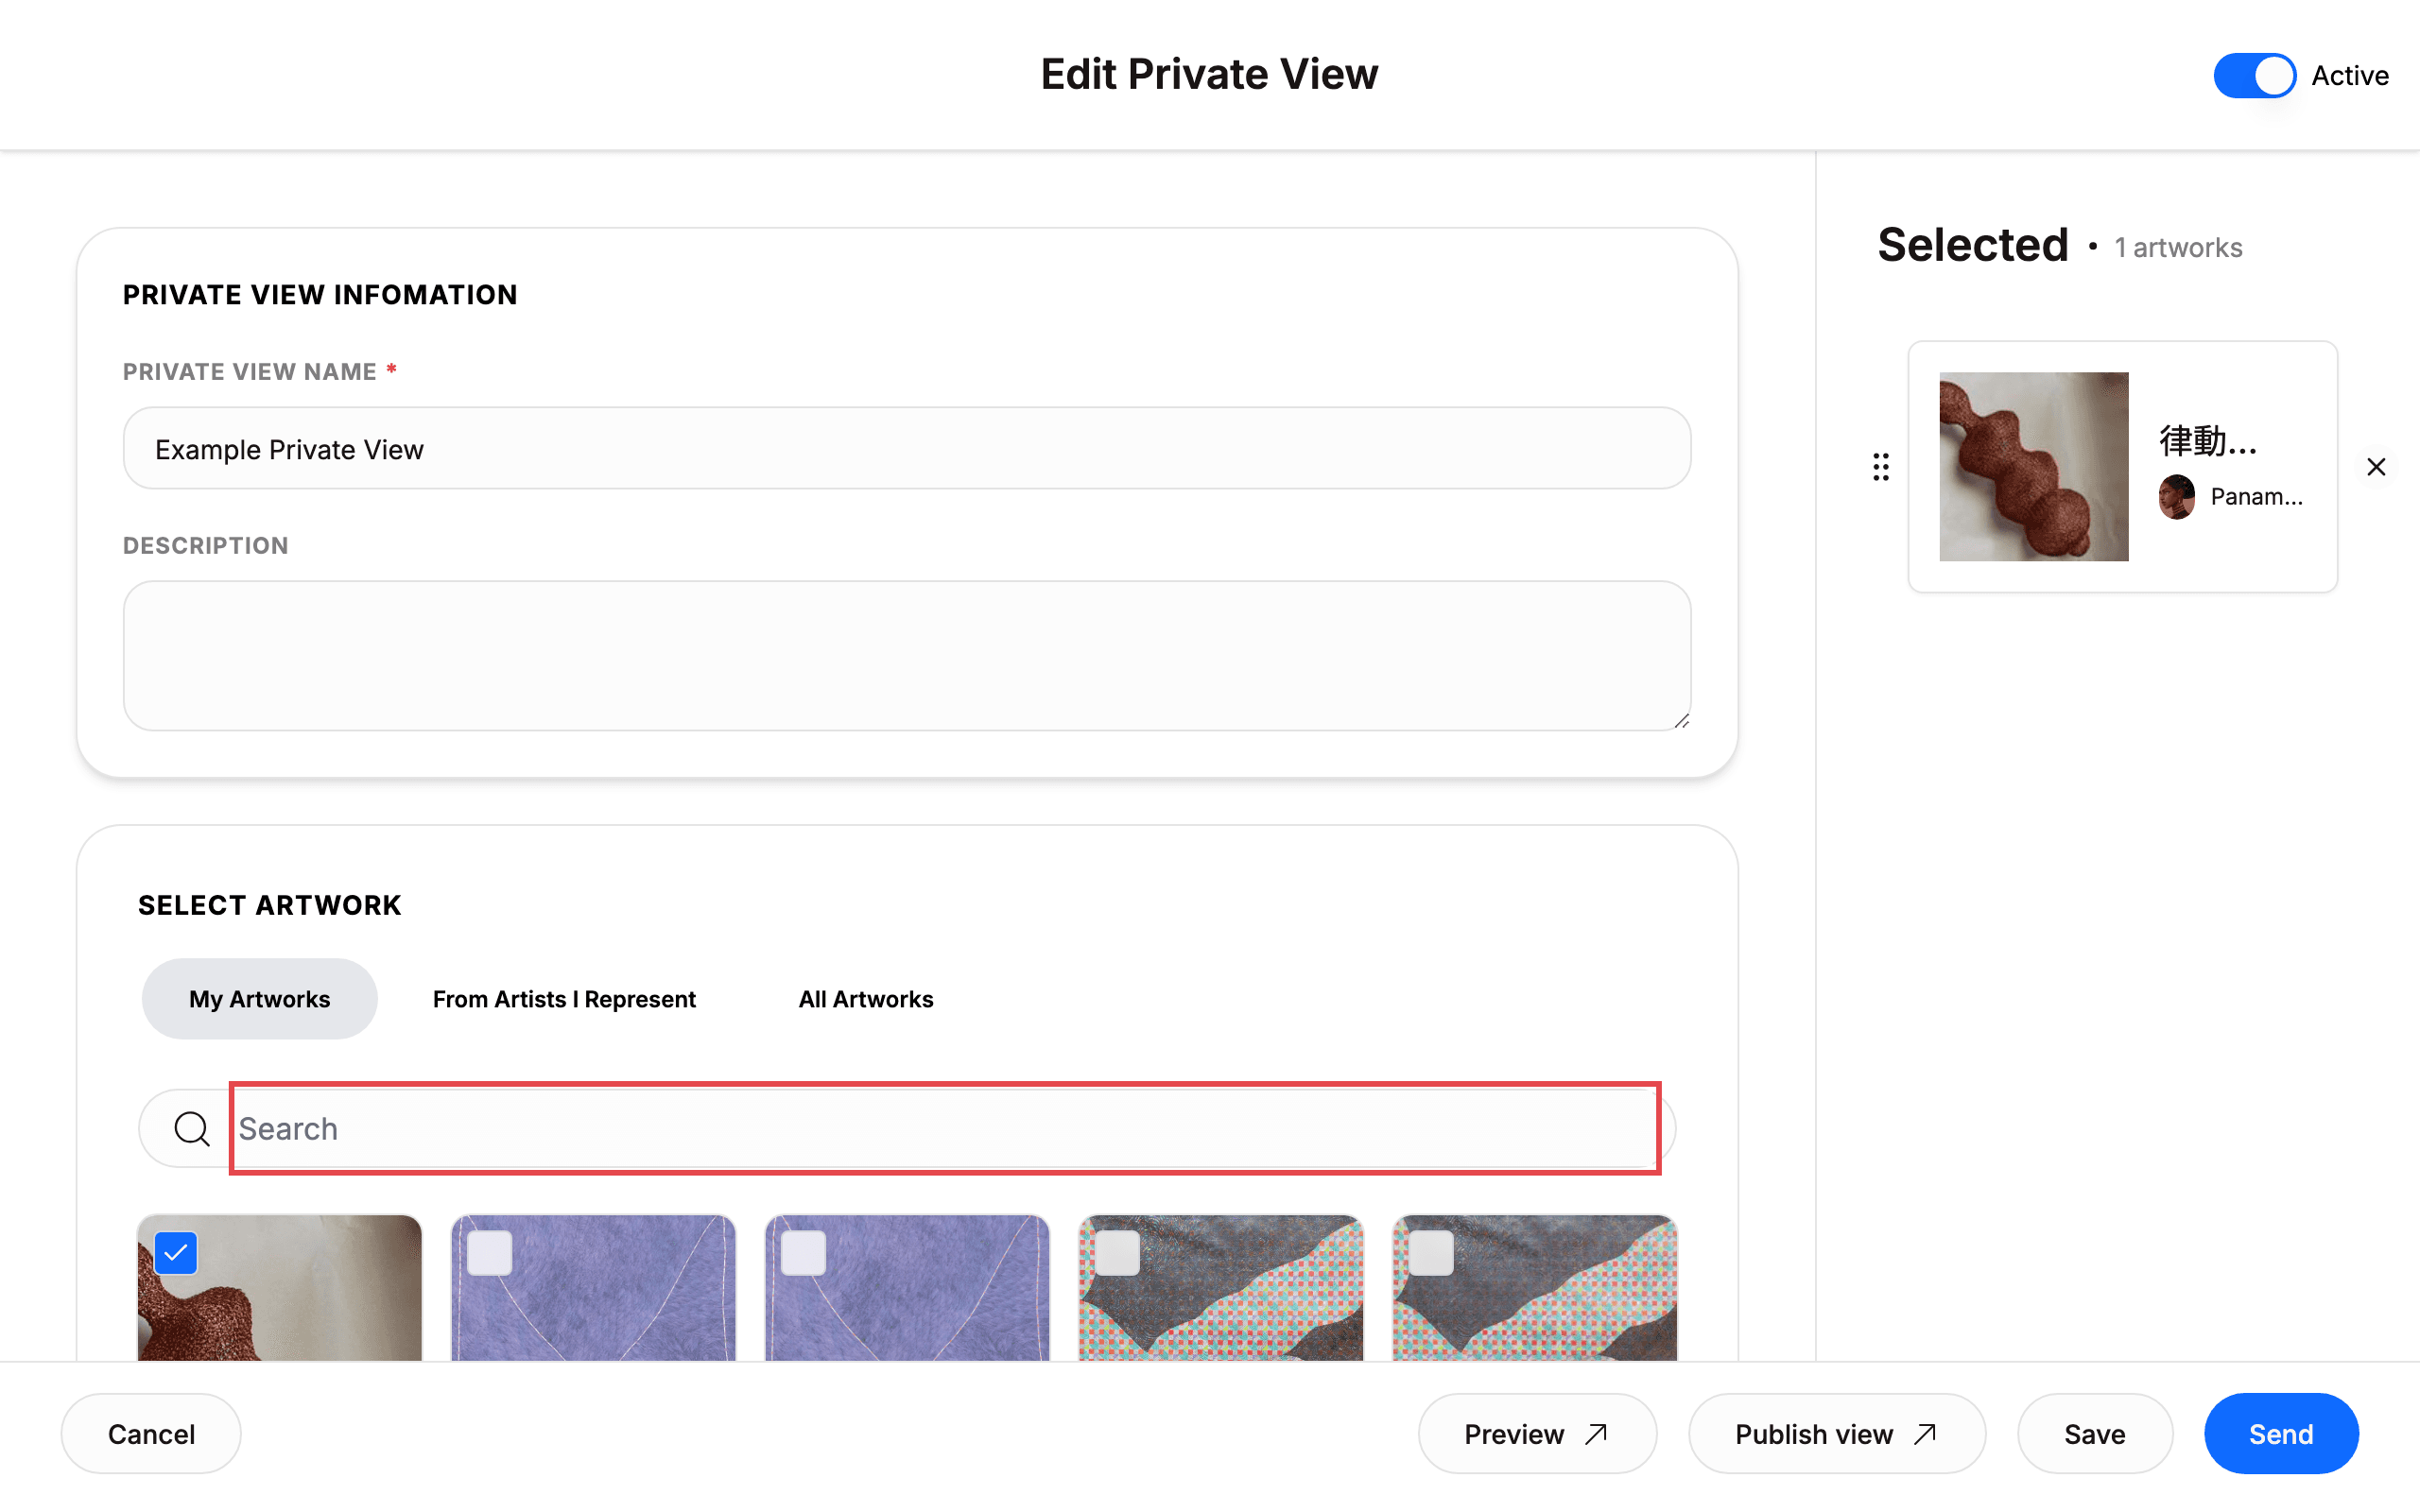
Each artwork row links to its artwork page and profile. Sold works show SOLD.
7. Preview the collector-facing view
- Click Preview.
- Read the preview dialog showing the view name, ACTIVE status, and artworks.
- Click Close to return to editing.
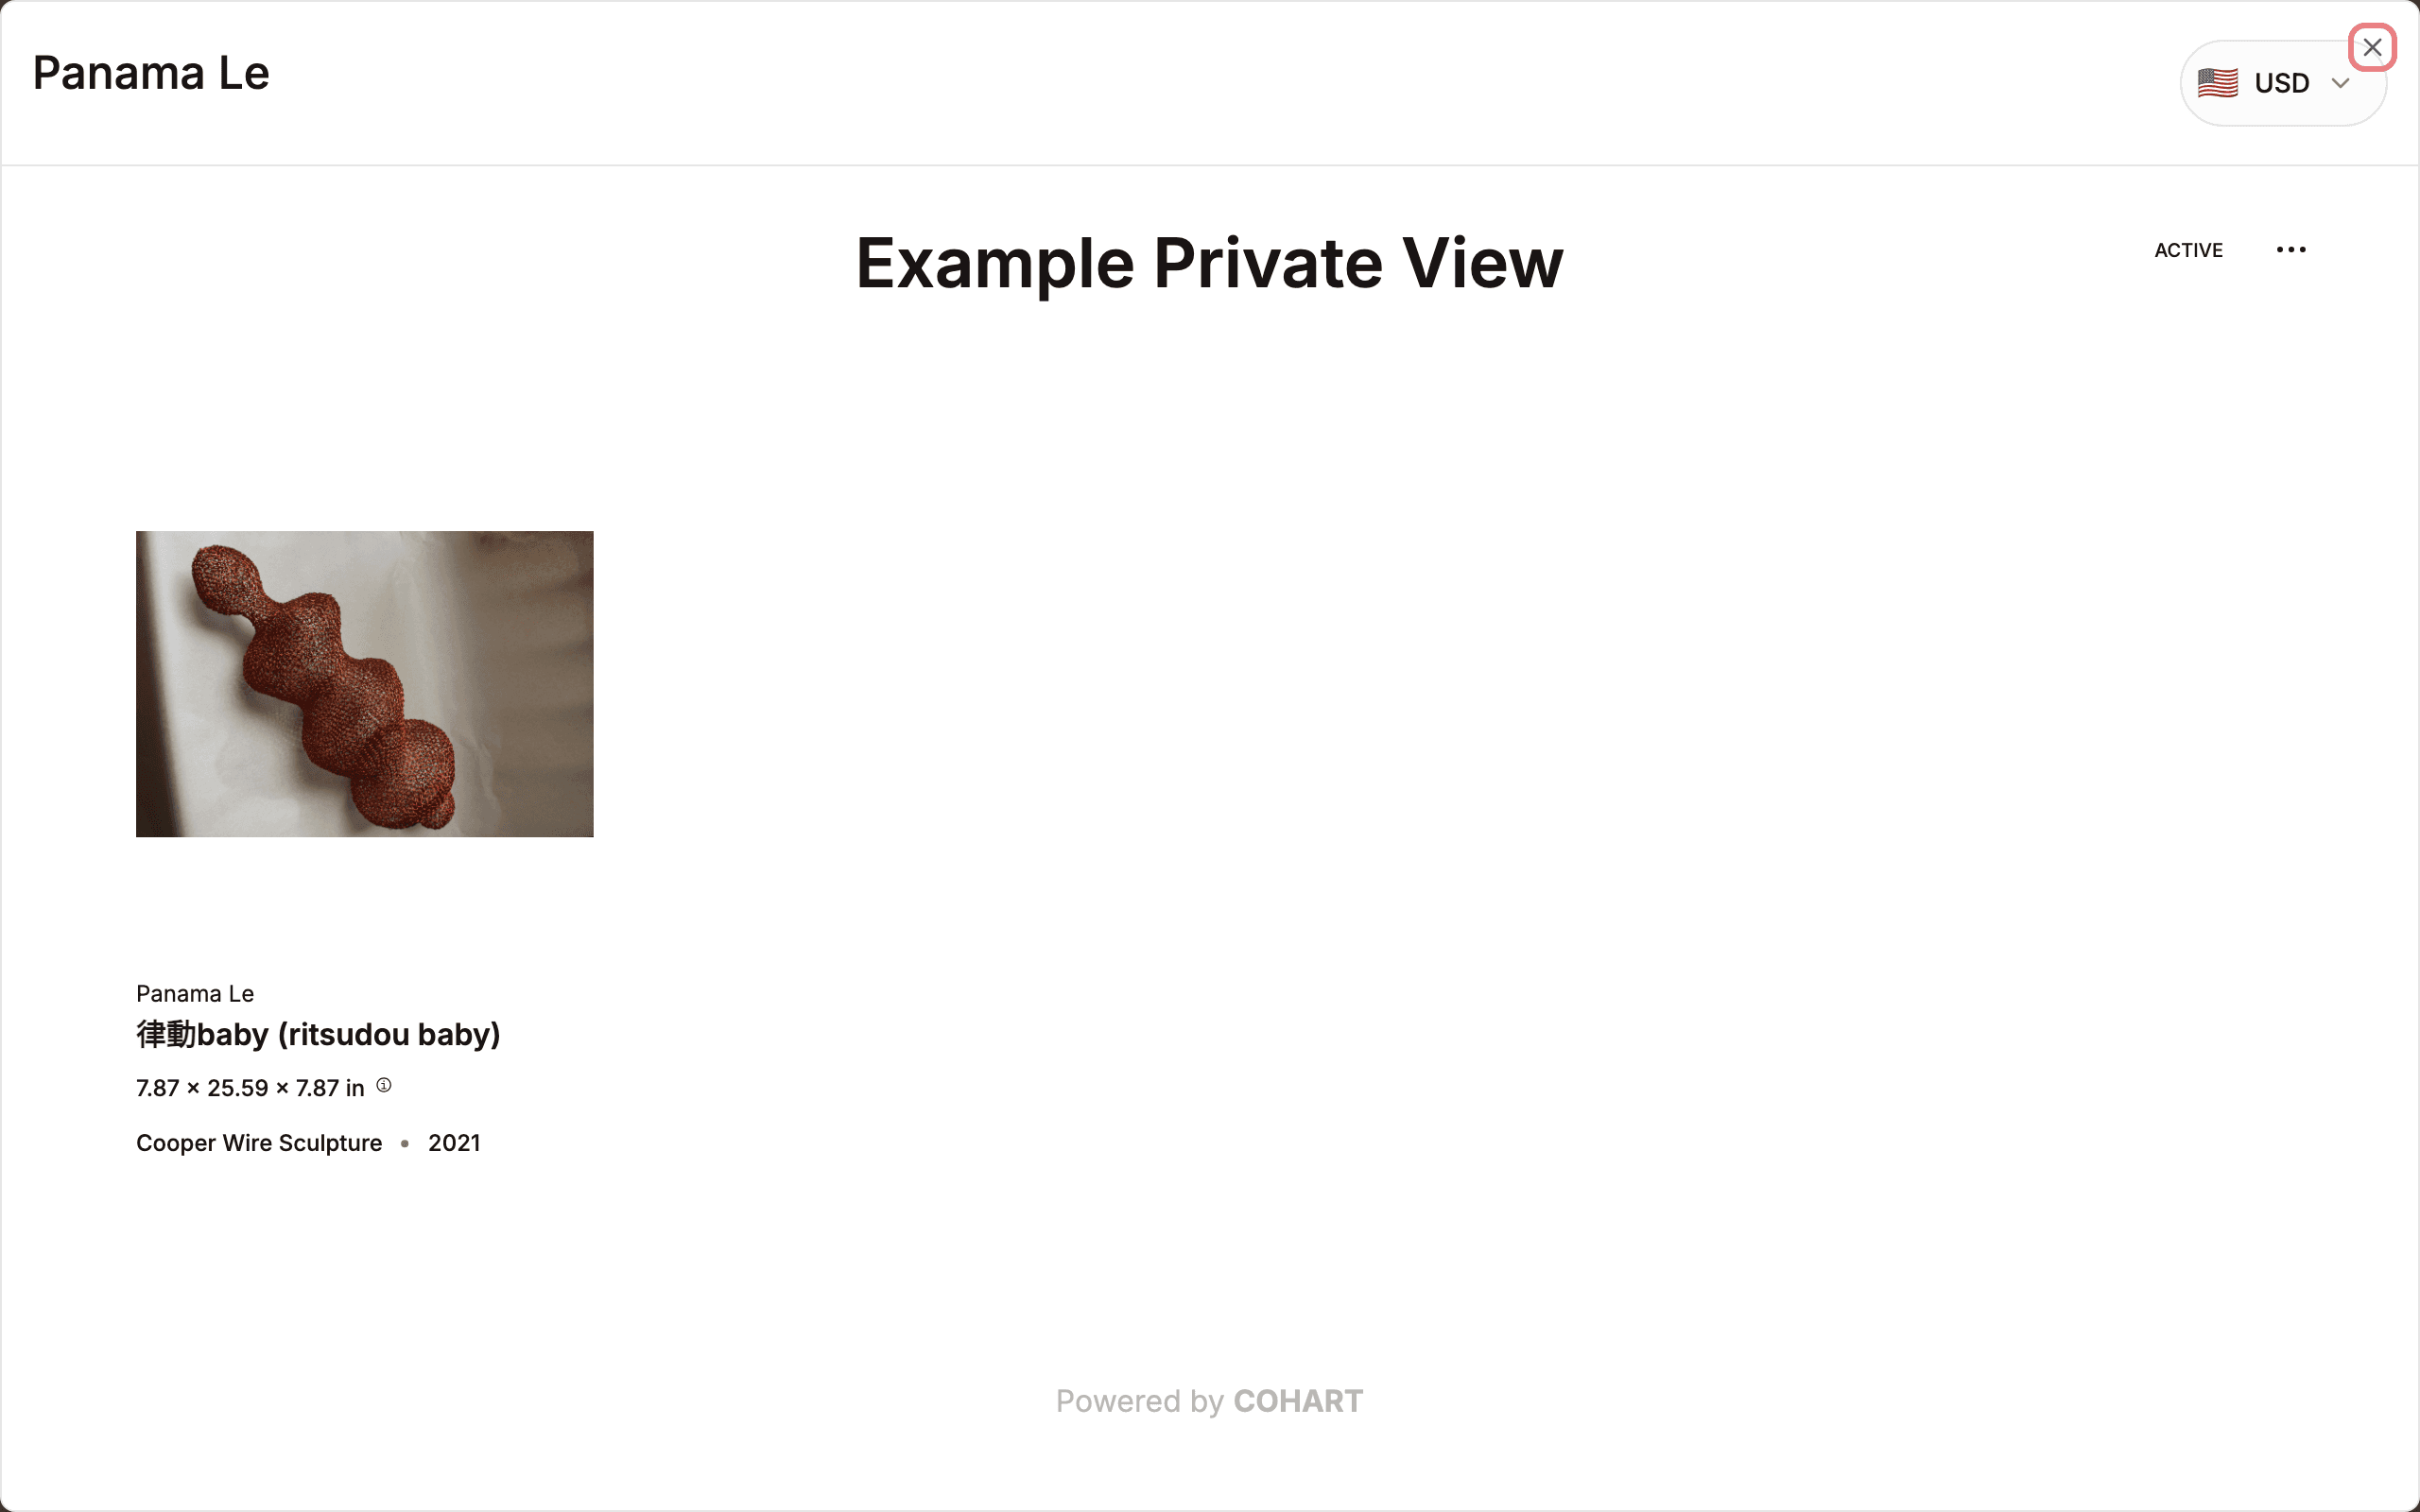
The preview shows the currency selector (for example 🇺🇸 USD) and Powered by COHART at the bottom. The preview URL does not change; it stays on the edit page.
8. Open Invite to Private View
- Click Send at the bottom of the edit page.
- Read the Invite to Private View dialog.
- Click Type to search contact emails, groups, user on Cohart, or add new emails.
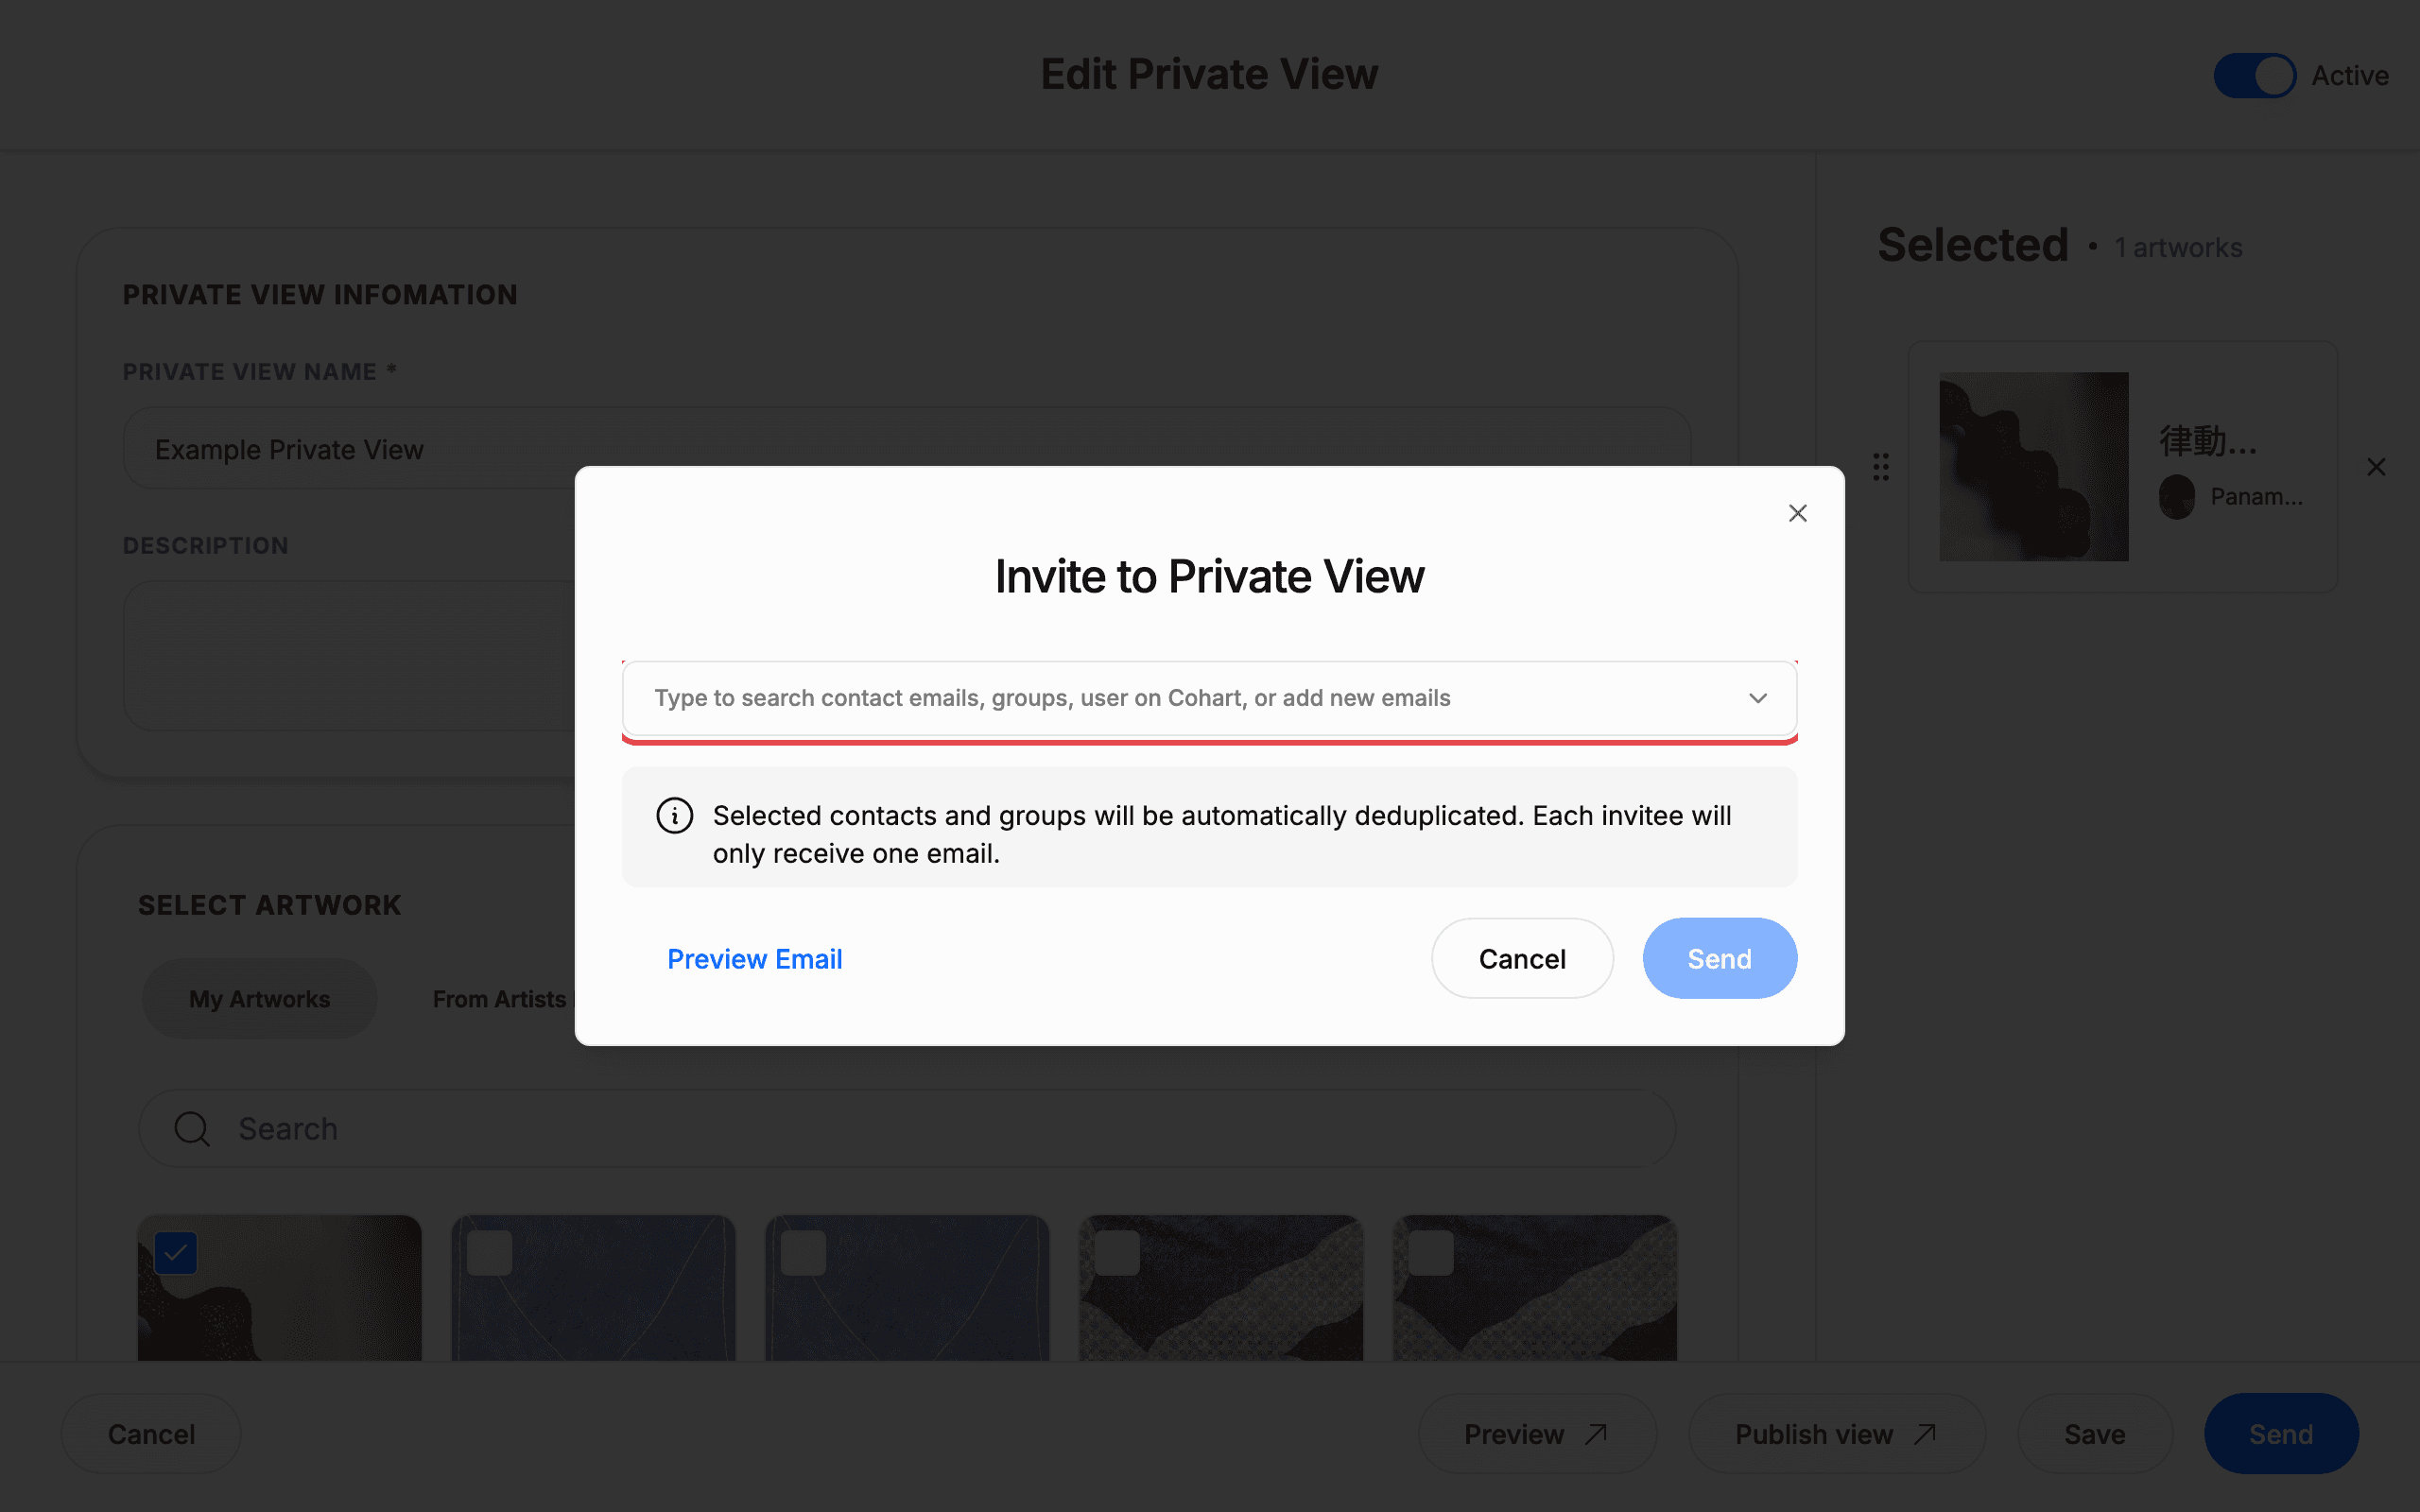
The dialog notes: Selected contacts and groups will be automatically deduplicated. Each invitee will only receive one email. You can also click Preview Email to check the email, Cancel to close without inviting, or Close (X) at the top-right.
9. Add invitees and send
- Type an email (for example
you@example.com) in Search…. - Click Add email you@example.com or pick a result under All contacts or All groups.
- Read Estimated total recipients: 1 invitee and click See Details to review.
- Click Send.
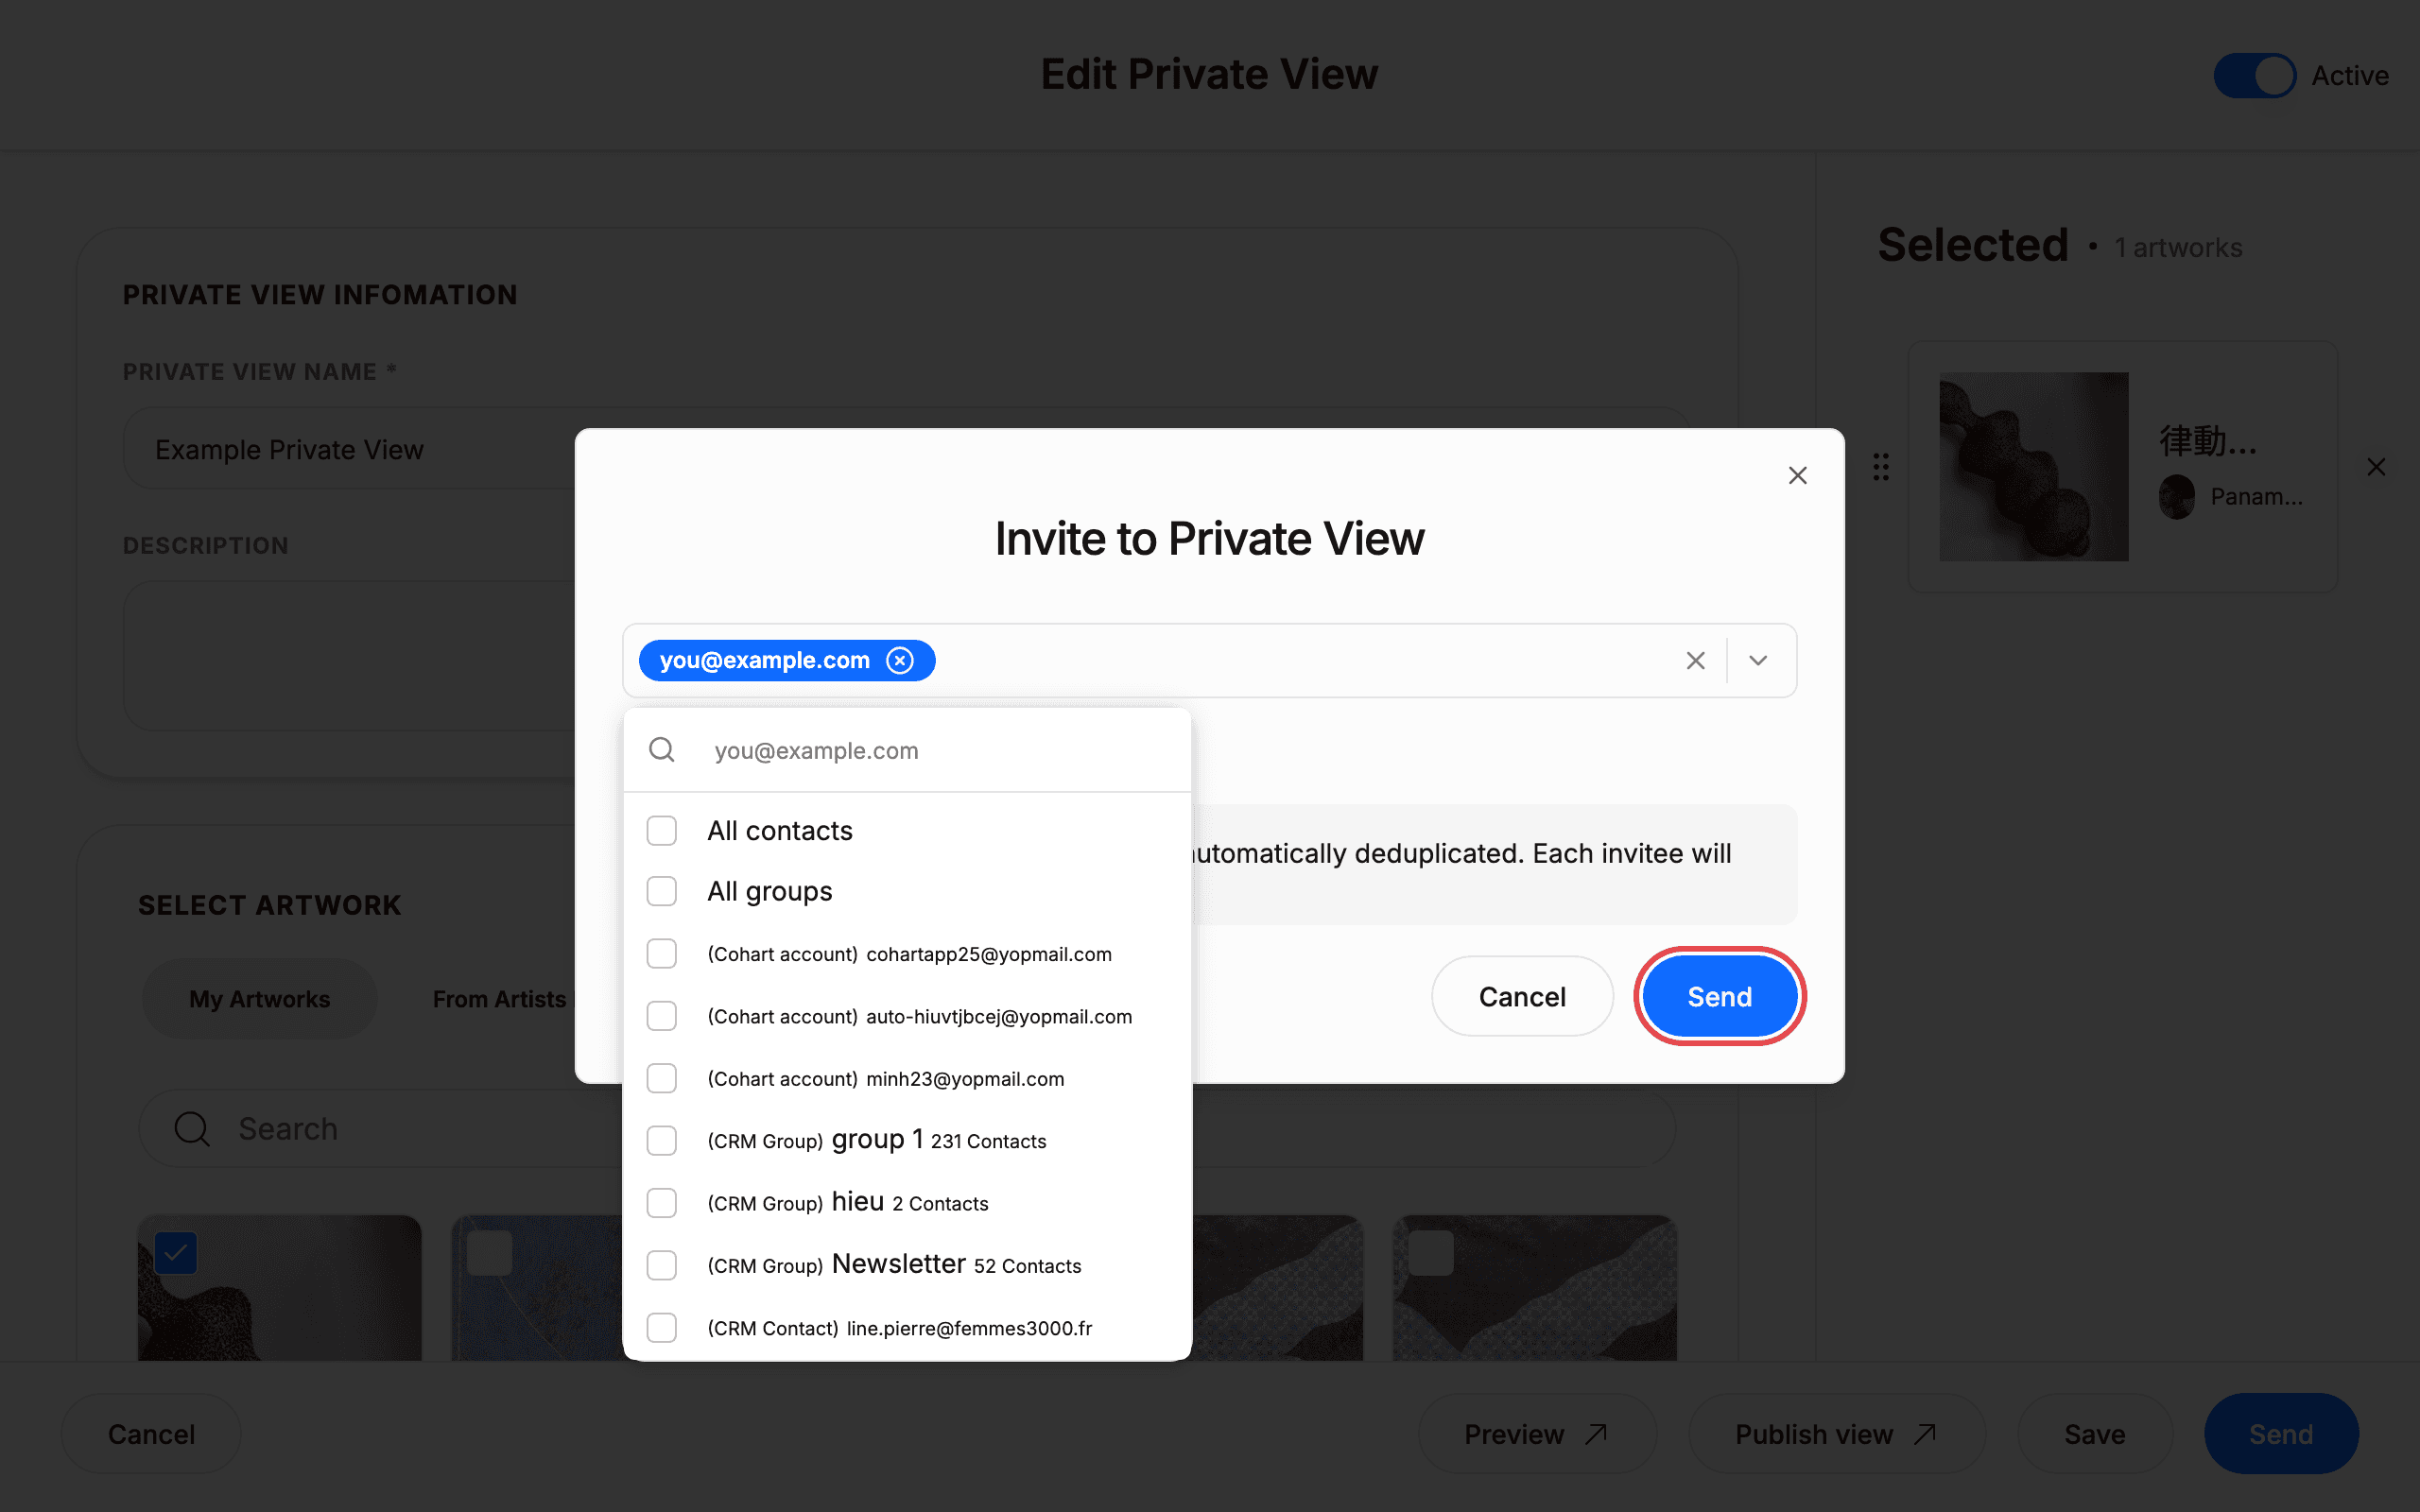
Matching results include (Cohart account) entries, (CRM Group) entries with contact counts, and (CRM Contact) entries. To remove the selection, click Clear. The demo screenshots select you@example.com and close the dialog without sending.
10. Save or publish your changes
- Review the footer buttons on the edit page.
- Click Save to keep a draft.
- Click Publish view to make the view live.
- Click Preview to check again, or Cancel to discard changes.
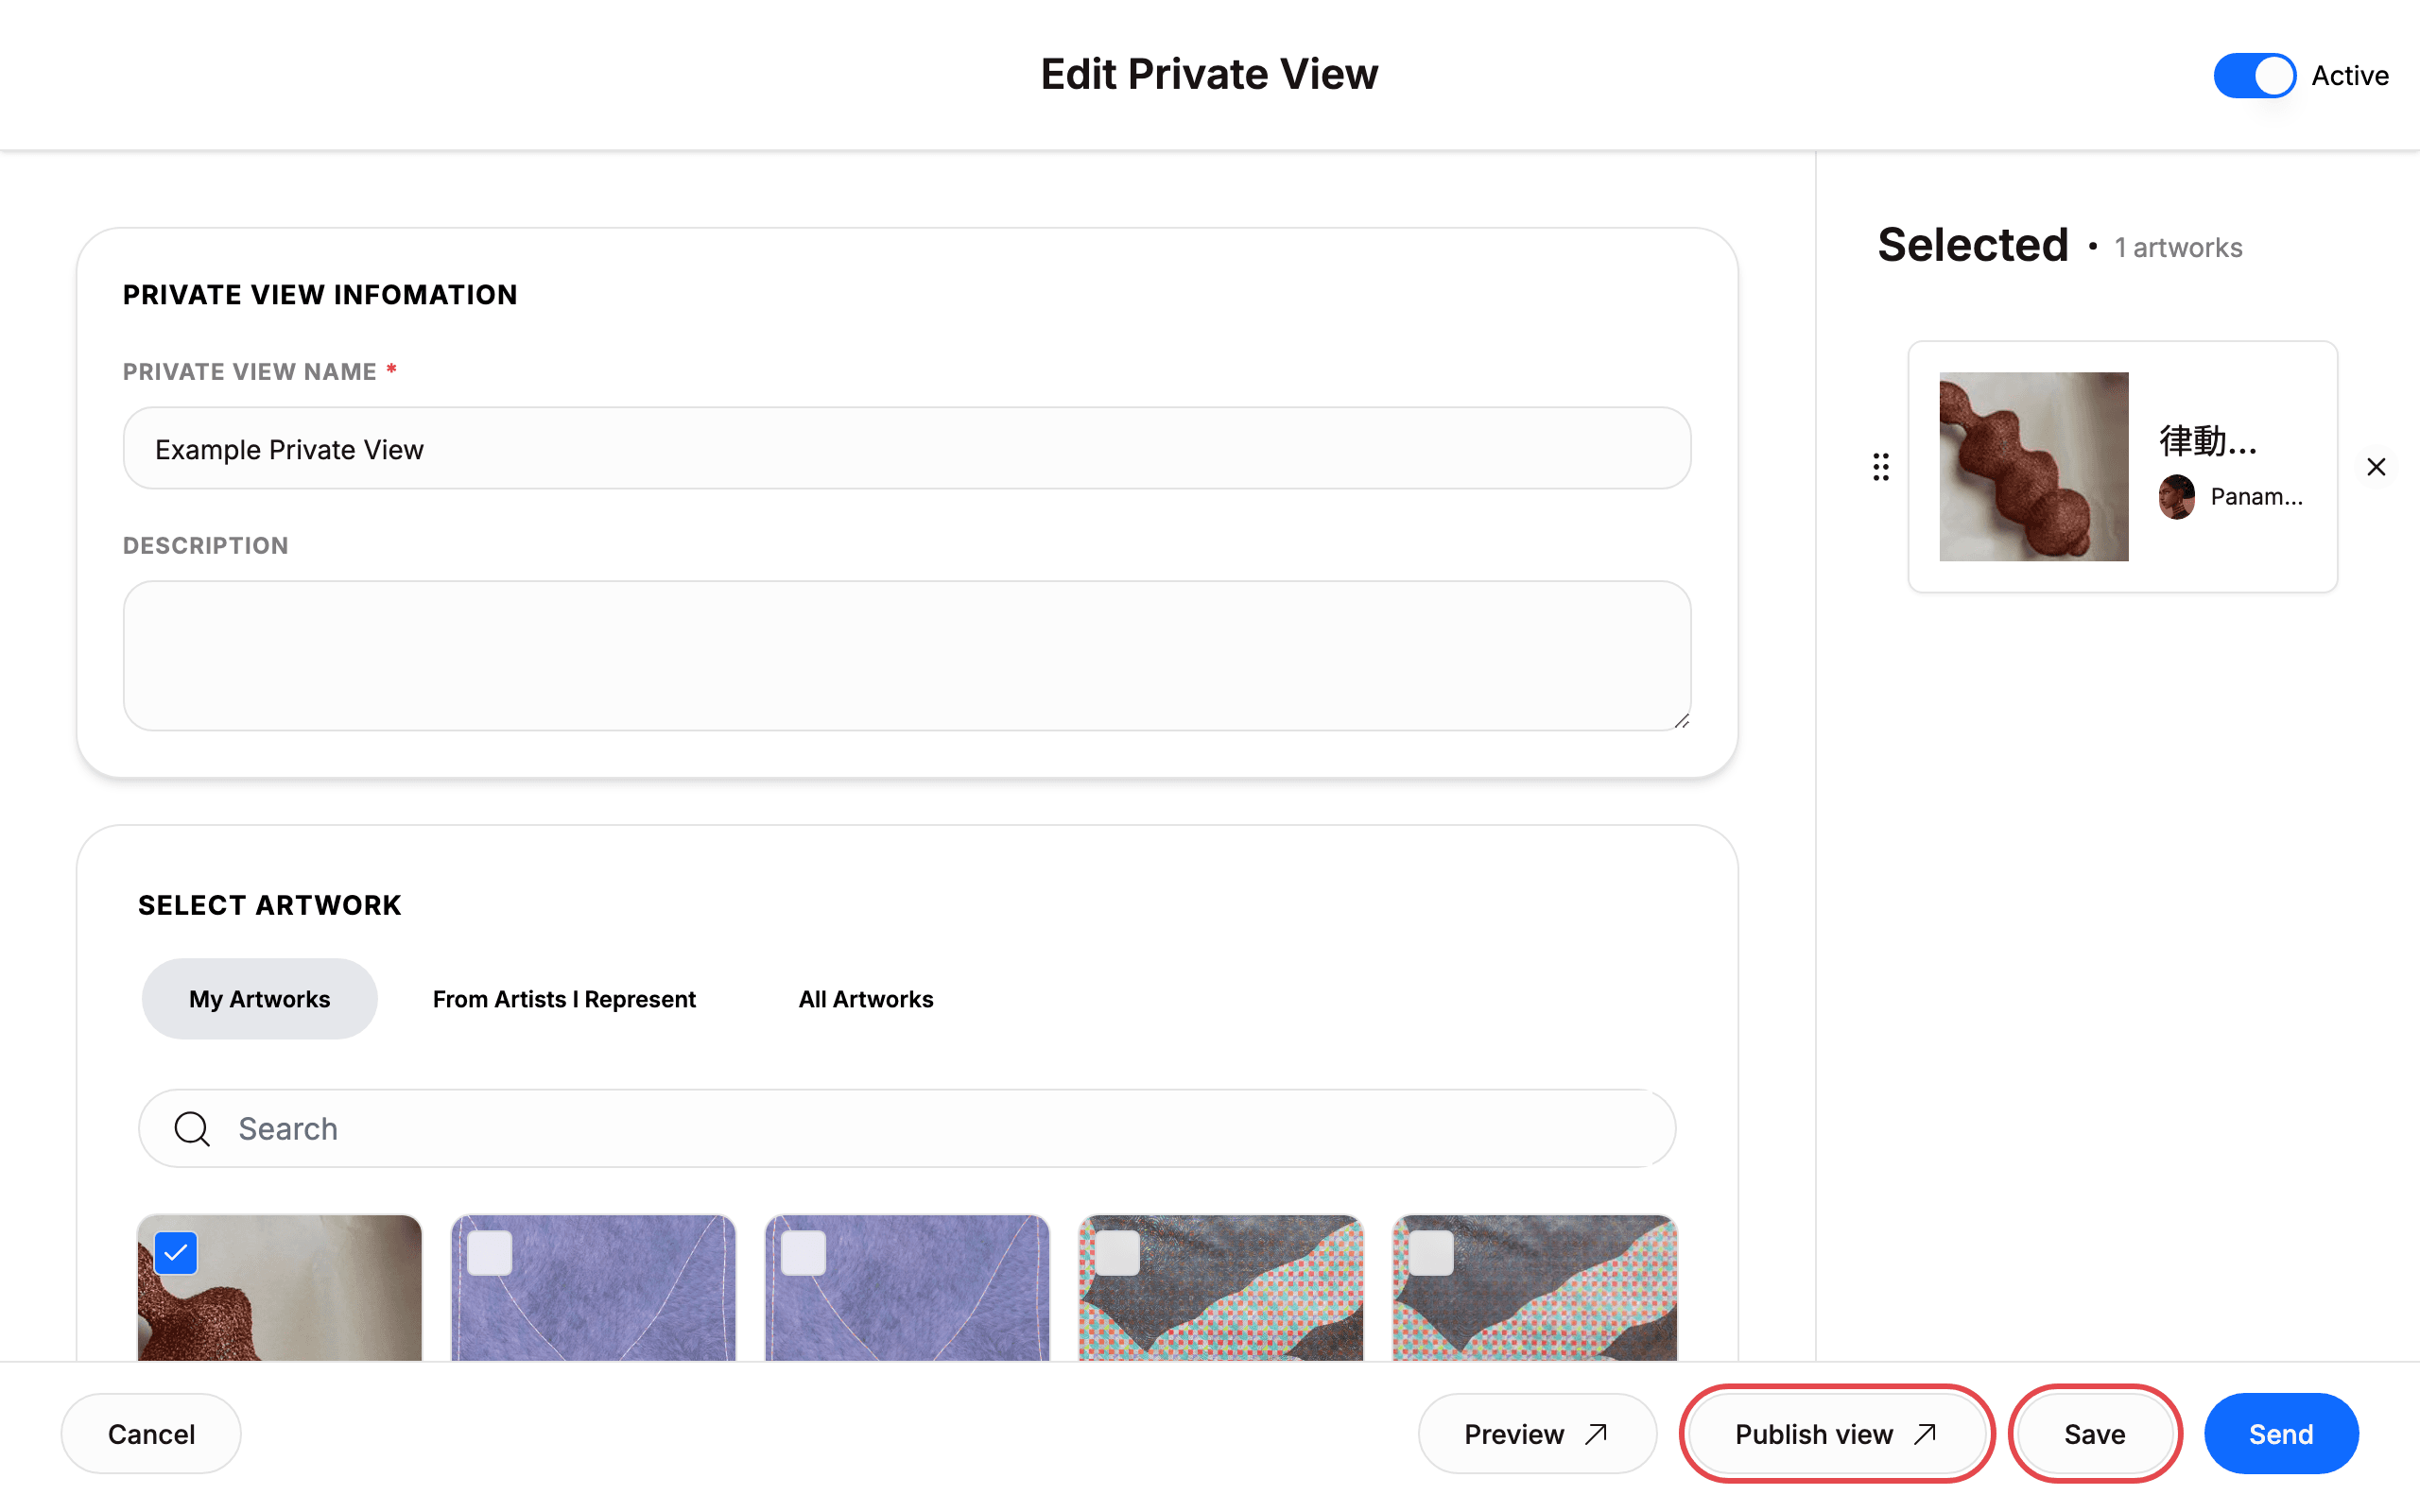
Do not click Save or Publish view in a demo capture run.
11. Check Shared with Me and status filters
- Go back to Private Views.
- Click Shared with Me.
- Read the empty state if you have no shared views.
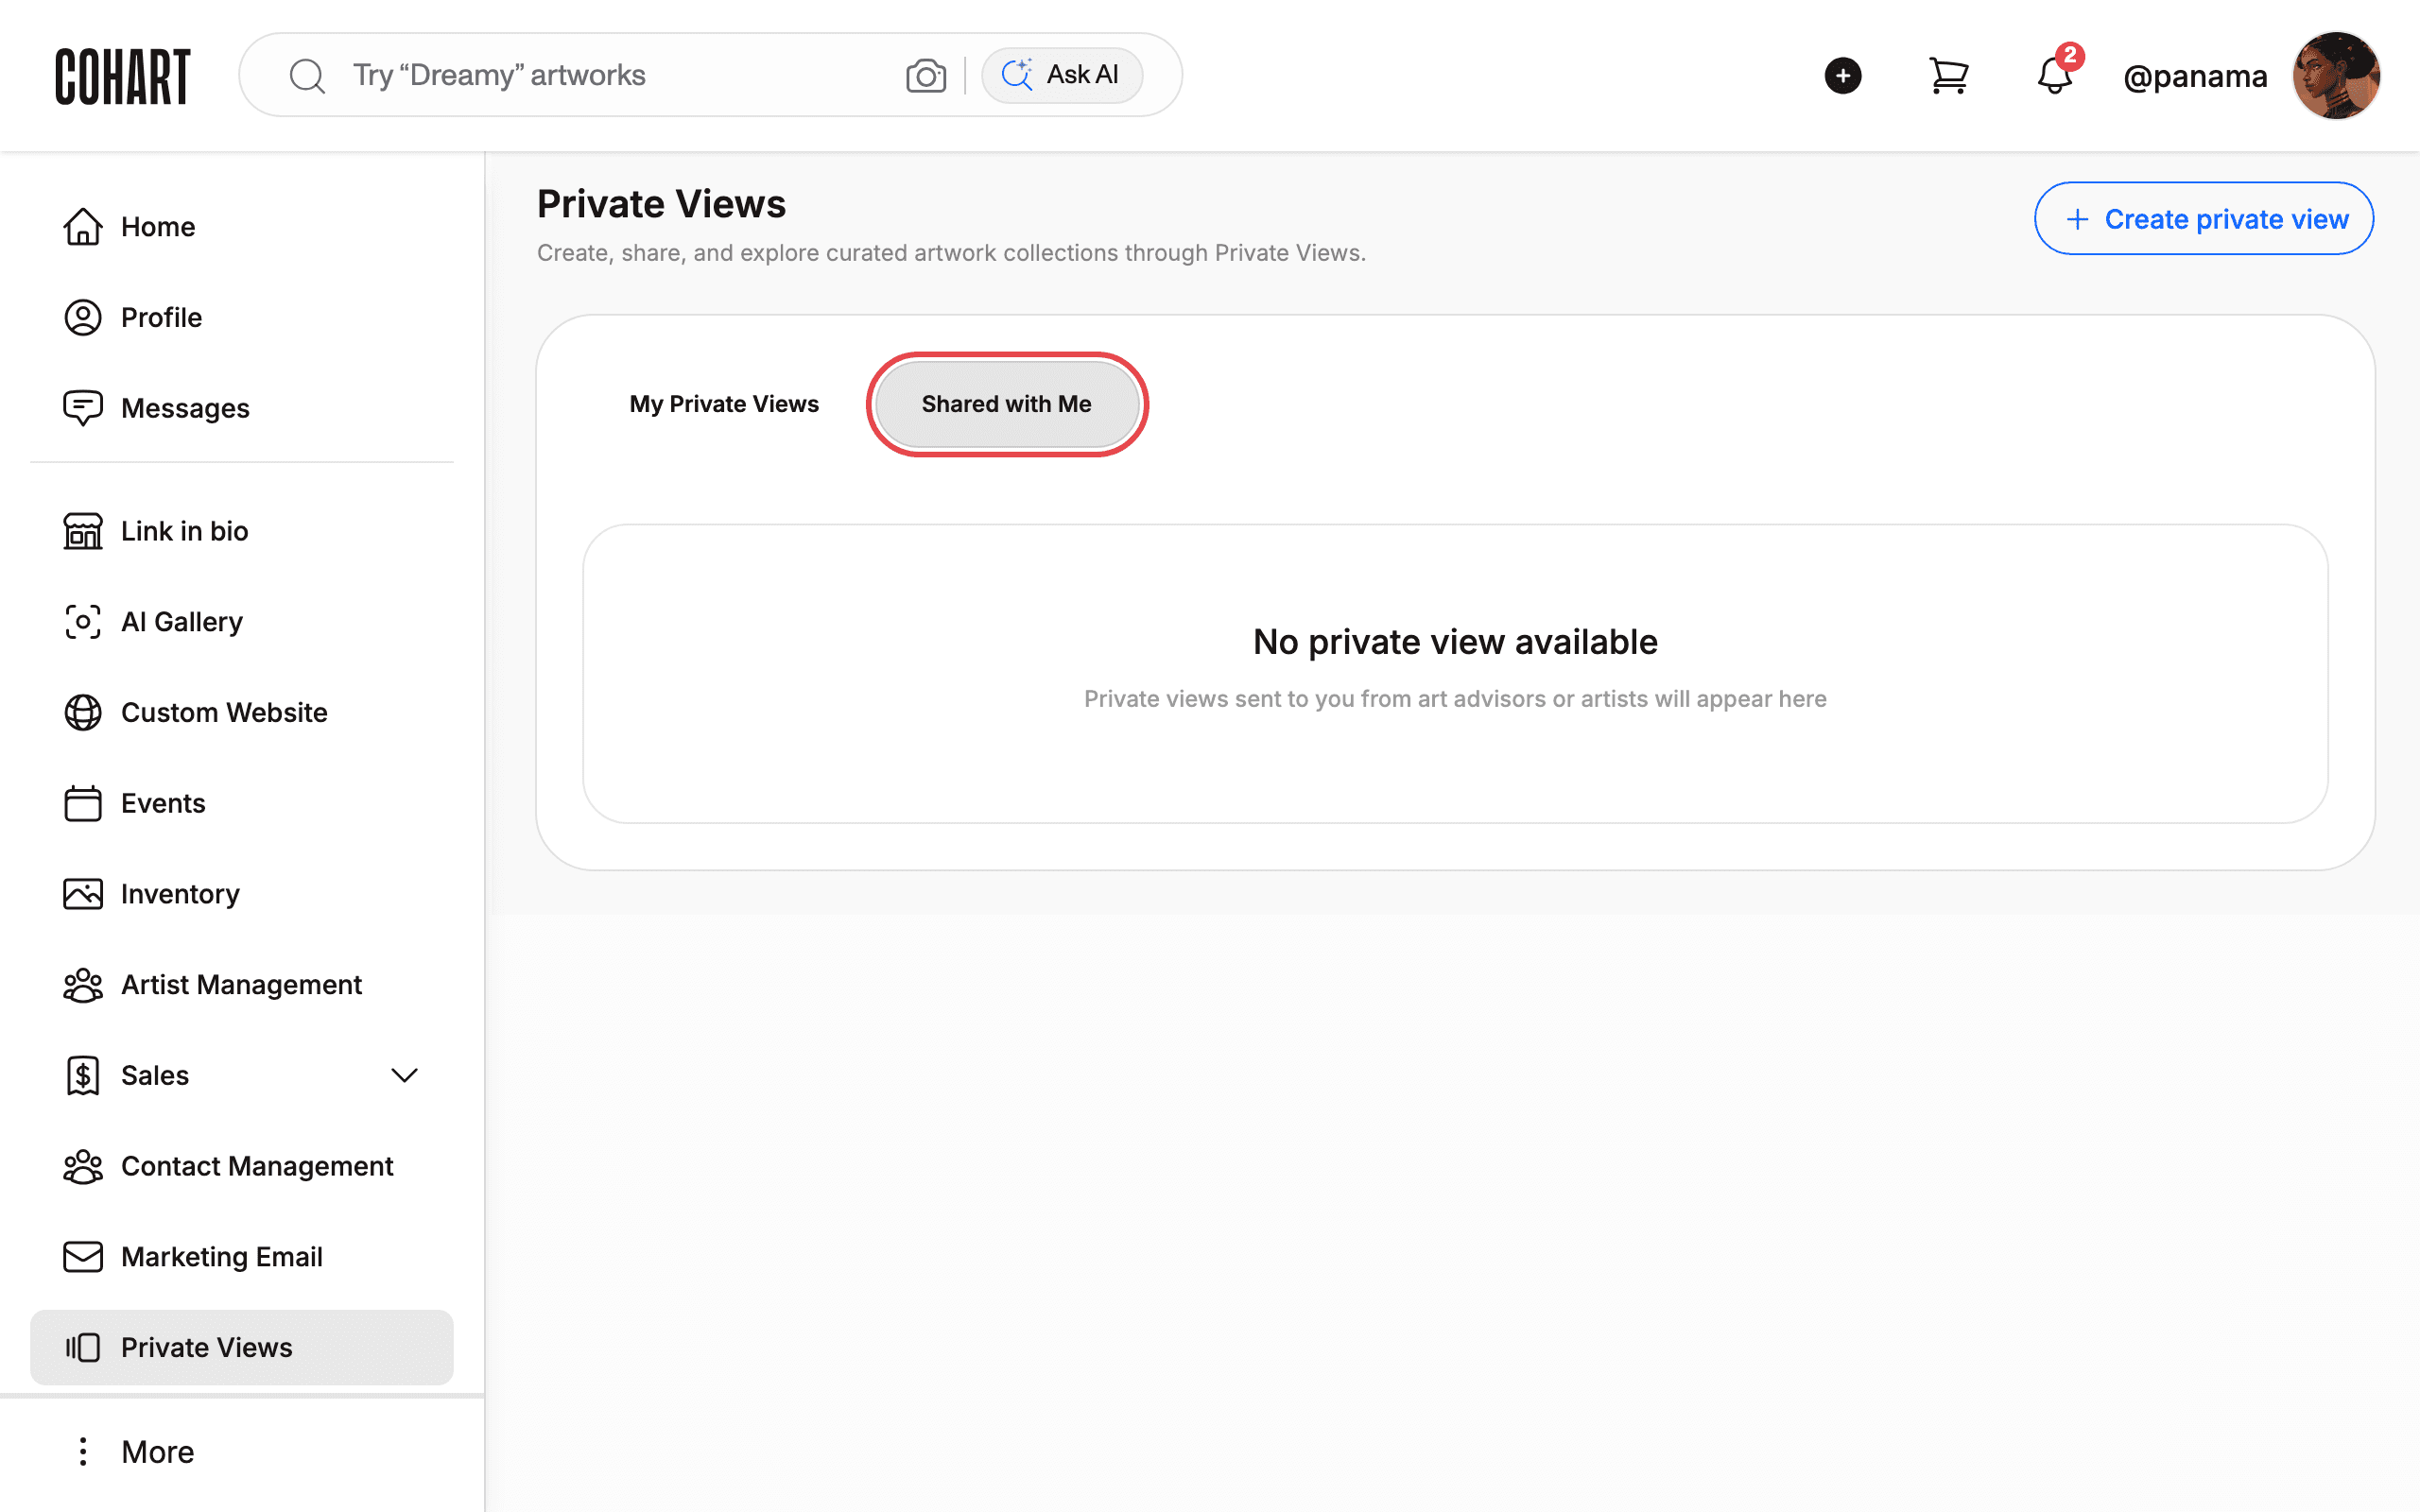
If no one has shared with you, the page shows No private view available and Private views sent to you from art advisors or artists will appear here. On My Private Views, use ACTIVE and INACTIVE to filter by status.
Tips and troubleshooting
- After signing in you land on Inventory. This is normal. Open Private Views in the sidebar whenever you need it.
- Cards link to the public view. Clicking a card title (for example Example Private View) opens
/private-views/<id>. To manage, use the card three-dot menu and click Edit private view, which opens/advisor/private-views/<id>/edit. - Active versus inactive. The list defaults to ACTIVE. Click INACTIVE to find deactivated views (URL changes to
?status=inactive). The card menu shows Deactivate private view on active views and Activate private view on inactive ones. - Shared views are read-only. The Shared with Me tab (URL
?tab=shared) only lists views others sent you. You cannot edit them there. - Send stays disabled until you add someone. In Invite to Private View, the Send button enables only after you pick a contact, group, or Add email you@example.com. Watch for Estimated total recipients: 1 invitee before sending.
- Duplicates are removed automatically. The invite dialog reminds you: Selected contacts and groups will be automatically deduplicated. Each invitee will only receive one email.
- Preview Email needs an invitee first. Clicking Preview Email with no selection shows nothing to preview. Add at least one email, then preview.
- Search has two boxes. On the edit page, Search filters the artwork picker. Inside the invite dialog, Search… finds contacts, groups, Cohart users, or new emails.
- Do not use real emails in tests. Type placeholder
you@example.comand close with Cancel or Close instead of clicking Send, so re-runs never spam real collectors. - Avoid destructive menu items in demos. Delete private view and Duplicate private view change your data. Save and Publish view also write changes. Highlight them for screenshots but do not click them in automated re-captures.
Screenshots are regenerated automatically from the live site. Last captured: 2026-09-03.