How to Manage Invoices
You will send, view, and edit invoices from your Invoices page, and track whether each buyer has paid.
Step 1 — Sign in
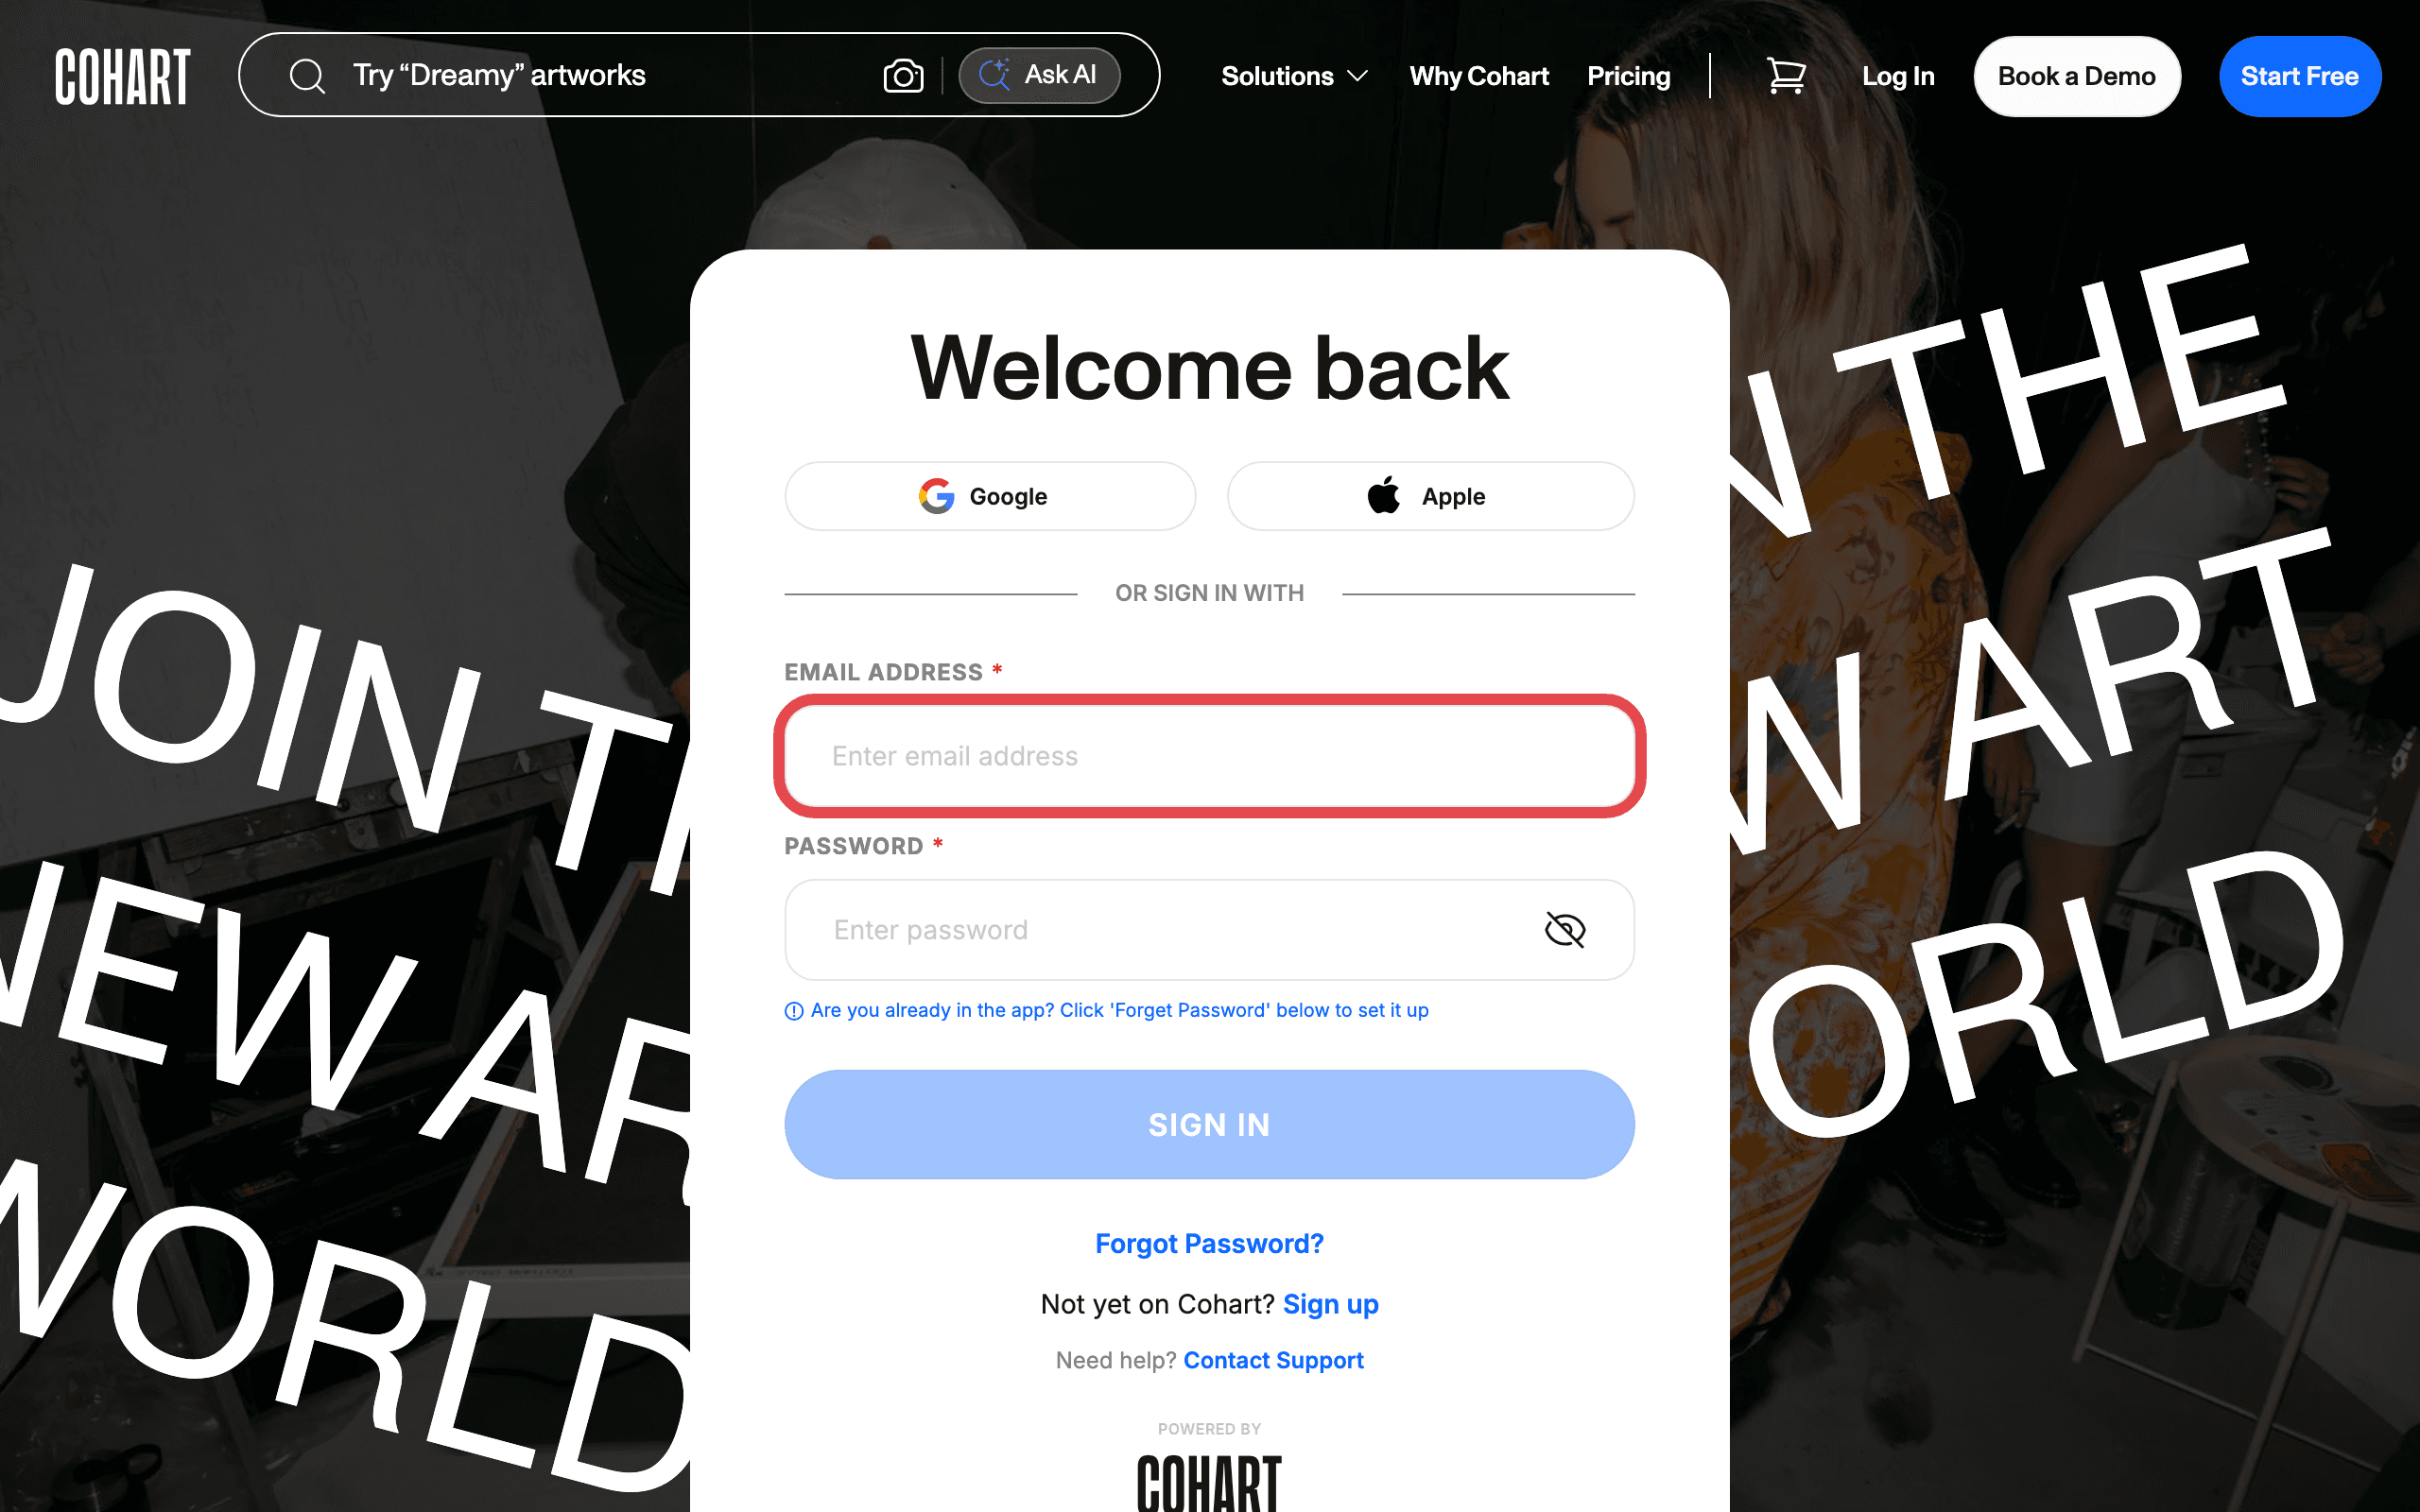
Open the sign-in page at staging.cohdev.co/auth/login . You can also reach it by clicking Log In on the homepage.
You have three ways to sign in:
- Google — click the Google button.
- Apple — click the Apple button.
- Email and password — enter your email in Enter email address and your password in Enter password, then click SIGN IN.
Step 2 — Open the Sales menu
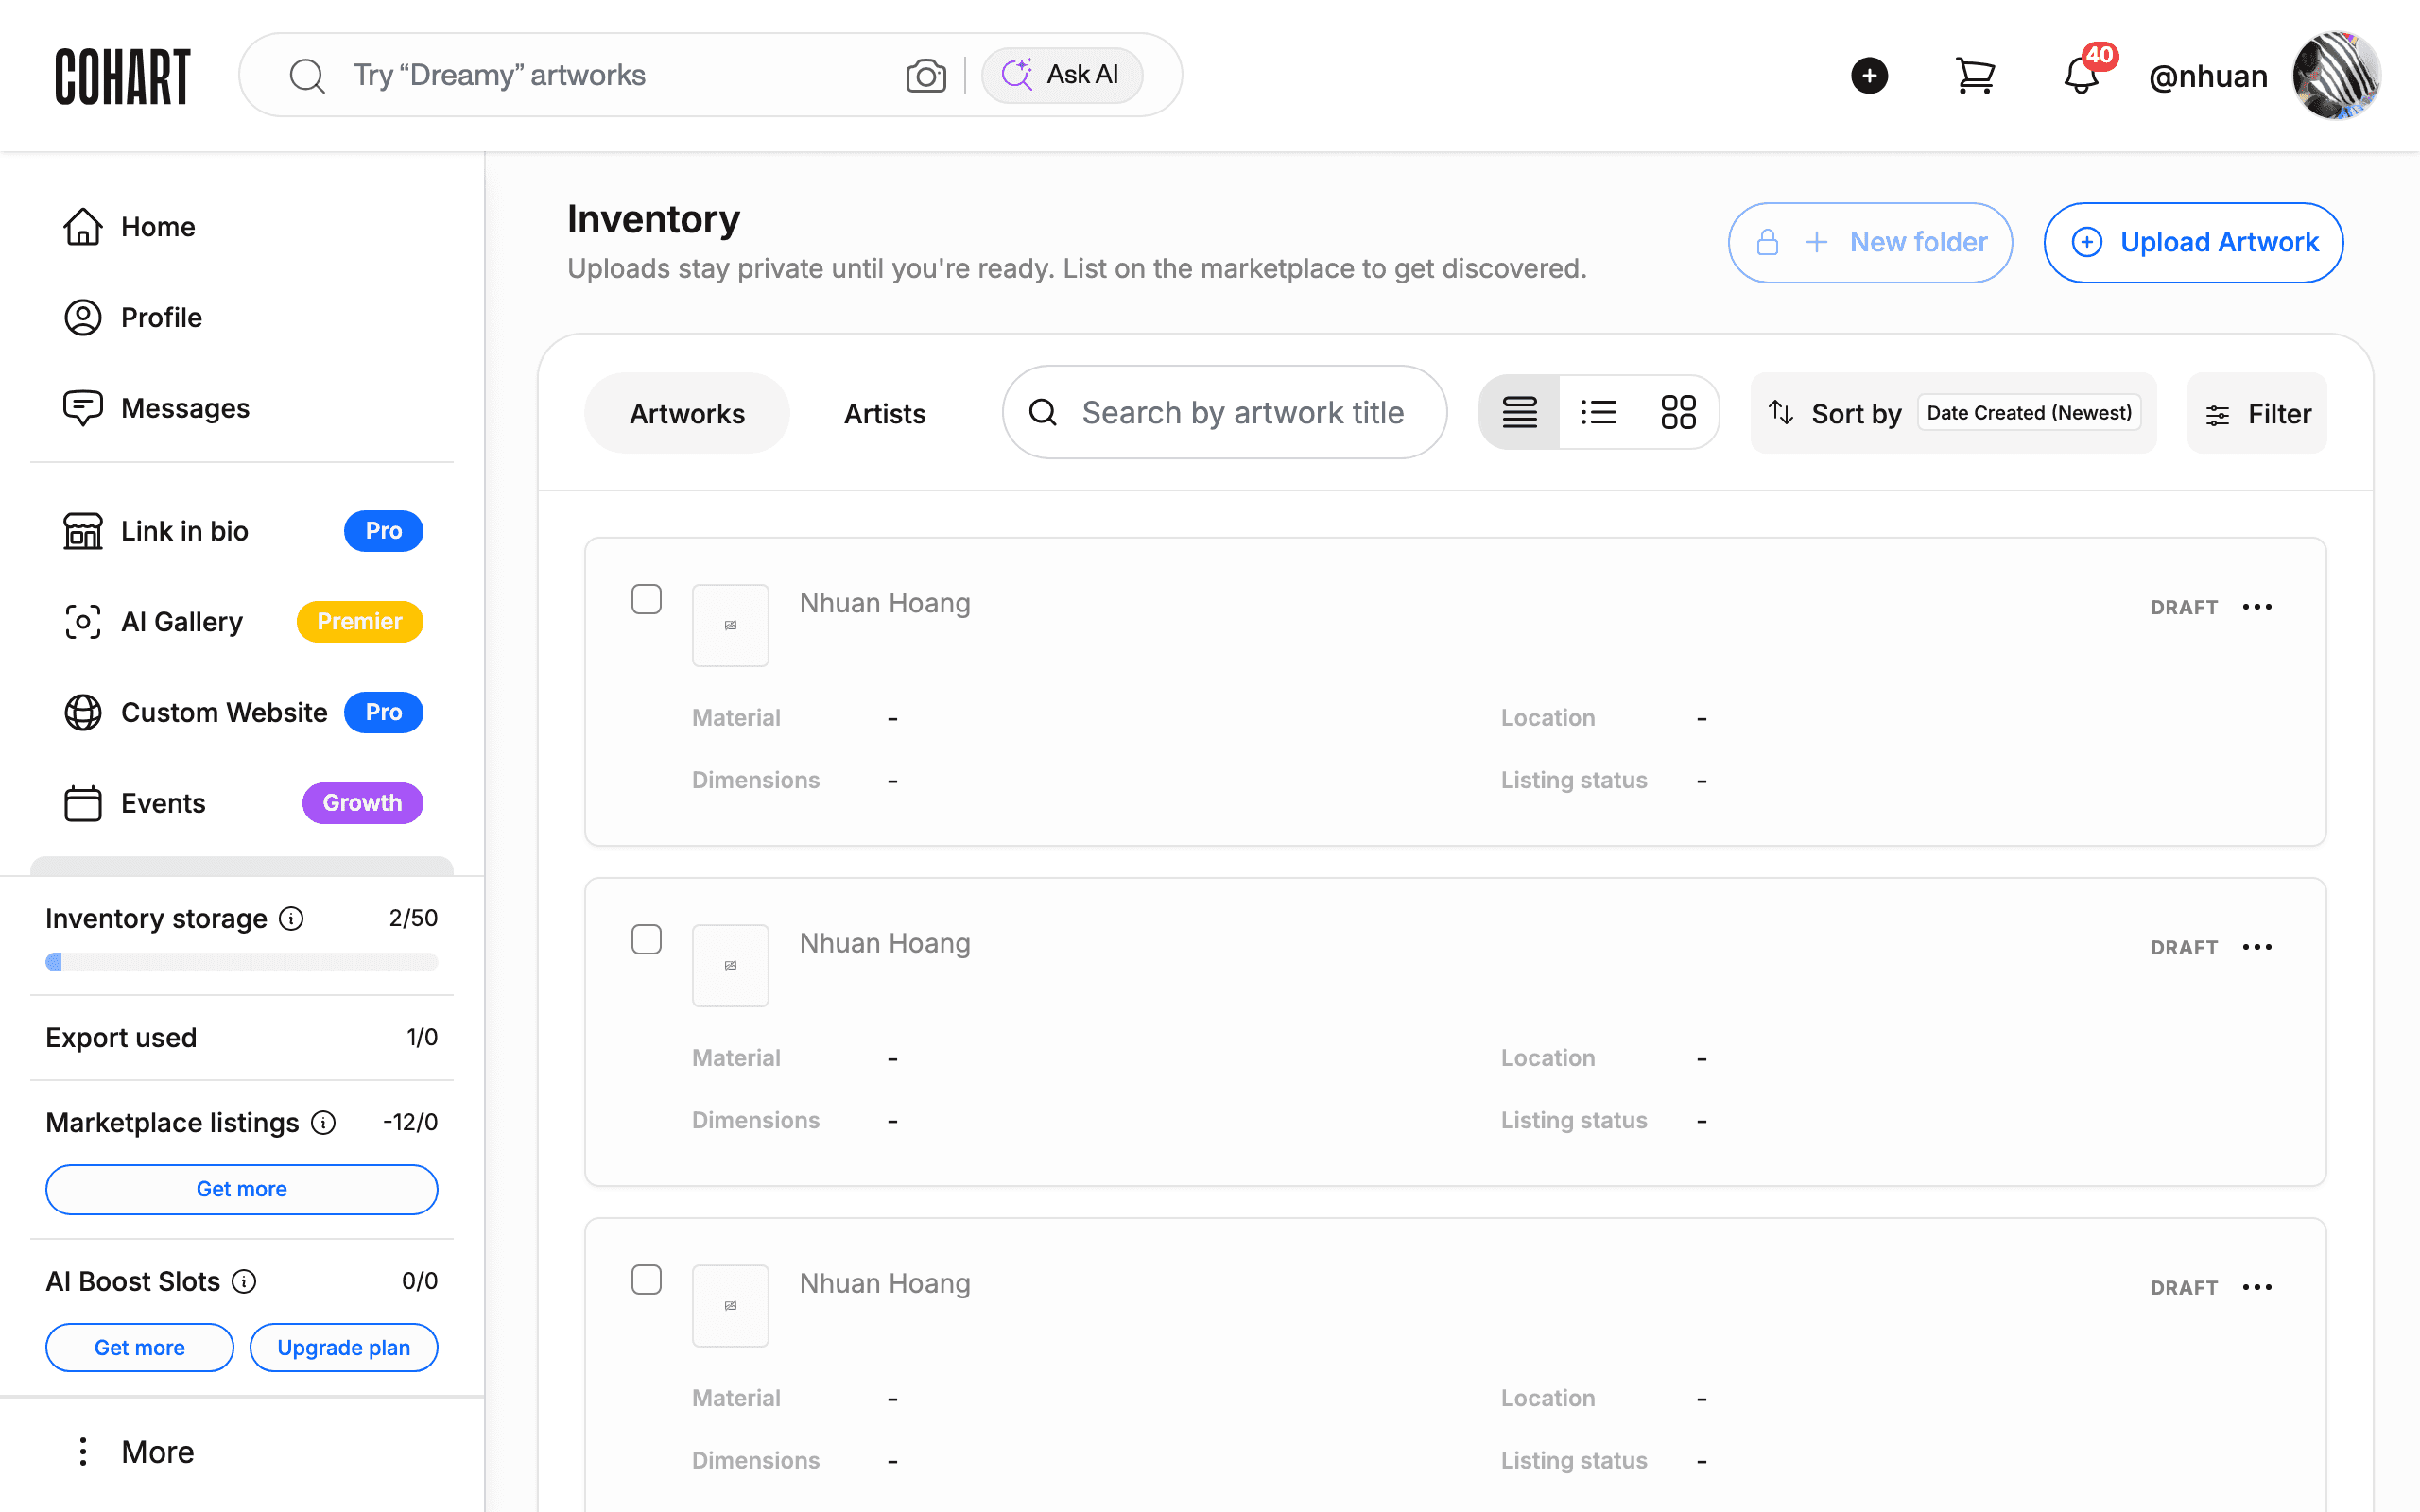
After signing in you land on your dashboard. In the left-hand navigation, click Sales.
Step 3 — Open Invoices
In the Sales menu you will see Invoices, Sales Record, Shipping, Transactions, and Testimonials. Click Invoices.
Step 4 — The Invoices page
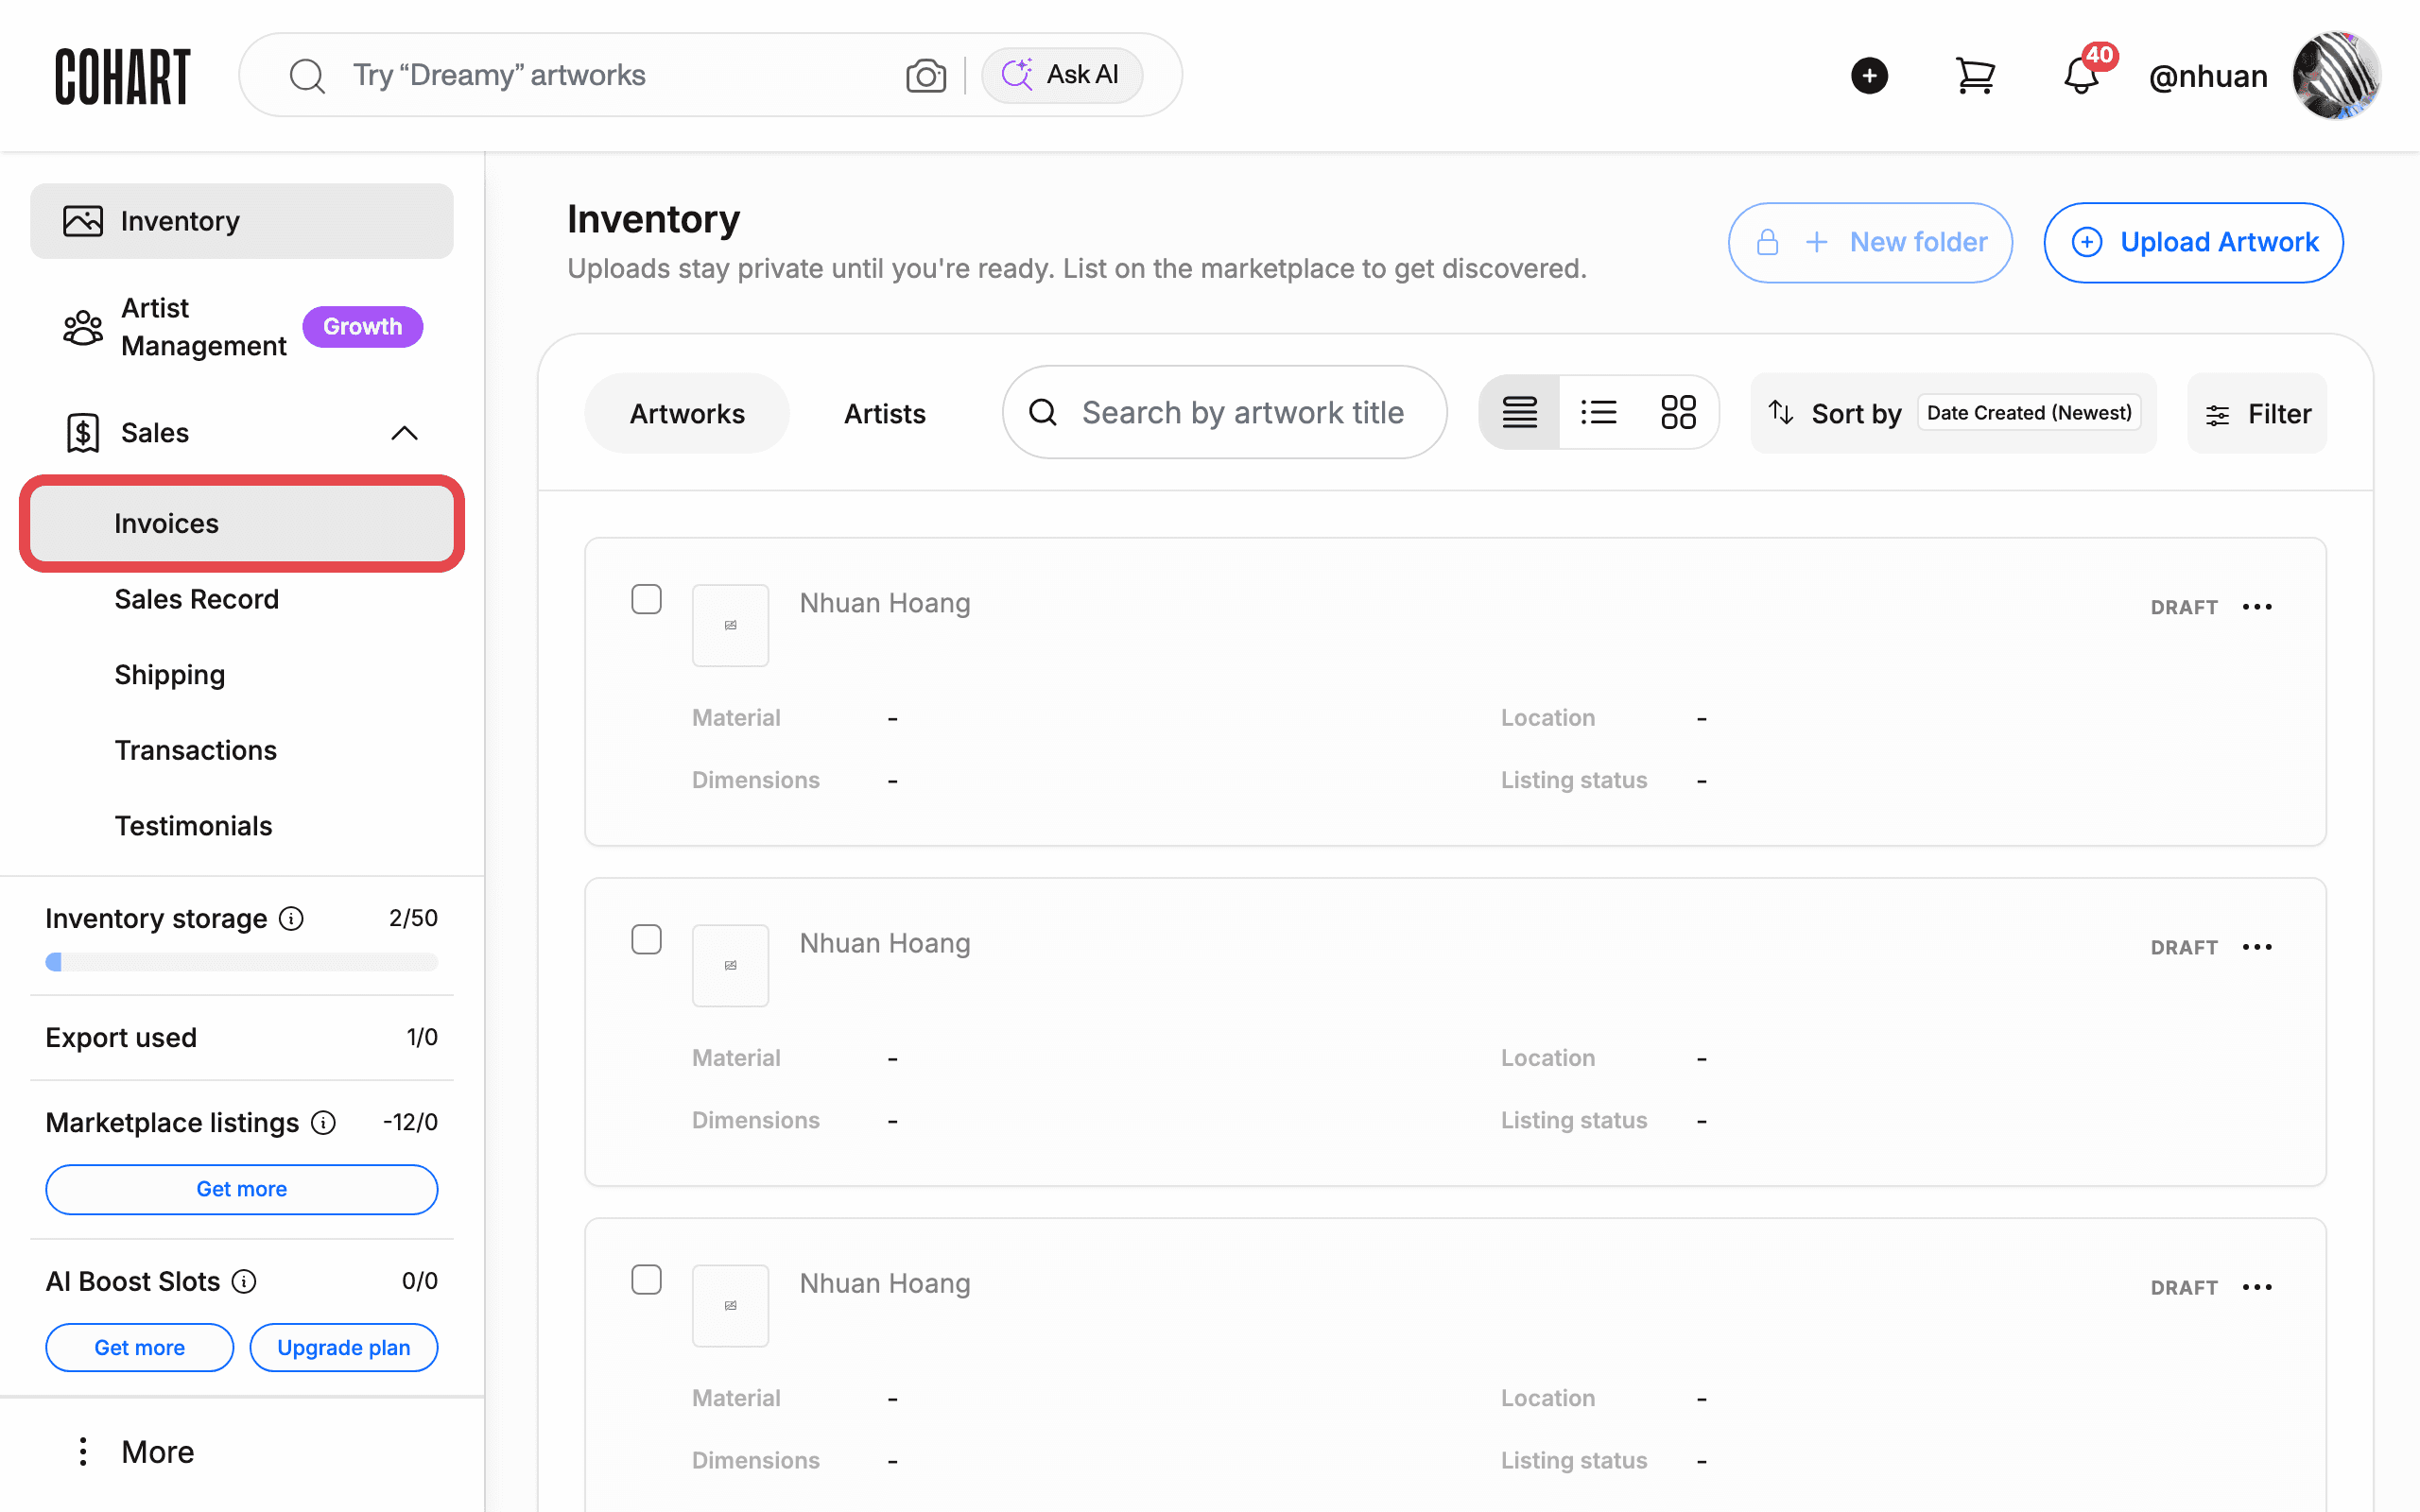
Each invoice appears as a card showing the Invoice #, the Items, Created On, Total Order, Sent to, Order Status (Paid or Open), and Last sent.
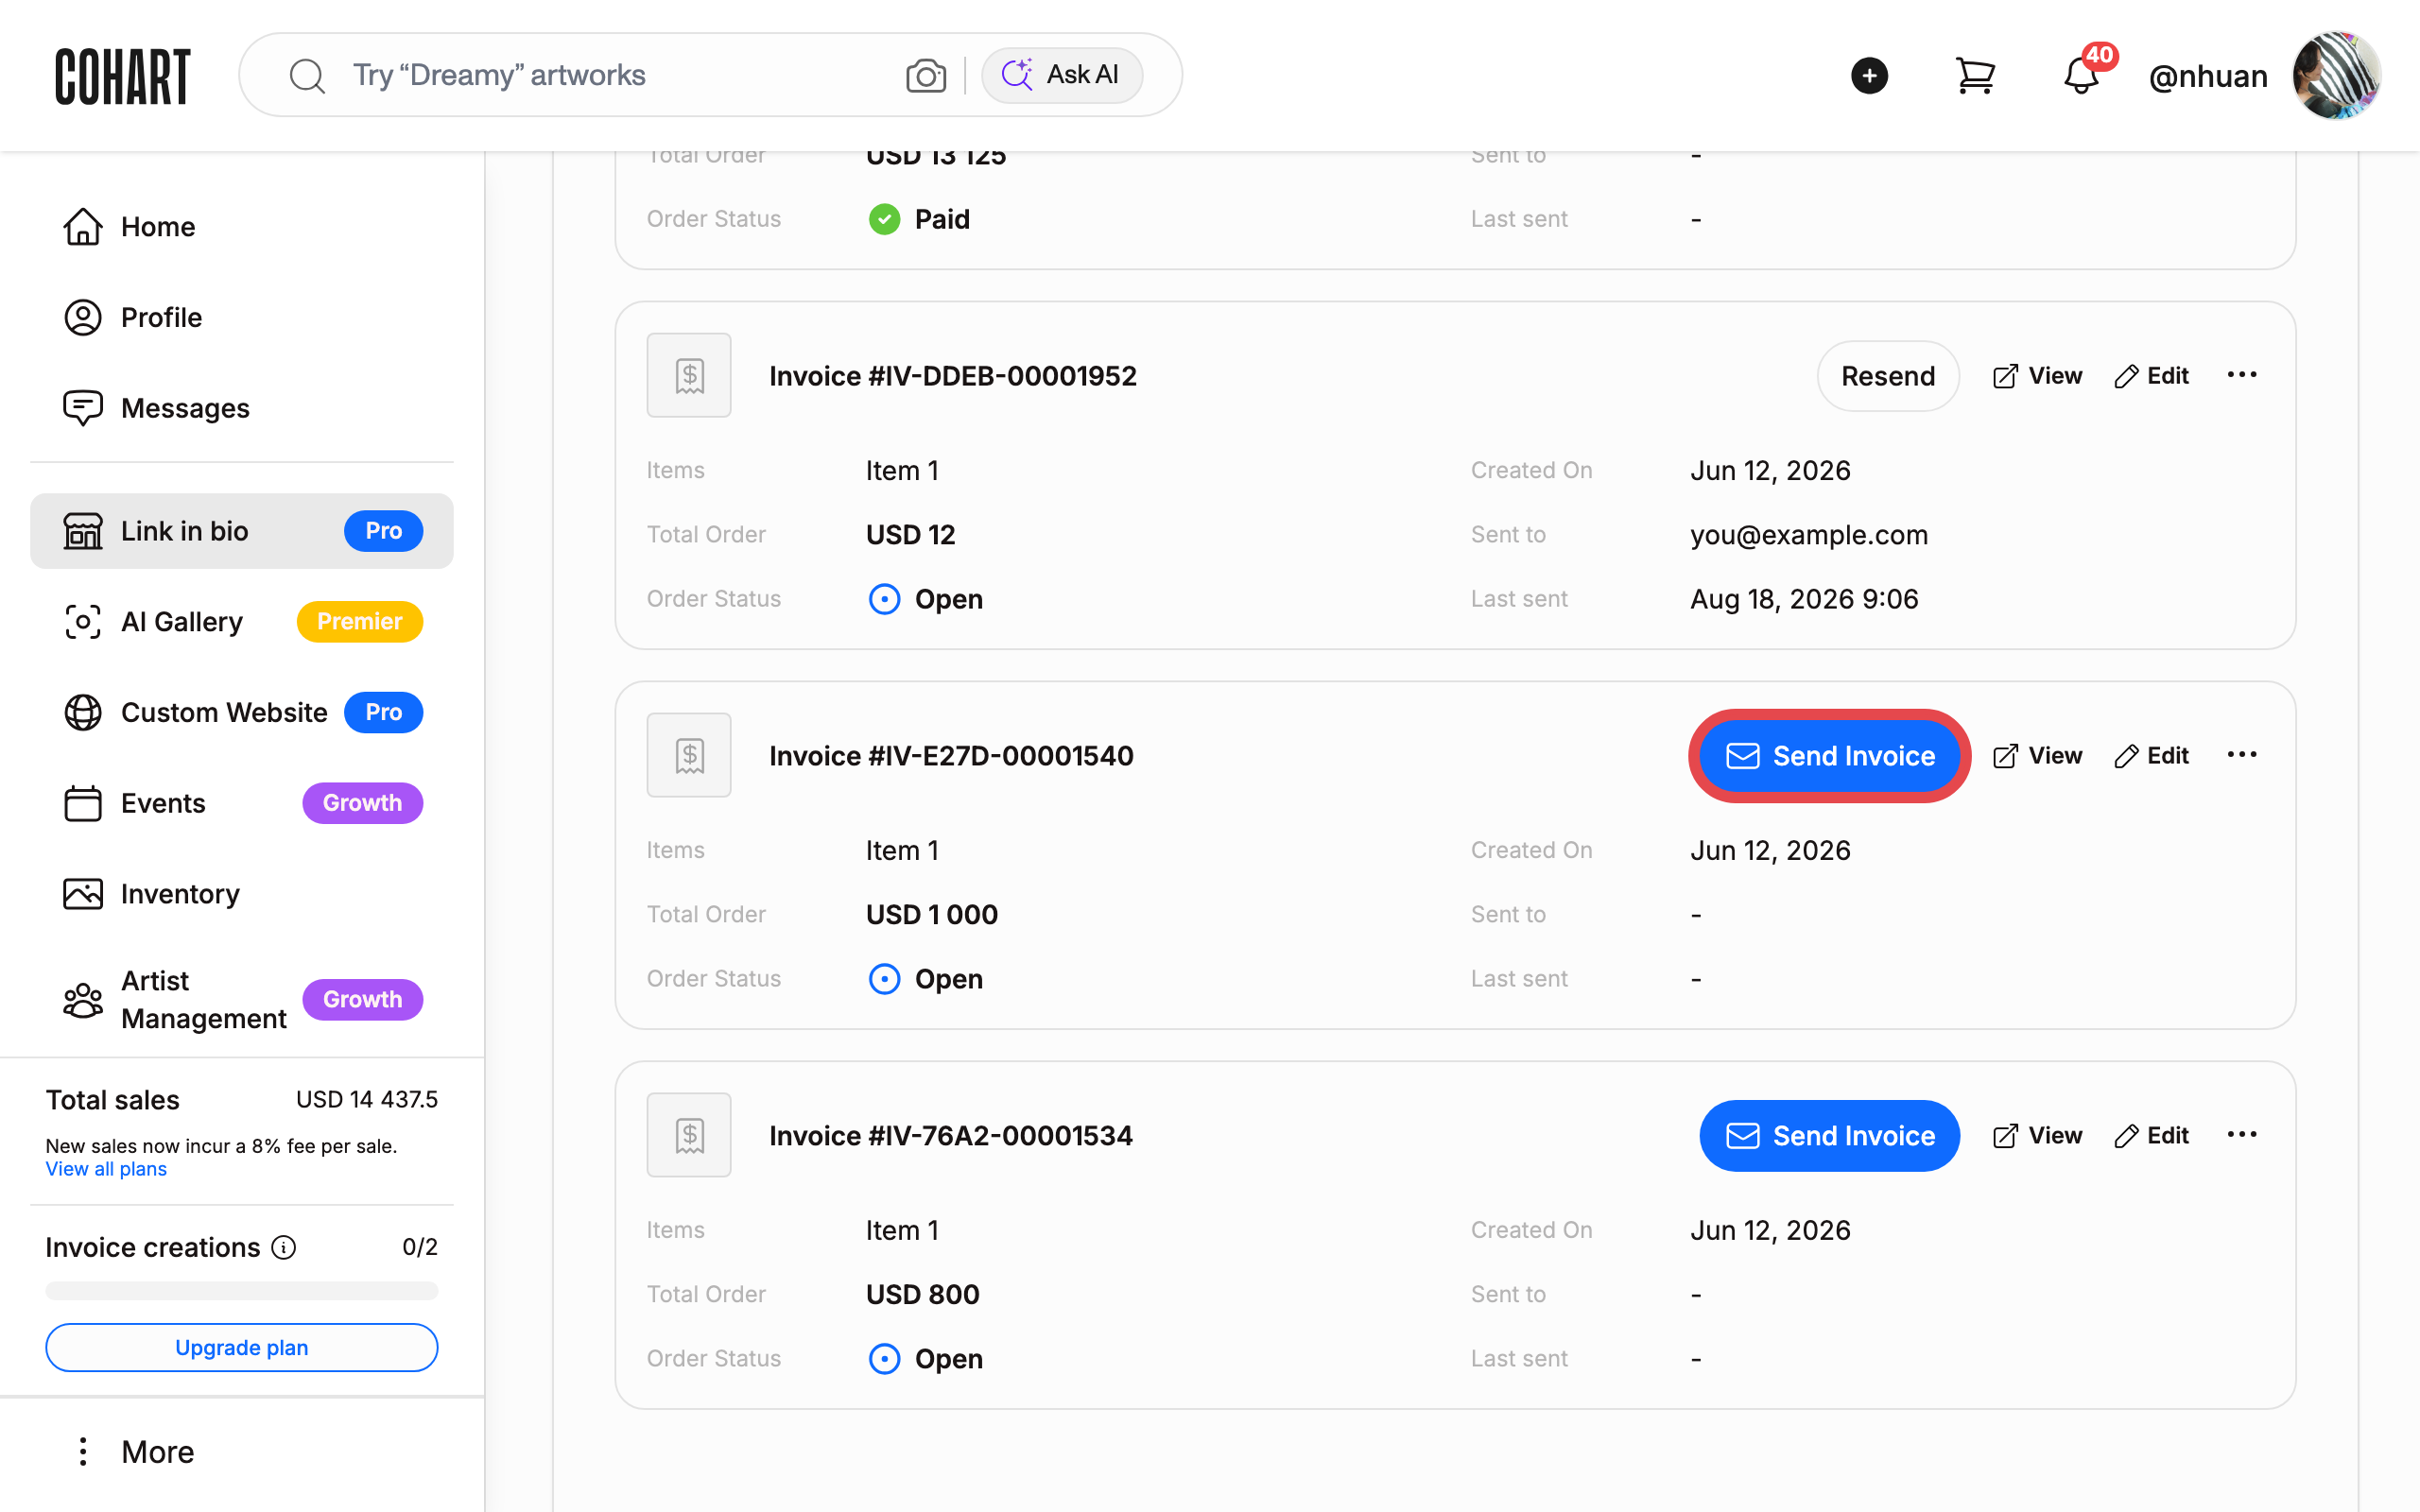
Every card has View and Edit buttons. Invoices that have not been sent yet also have a Send Invoice button; invoices you have already sent show Resend instead. Paid invoices show neither — they cannot be sent again.
The page also shows your Total sales, the Invoice creations counter (for example 0/2 on the free plan), and a Create a new invoice button. Use the pagination controls (for example 1-5of5) to page through more than ten invoices.
Step 5 — Send an invoice to a buyer
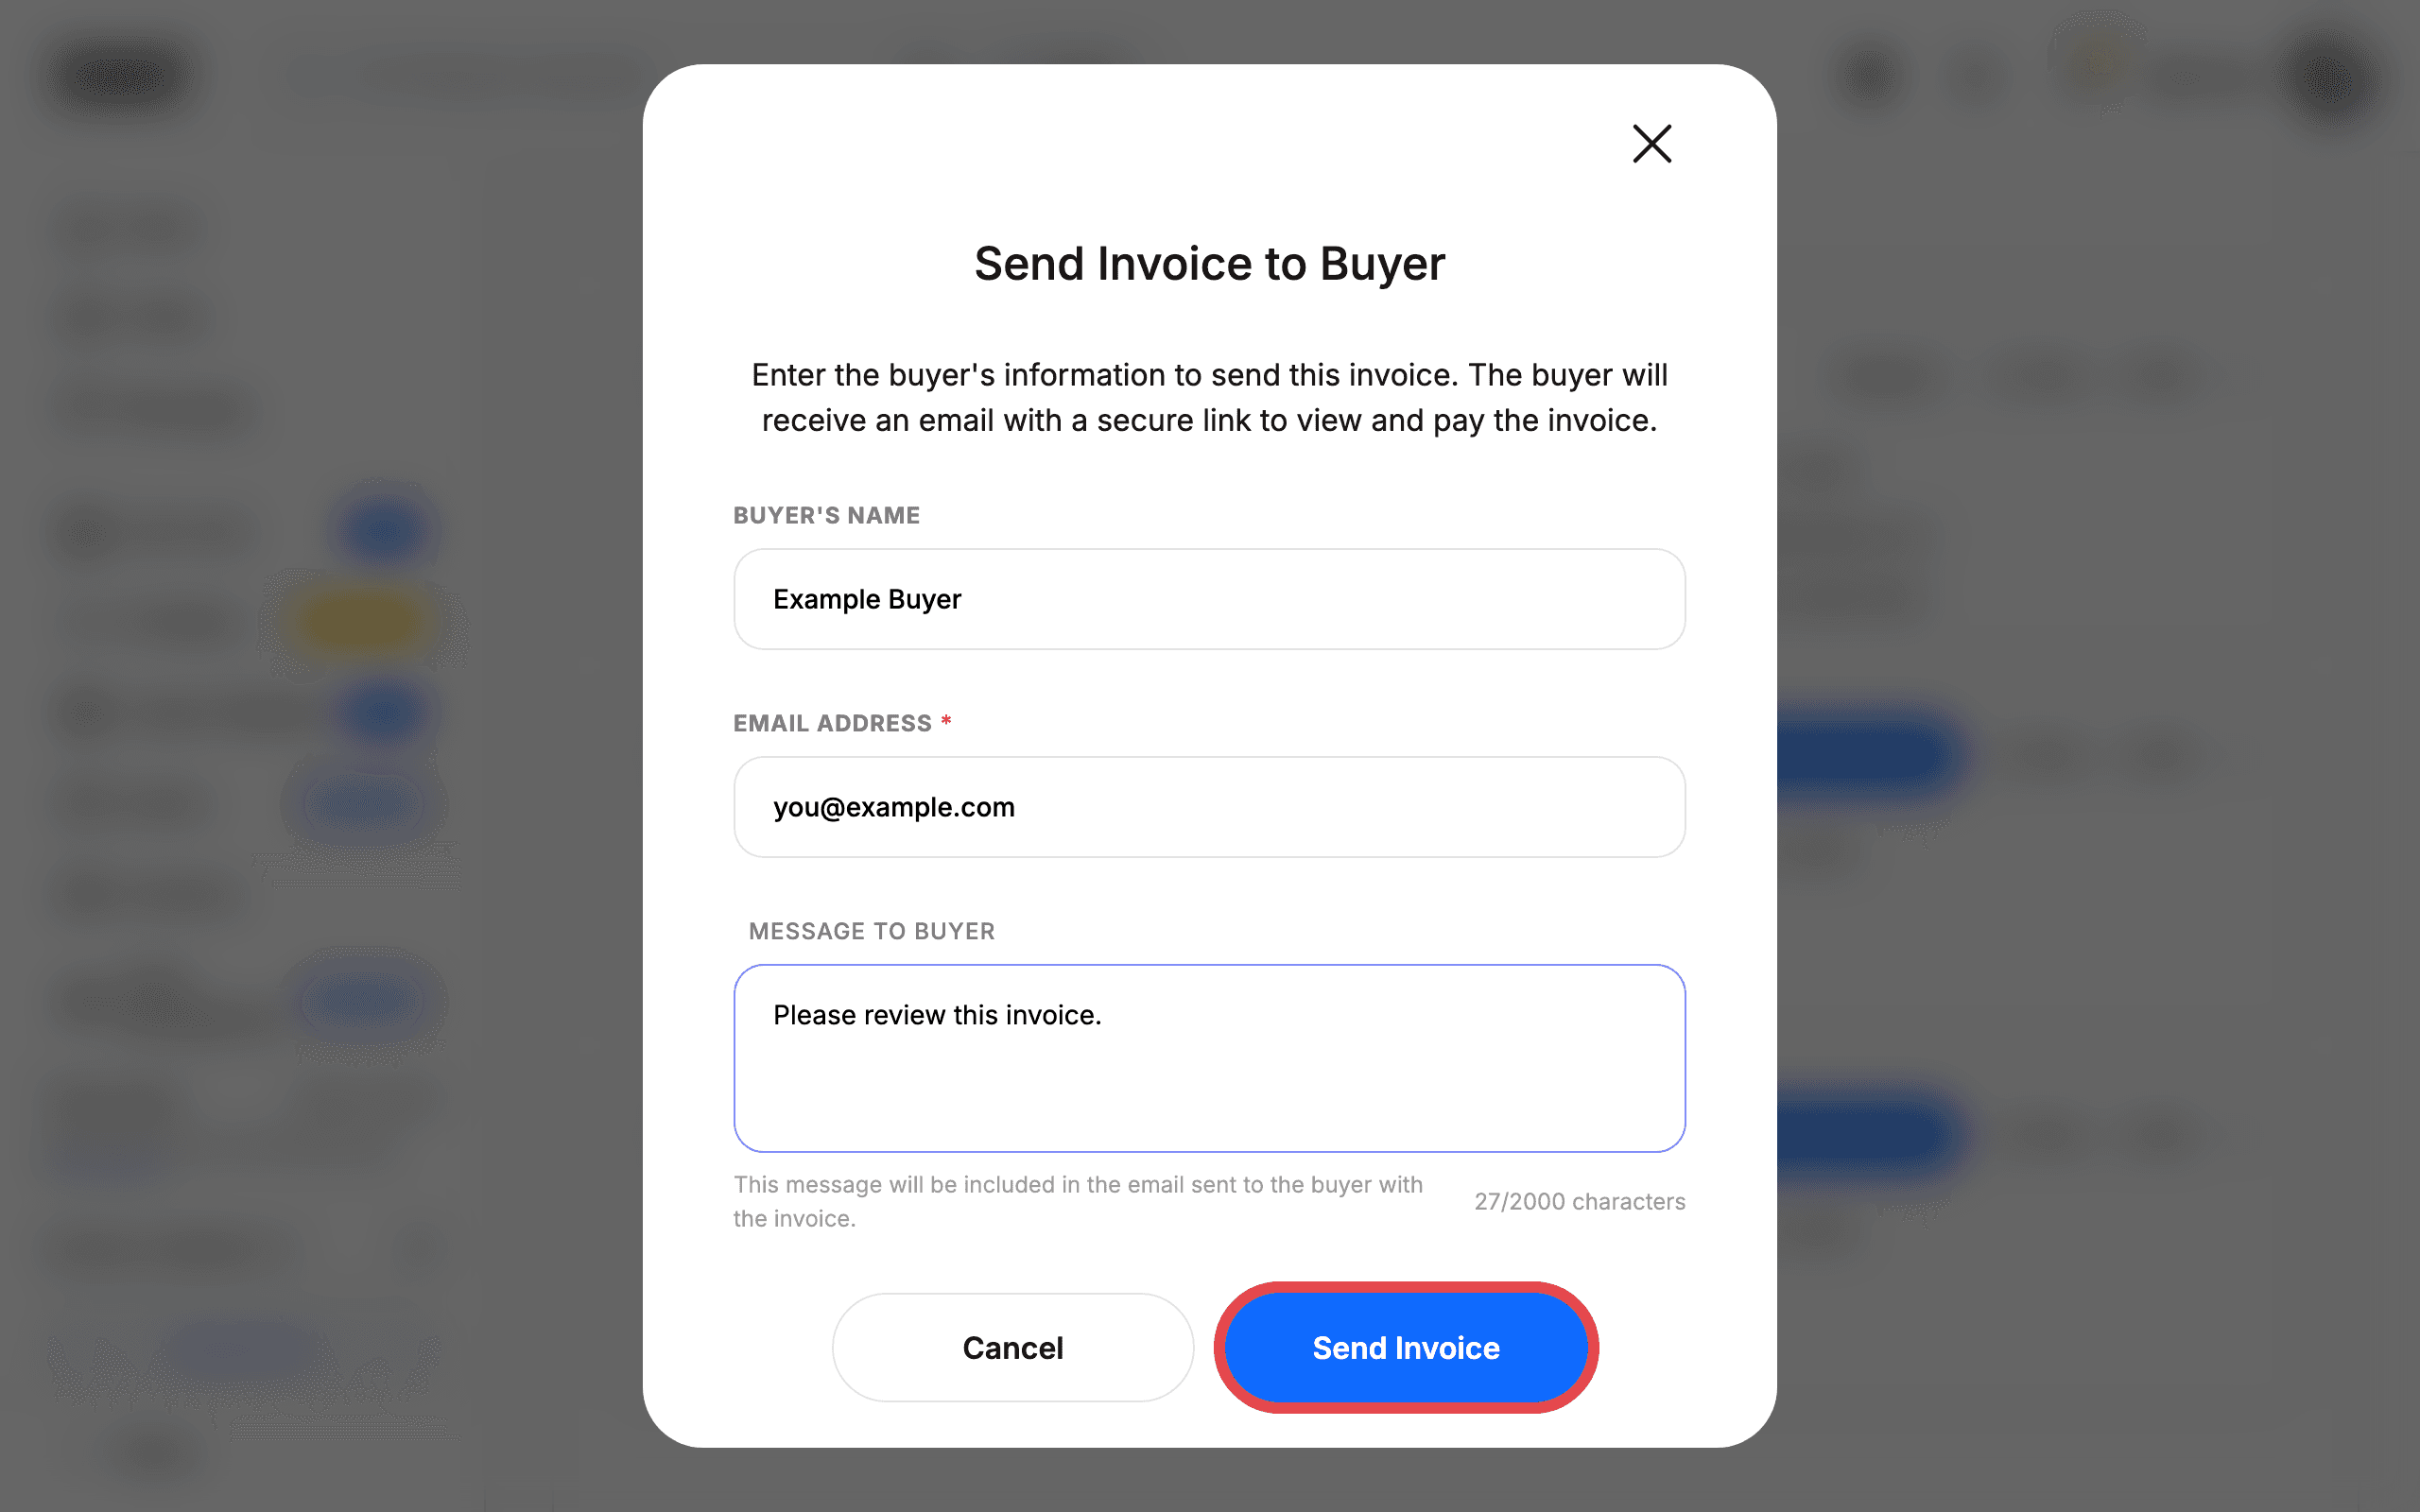
Click Send Invoice on the invoice you want to send. The Send Invoice to Buyer dialog opens with a note: “The buyer will receive an email with a secure link to view and pay the invoice.”
Fill in:
- BUYER’S NAME — the buyer’s full name.
- EMAIL ADDRESS — required. The invoice is emailed to this address.
- MESSAGE TO BUYER — optional, up to 2,000 characters. The message is included in the email.
Then click Send Invoice. You can click Cancel to close the dialog without sending.
Step 6 — Confirm the invoice was sent
Back on the Invoices page, the card updates immediately:
- The Send Invoice button becomes Resend.
- Sent to shows the buyer’s email address.
- Last sent shows the date and time the invoice was emailed.
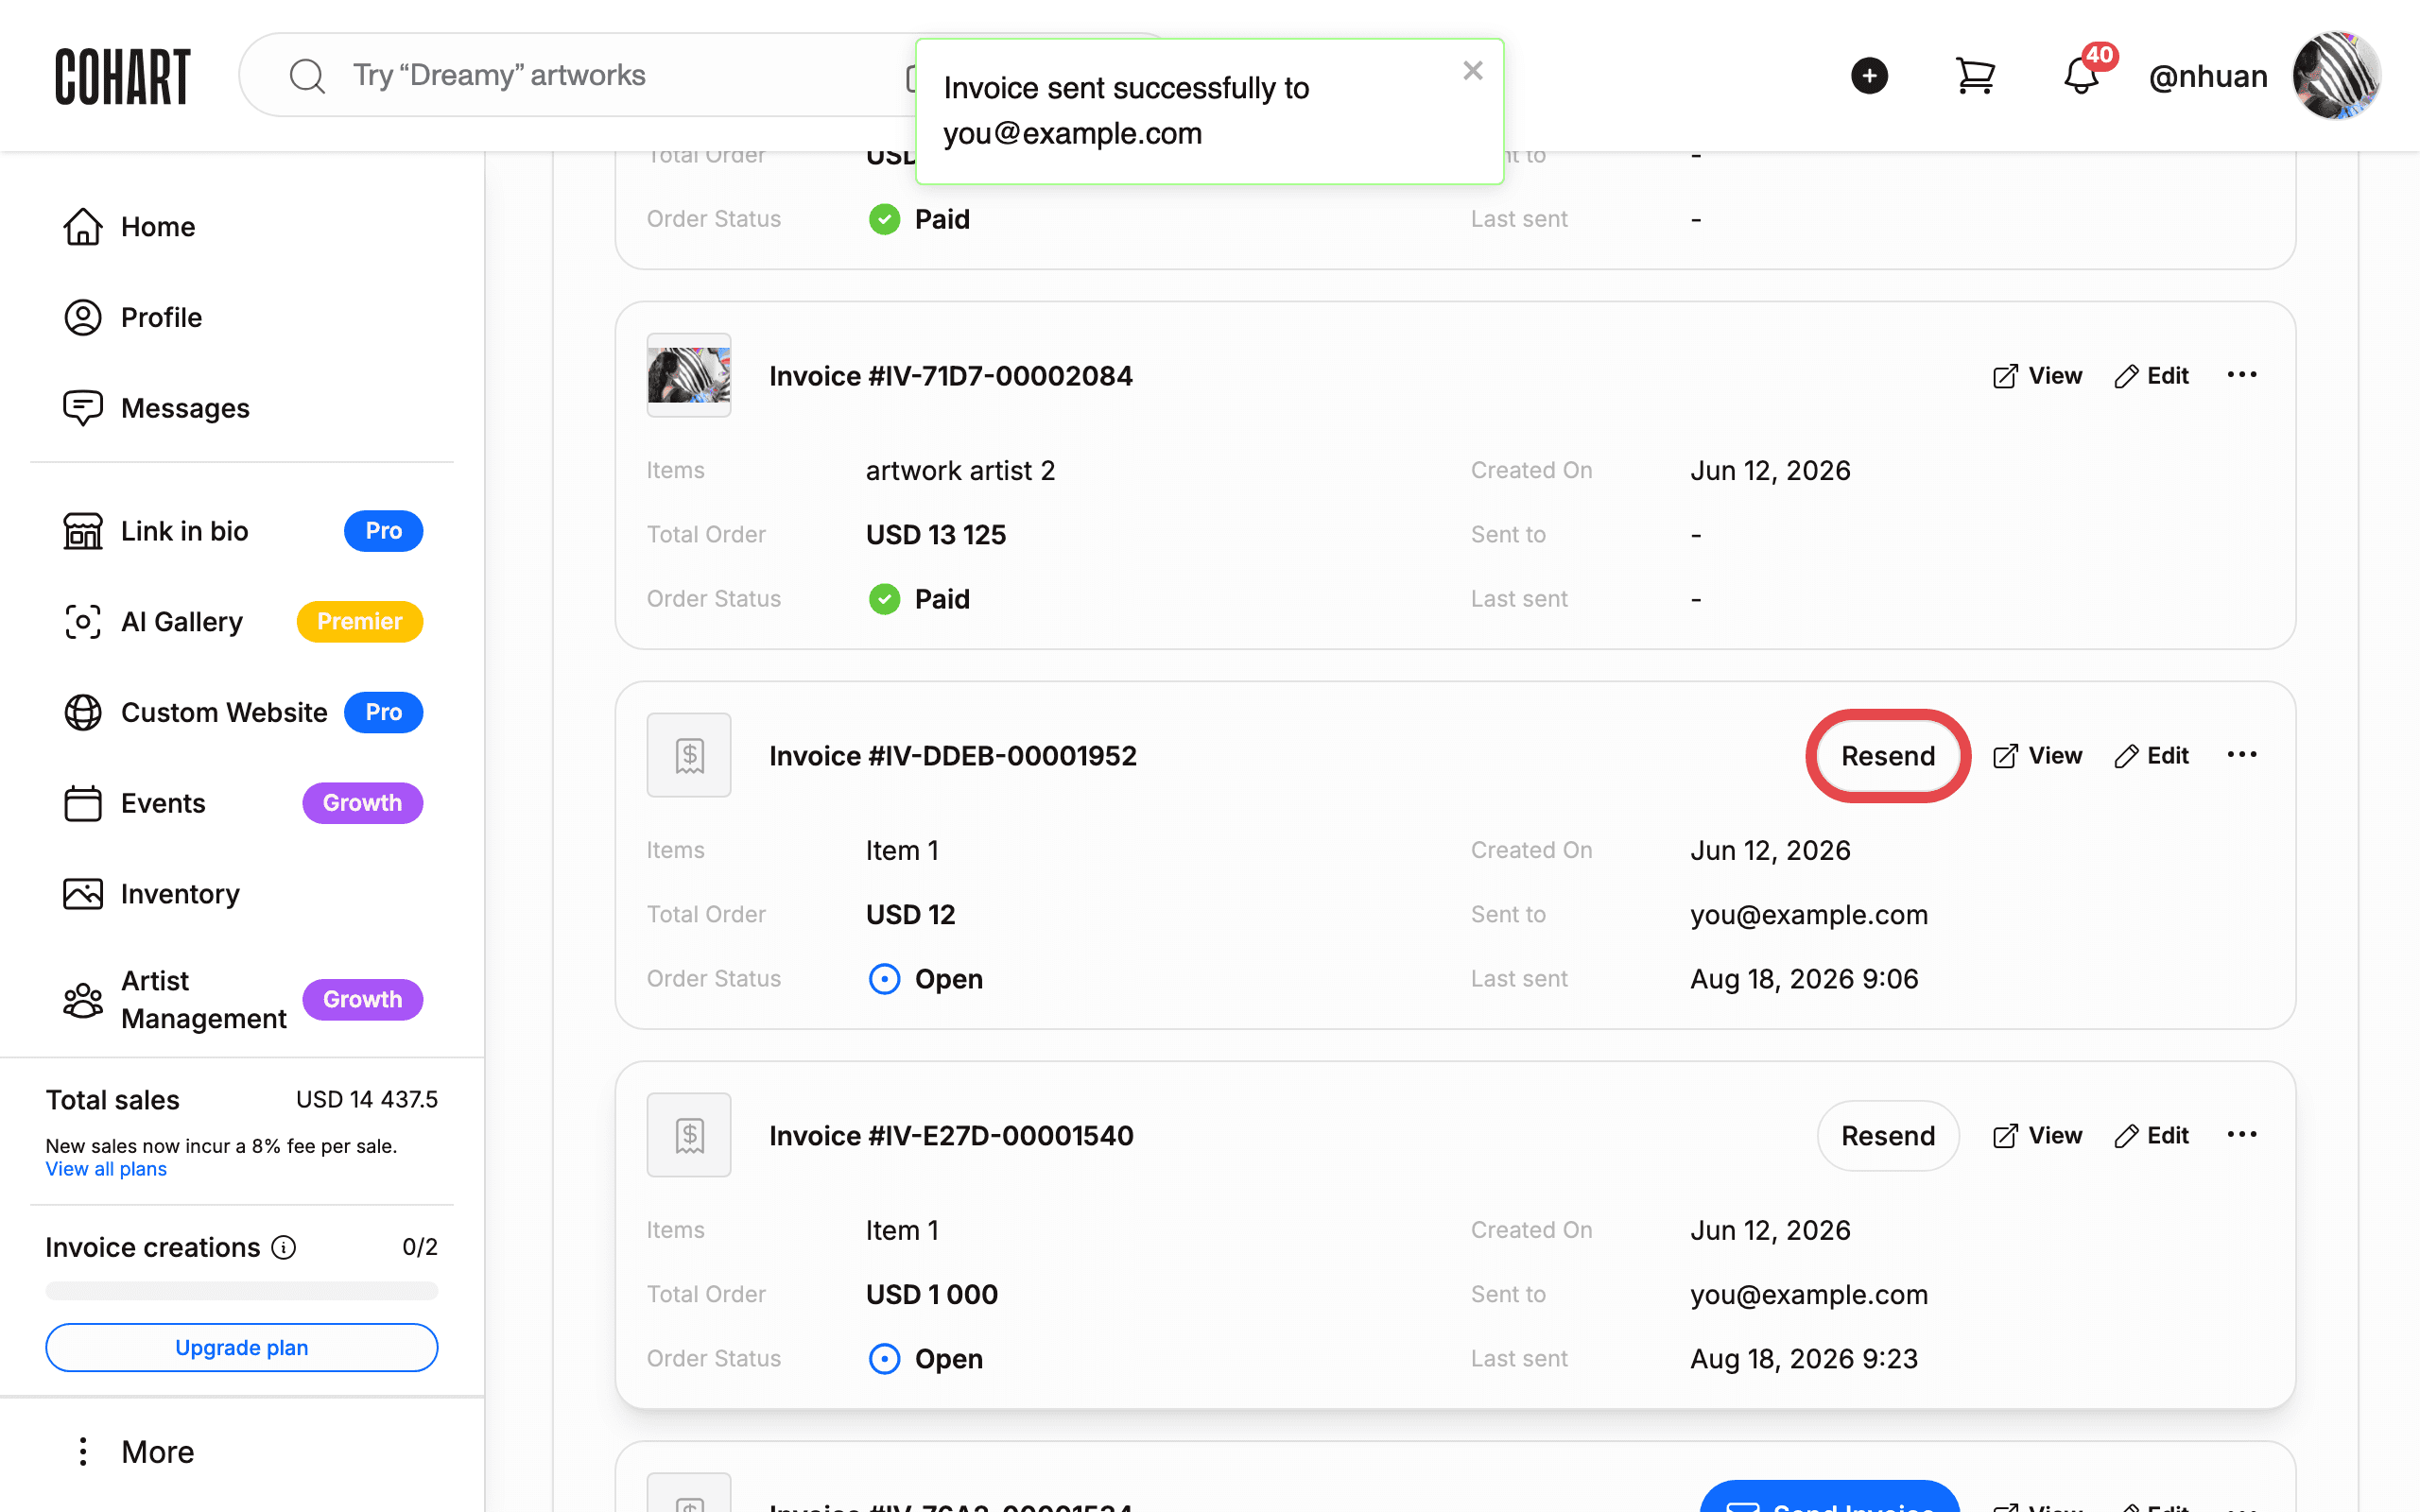
Tip: Click Resend to email the invoice to the buyer again. [UNVERIFIED — check manually: the resend dialog was not tested during capture.]
Step 7 — View an invoice
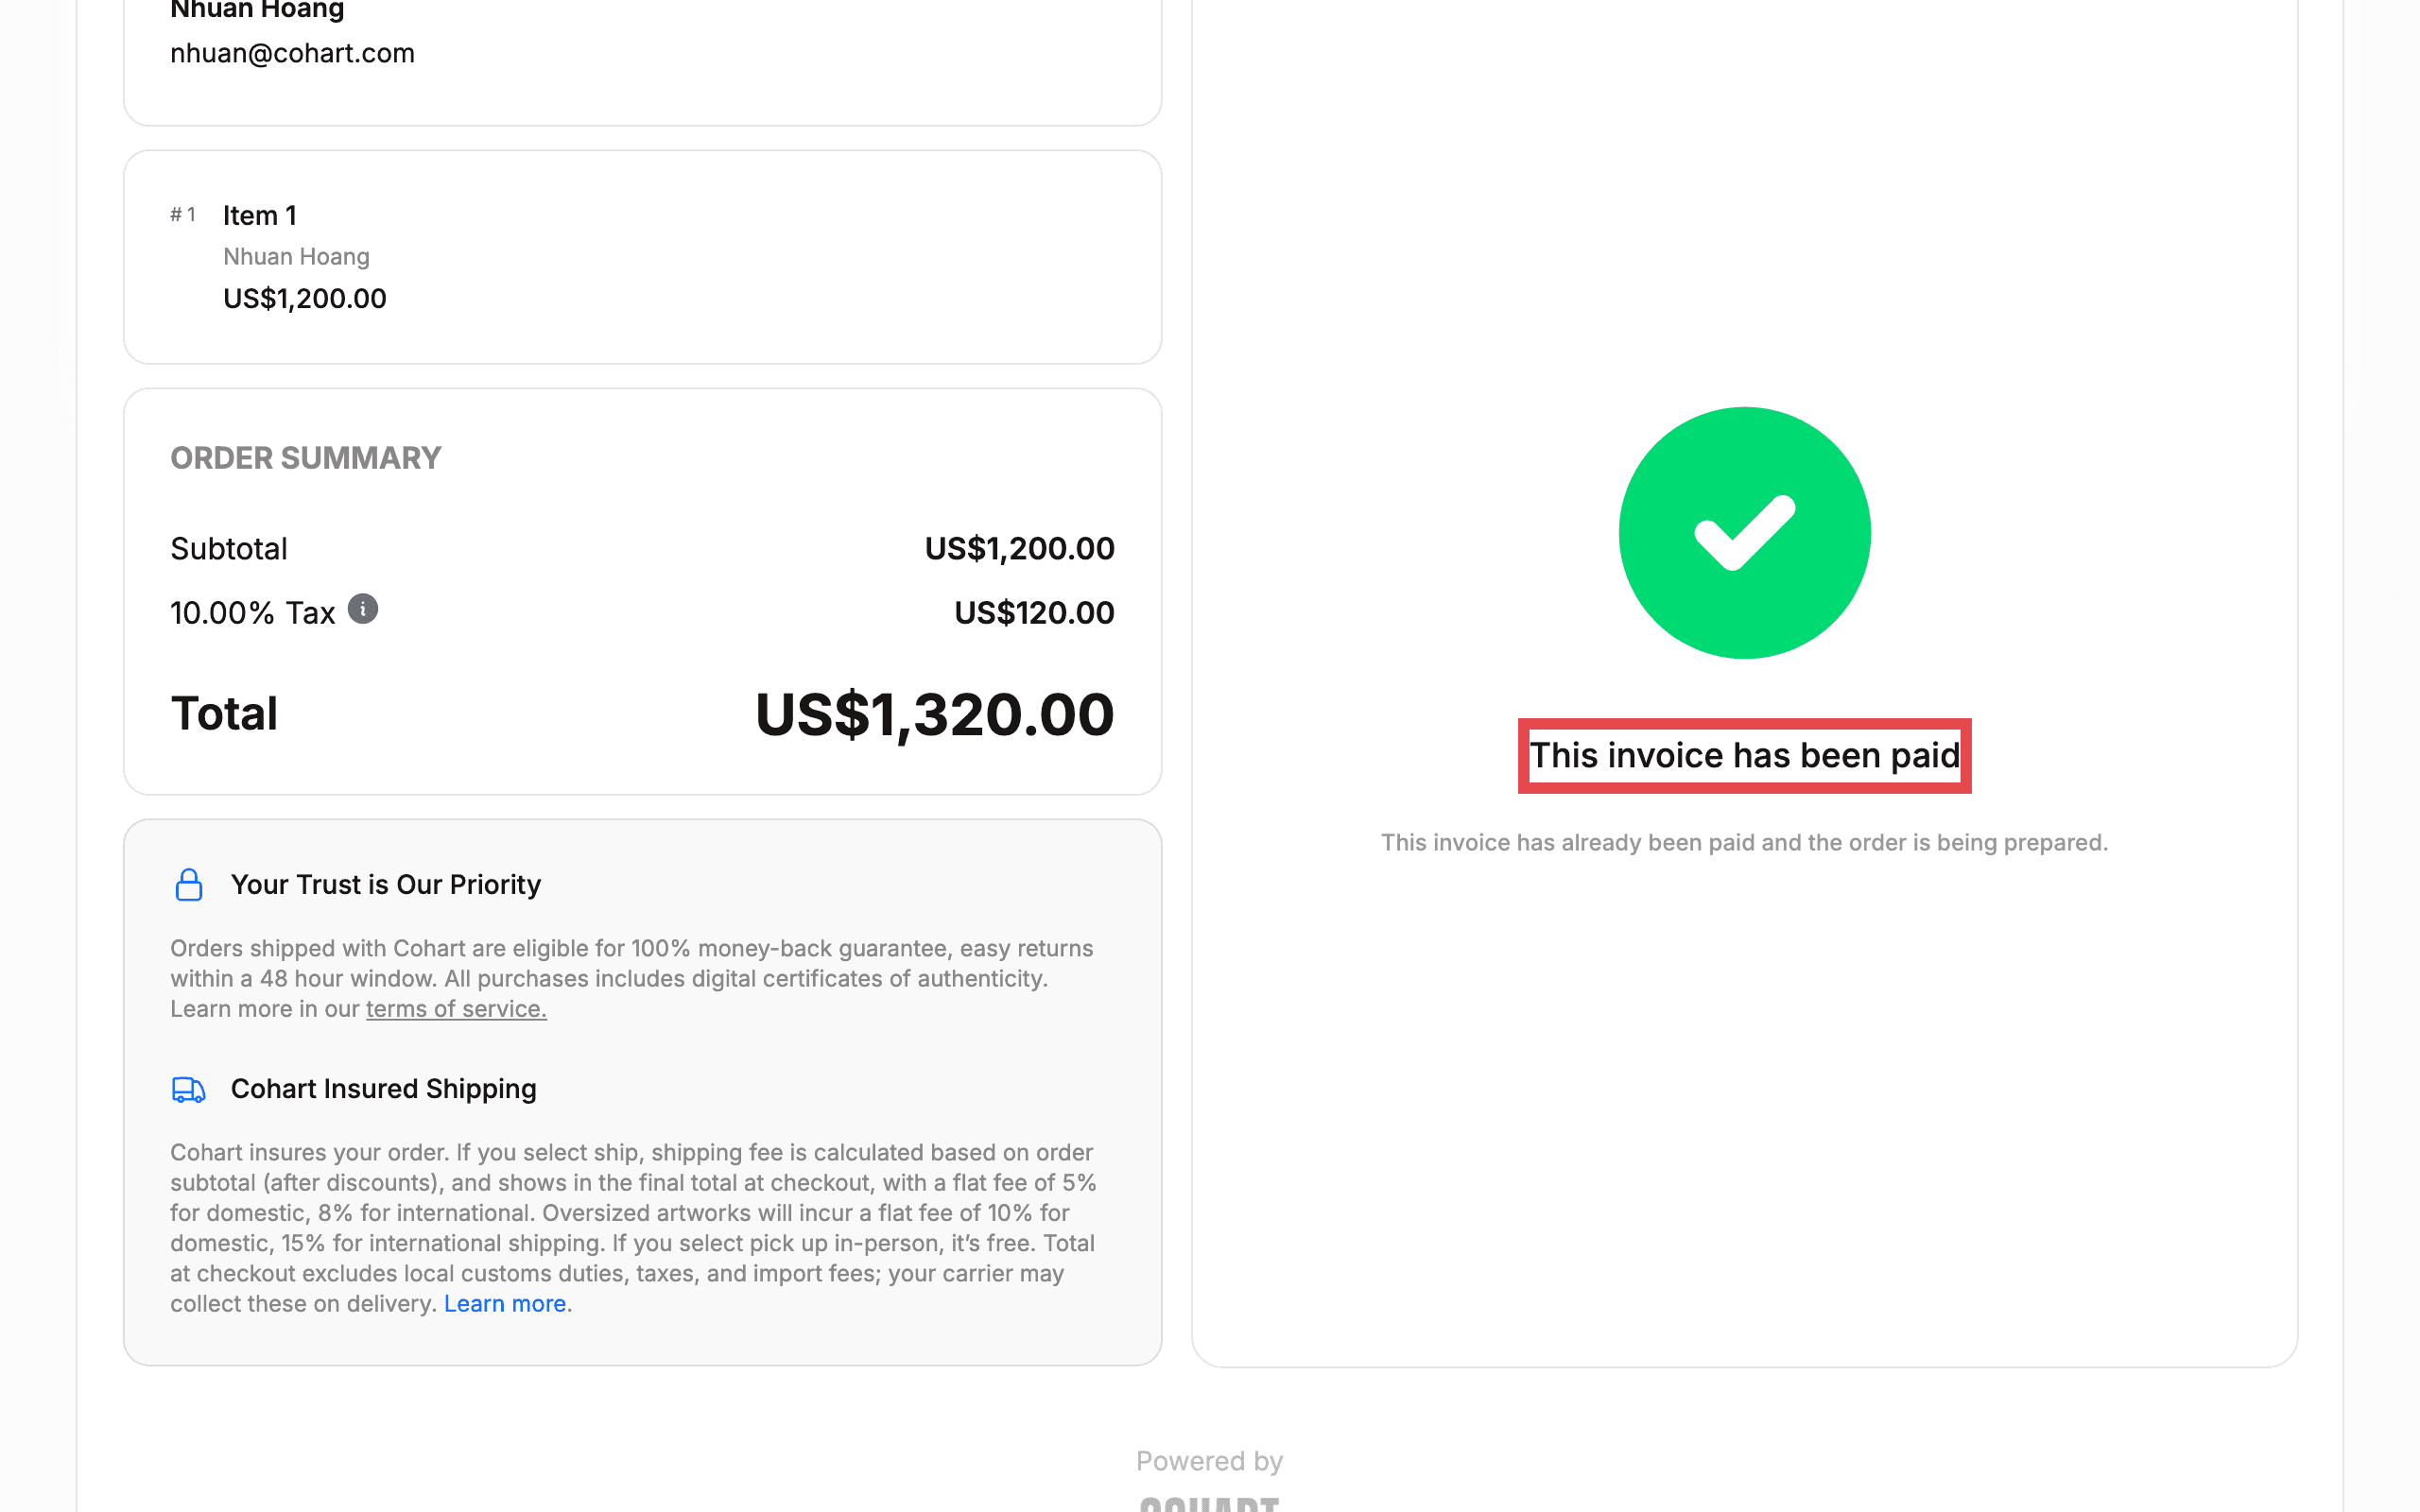
Click View on an invoice card. The secure checkout page opens in a new tab, showing the invoice number, the seller (FROM), the items, and the ORDER SUMMARY with subtotal, tax, and total.
If the invoice has been paid, the page shows the banner “This invoice has been PAID” and the note “This invoice has already been paid and the order is being prepared.”
Step 8 — Edit an invoice that is still open
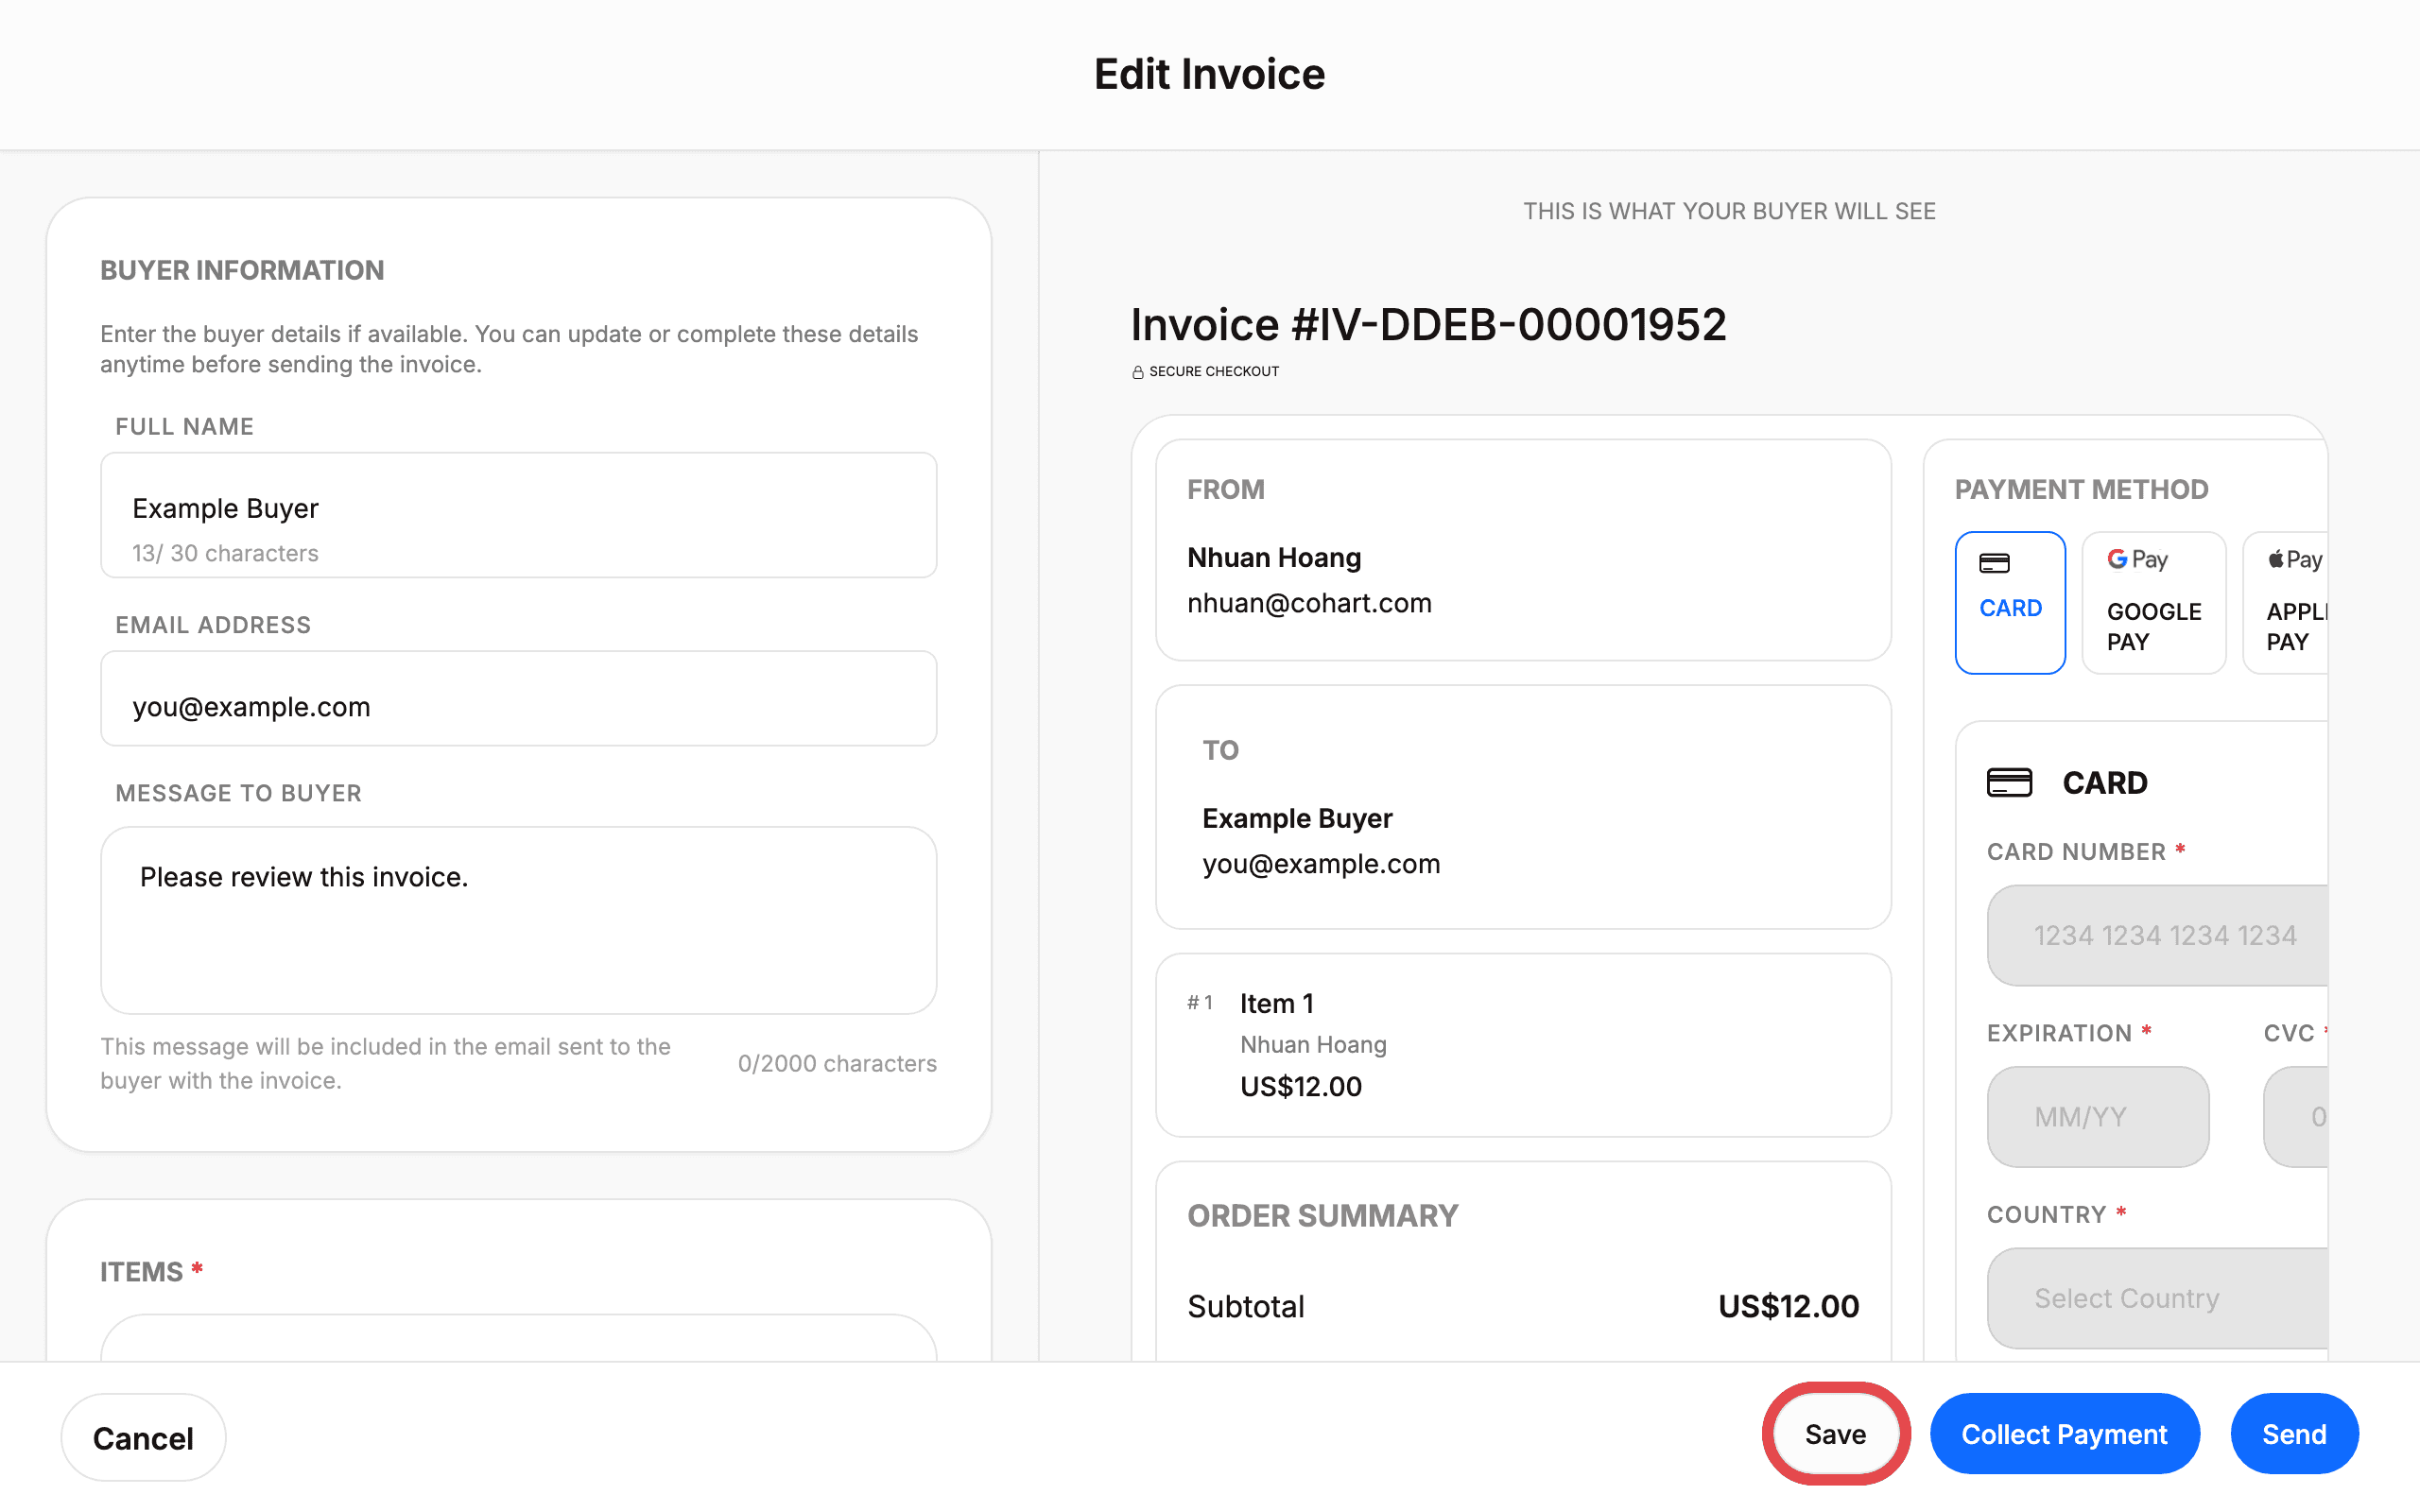
Click Edit on an invoice with Order Status Open. The Edit Invoice page opens in a new tab with:
- BUYER INFORMATION — FULL NAME, EMAIL ADDRESS, and MESSAGE TO BUYER.
- ITEMS — each item’s NAME, SALE PRICE*, and DISCOUNT. Use Add item from inventory or Add a custom item to change the line items.
- SALES TAX — ZIPCODE and SALES TAX, plus the option to handle sales tax yourself.
- THIS IS WHAT YOUR BUYER WILL SEE — a live preview of the invoice and checkout page.
Click Save to keep your changes, or Cancel to discard them. [UNVERIFIED — check manually: the Collect Payment and Send buttons on this page were not clicked during capture; saving an edited invoice was not submitted.]
Step 9 — Edit a paid invoice (buyer information only)
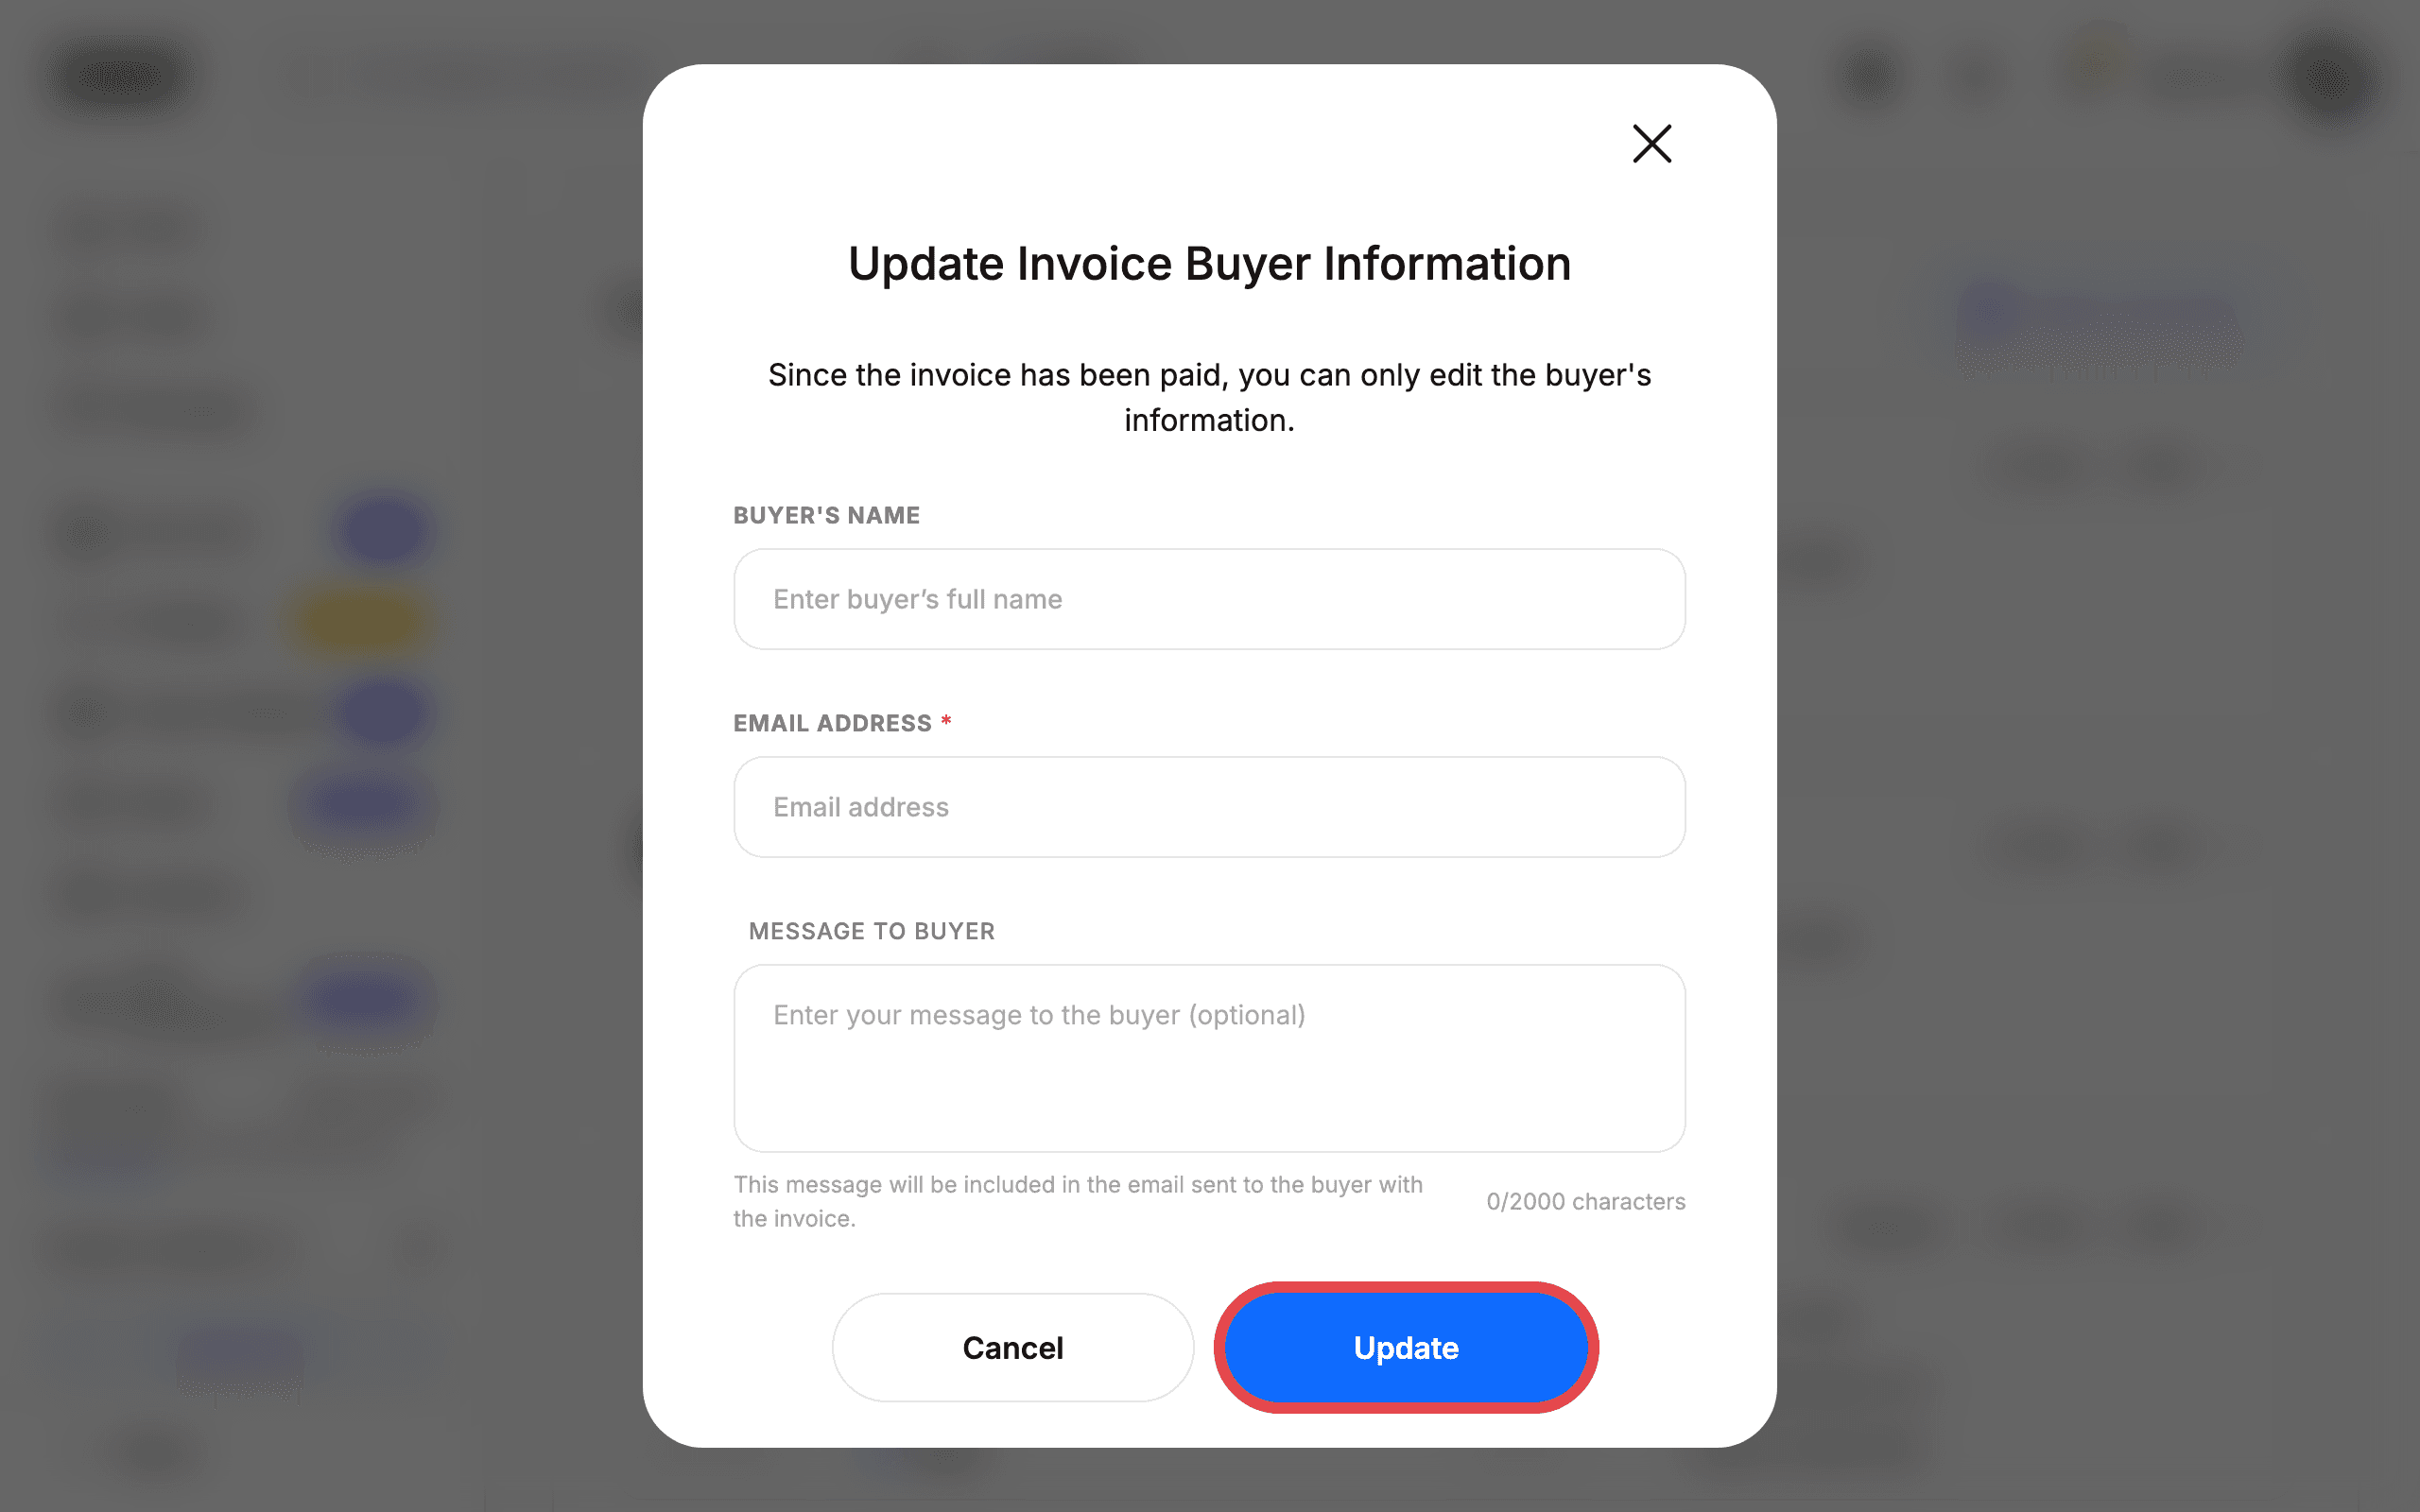
Click Edit on an invoice with Order Status Paid. The Update Invoice Buyer Information dialog opens with the note: “Since the invoice has been paid, you can only edit the buyer’s information.”
Update BUYER’S NAME, EMAIL ADDRESS, or MESSAGE TO BUYER, then click Update, or click Cancel to close the dialog.
Tips
- SIGN IN stays dimmed until you type your email and password — that is normal.
- The Invoice creations counter tracks how many invoices your plan allows. If it reads
0/2, you can create two invoices before upgrading (Upgrade plan or View all plans). - Paid invoices are locked down: the checkout shows the PAID banner, there is no Send Invoice or Resend button, and Edit only lets you change buyer information.
- If the cookie banner overlaps the dialog buttons, accept or reject cookies first — the dialog stays usable either way.
- The invoice list paginates at ten invoices per page (Items per page | 10).
Troubleshooting
- During testing, open (unpaid) invoices opened their secure checkout showing “This invoice has expired — This invoice is no longer valid and can no longer be paid. Please create a new invoice to continue the sale.” with a Create new invoice link. If a buyer reports they cannot pay, check the invoice’s Order Status and create a new invoice if it is no longer valid.
- The Sales menu is part of the artist dashboard. If you don’t see it, you may be signed in to a buyer account — use an artist or gallery account instead.
- If a buyer says they never received the invoice email, check Sent to and Last sent on the card, then click Resend. Make sure the EMAIL ADDRESS you entered is correct — it is marked with an asterisk as required.
Screenshots are regenerated automatically from the live site. Last captured: 2026-08-18.