How to Sell Artworks with QR Code Checkout
Overview
QR code checkout lets a collector scan a code next to an artwork and pay for it on their own phone, with no staff assistance needed. This guide also covers sharing the checkout link with Copy Link, and what to do when the Copy Link button seems to do nothing.
- Who it’s for — artists and galleries selling in person at fairs, exhibitions, galleries, and open studios who want a self-service way to sell fixed-price work.
- What it does — every published artwork in your Inventory has its own QR code that opens a checkout page pre-filled with that artwork’s title, image, price, and details, so a buyer can pay directly from their own device.
- What it affects — the code is generated from your Inventory listing, so it always uses whatever price and description the artwork has at the moment you print or show the code; changing the artwork later does not update a code you already printed.
- What you end up with — a printable or shareable QR code (and, if you export in bulk, a full labels sheet with QR codes, prices, and artwork details) that lets buyers complete a purchase without you handling their card.
Before you start
- Artworks uploaded to Inventory with pricing. QR code checkout is generated from an existing Inventory listing, so the artwork must already exist there with a price set. See How to Upload an Artwork for how to add one.
- A published listing. Only published artworks show the Sell via QR code and Print QR Code menu items; draft artworks show a shorter menu without them.
- A connected payout account. You need to connect your bank account before you can accept payments through a QR checkout. Connect it from your account’s payment settings.
Steps
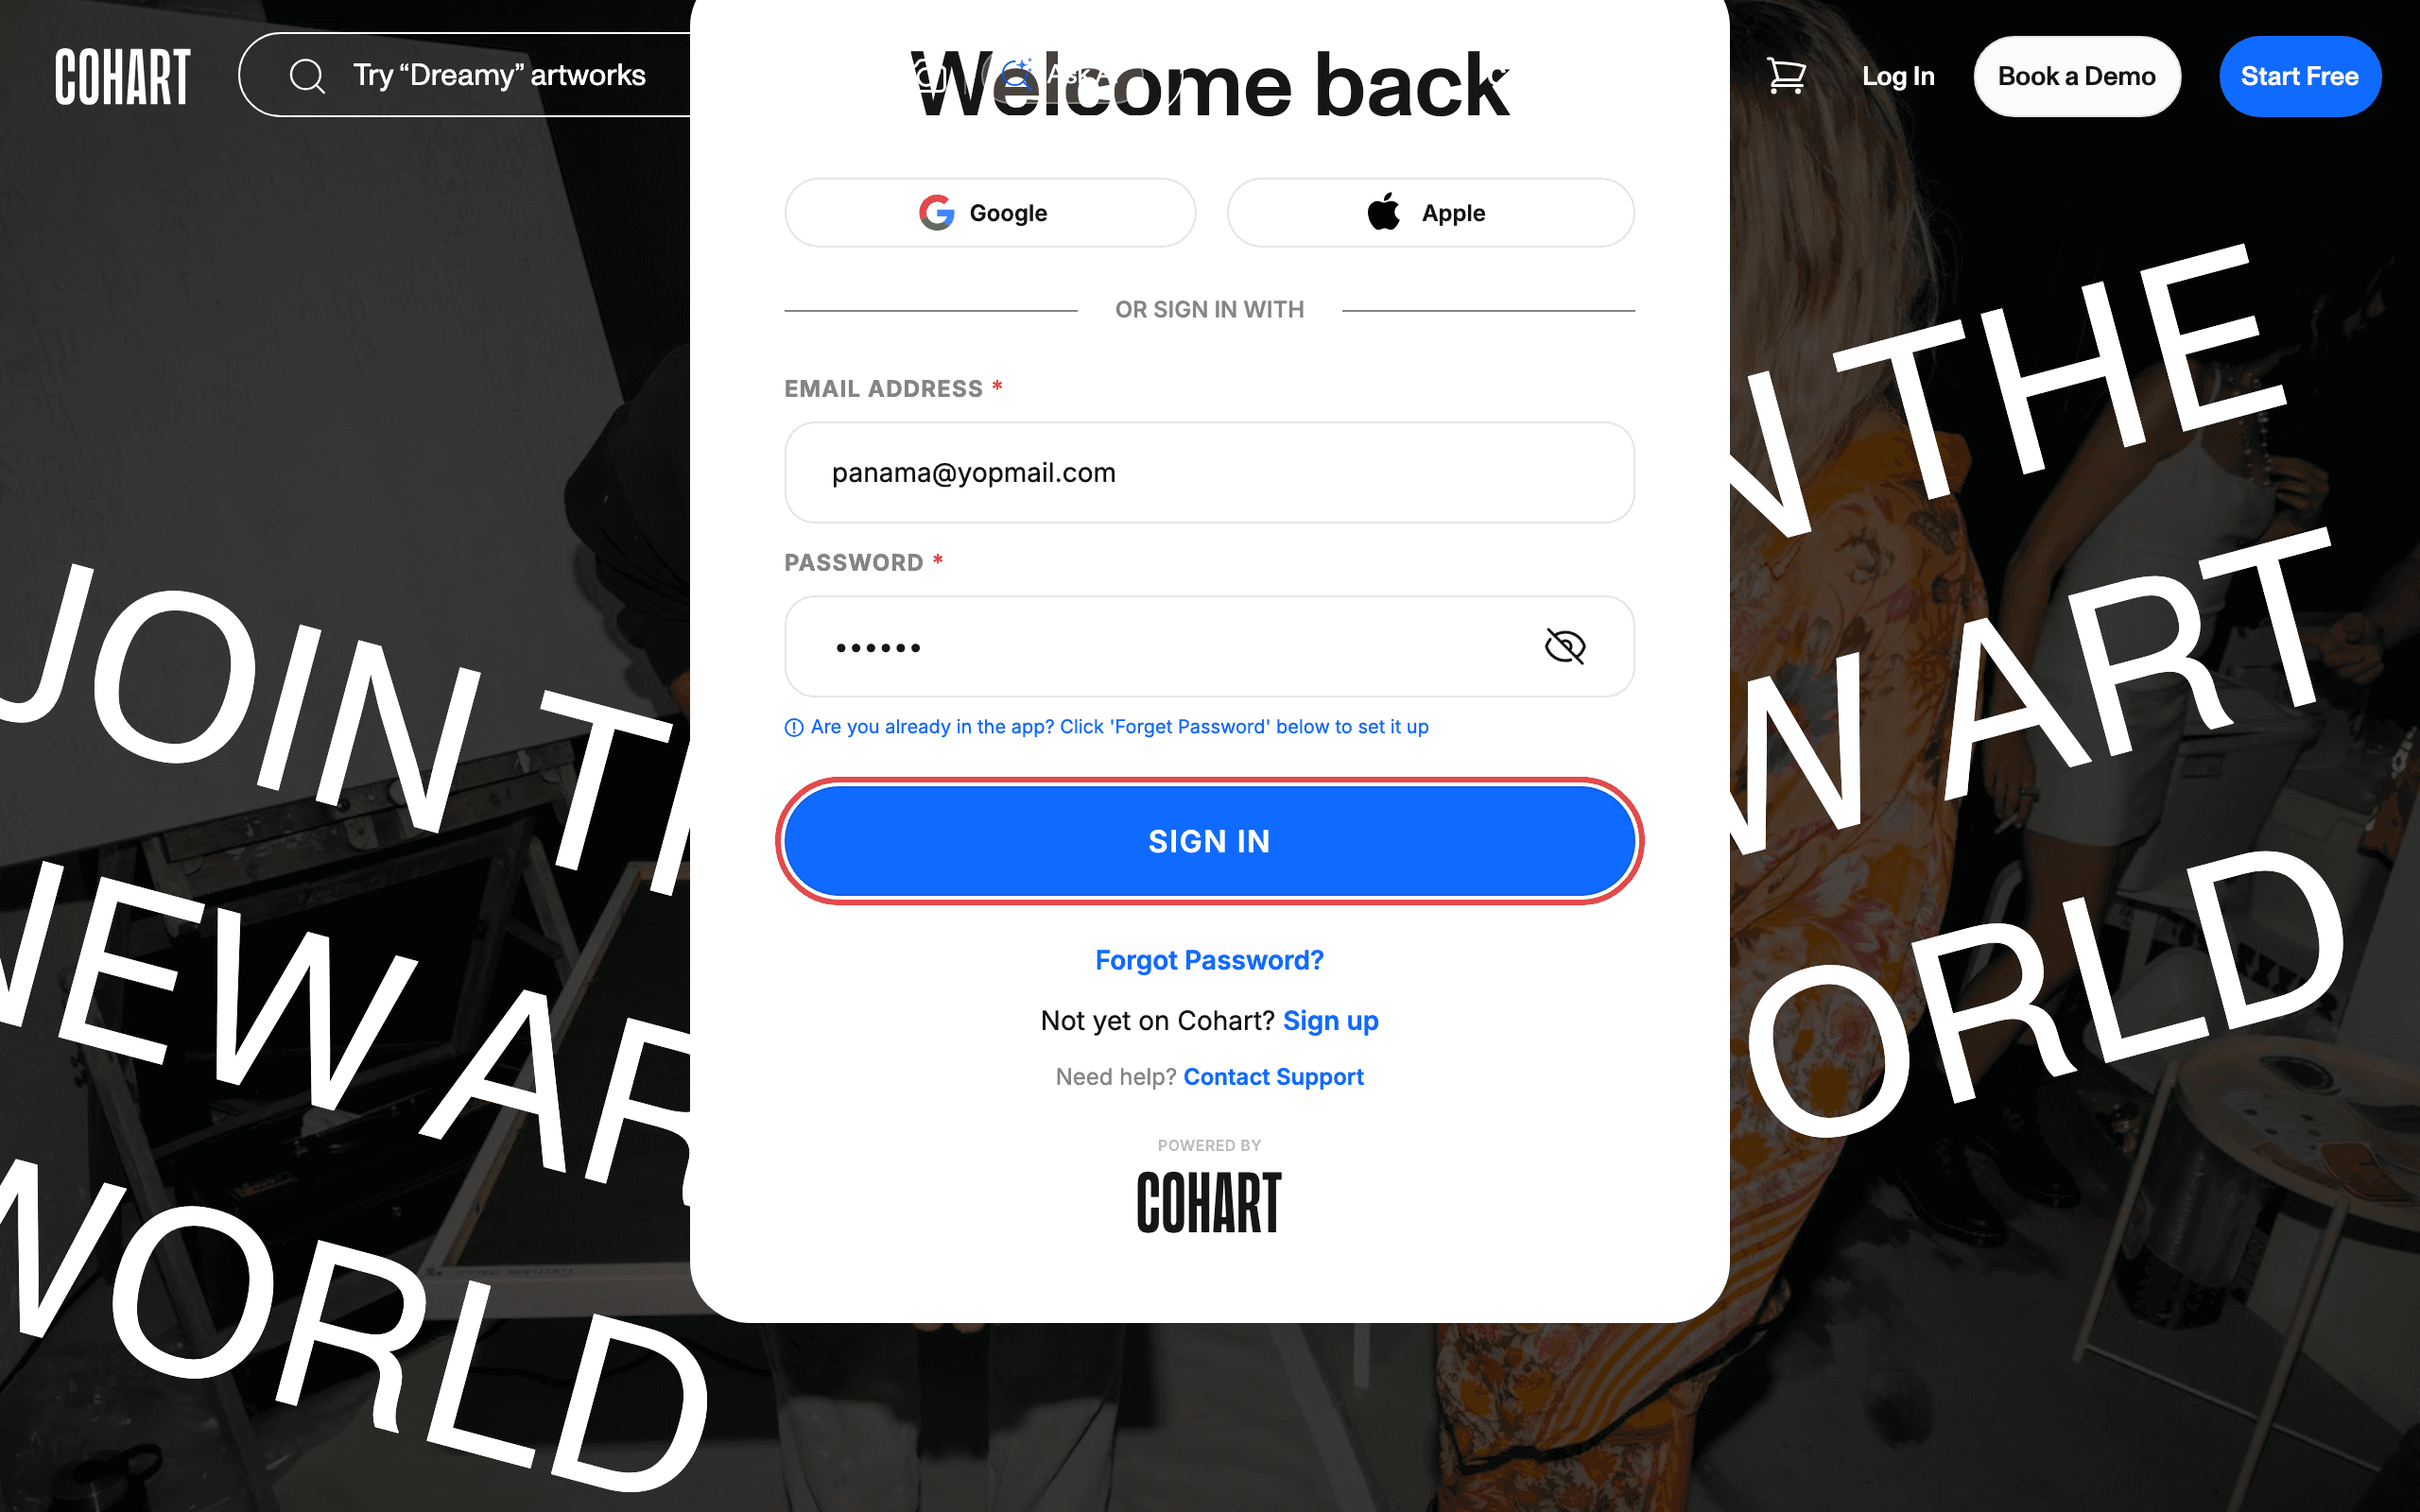
1. Sign in to Cohart
Sign in with your email address and password.
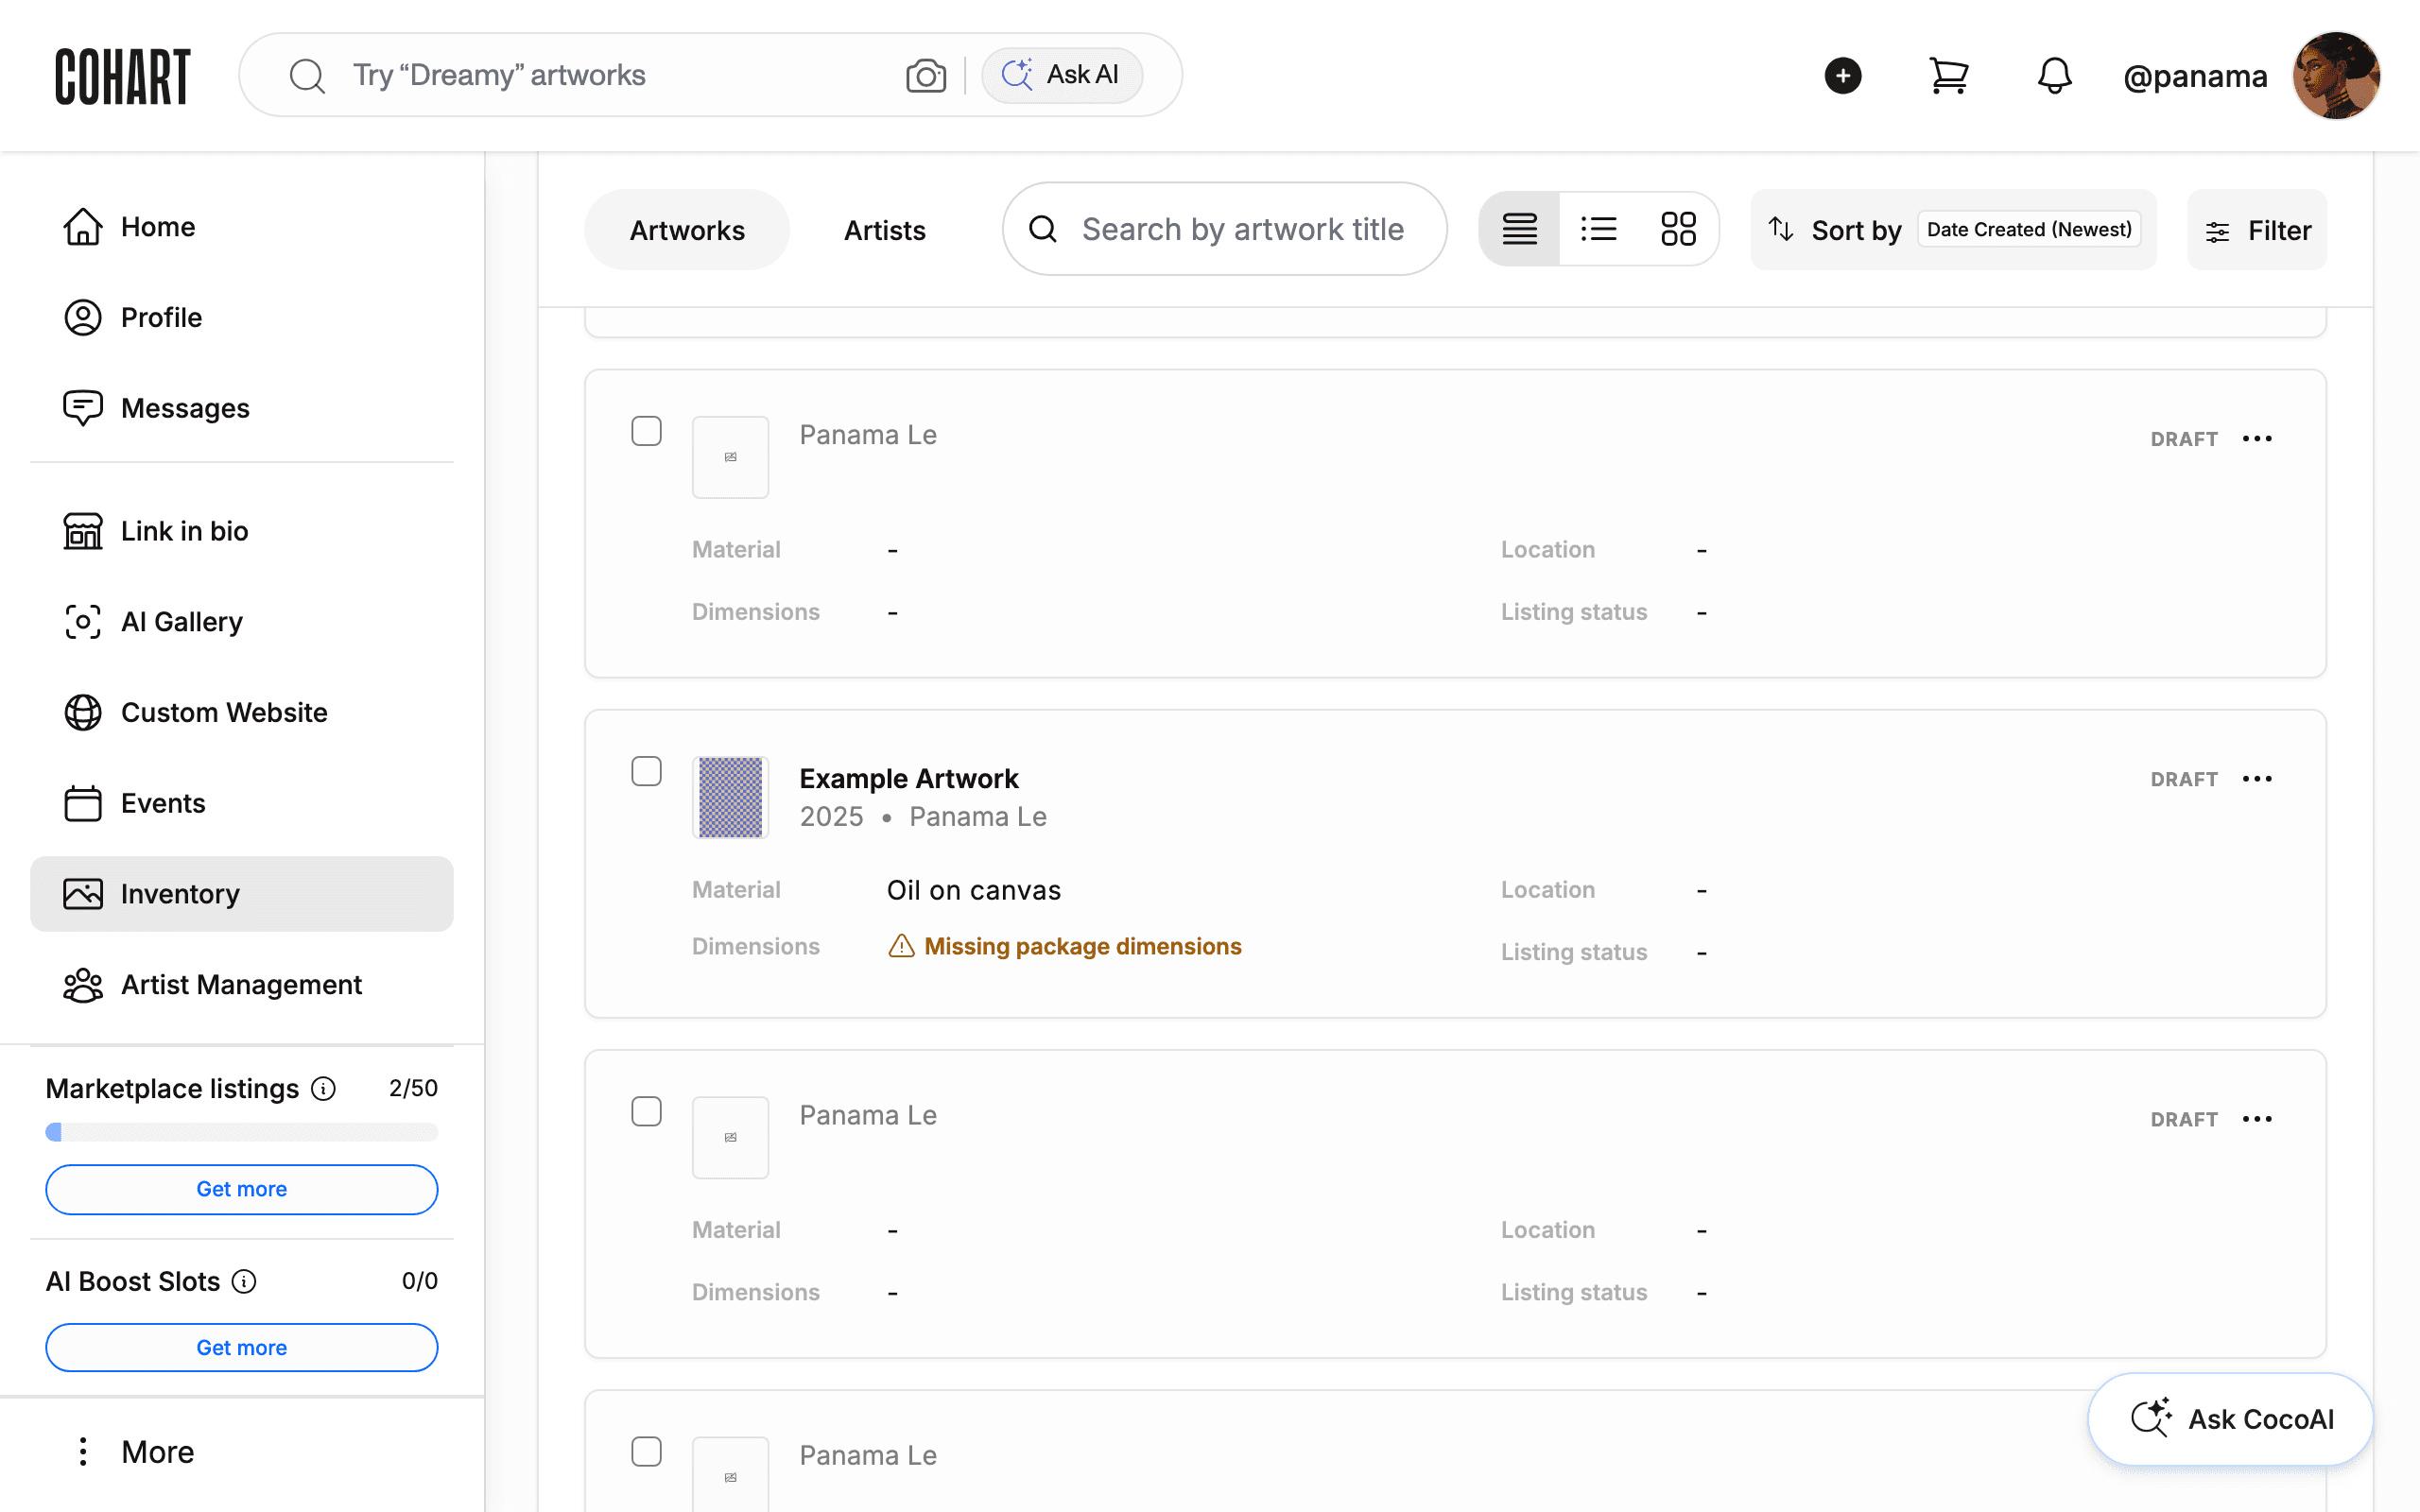
2. Open Inventory and find your artwork
Click Inventory in the left sidebar. Your artworks appear as a list of cards. Each card has a checkbox on the left and a ”…” menu button on the right.
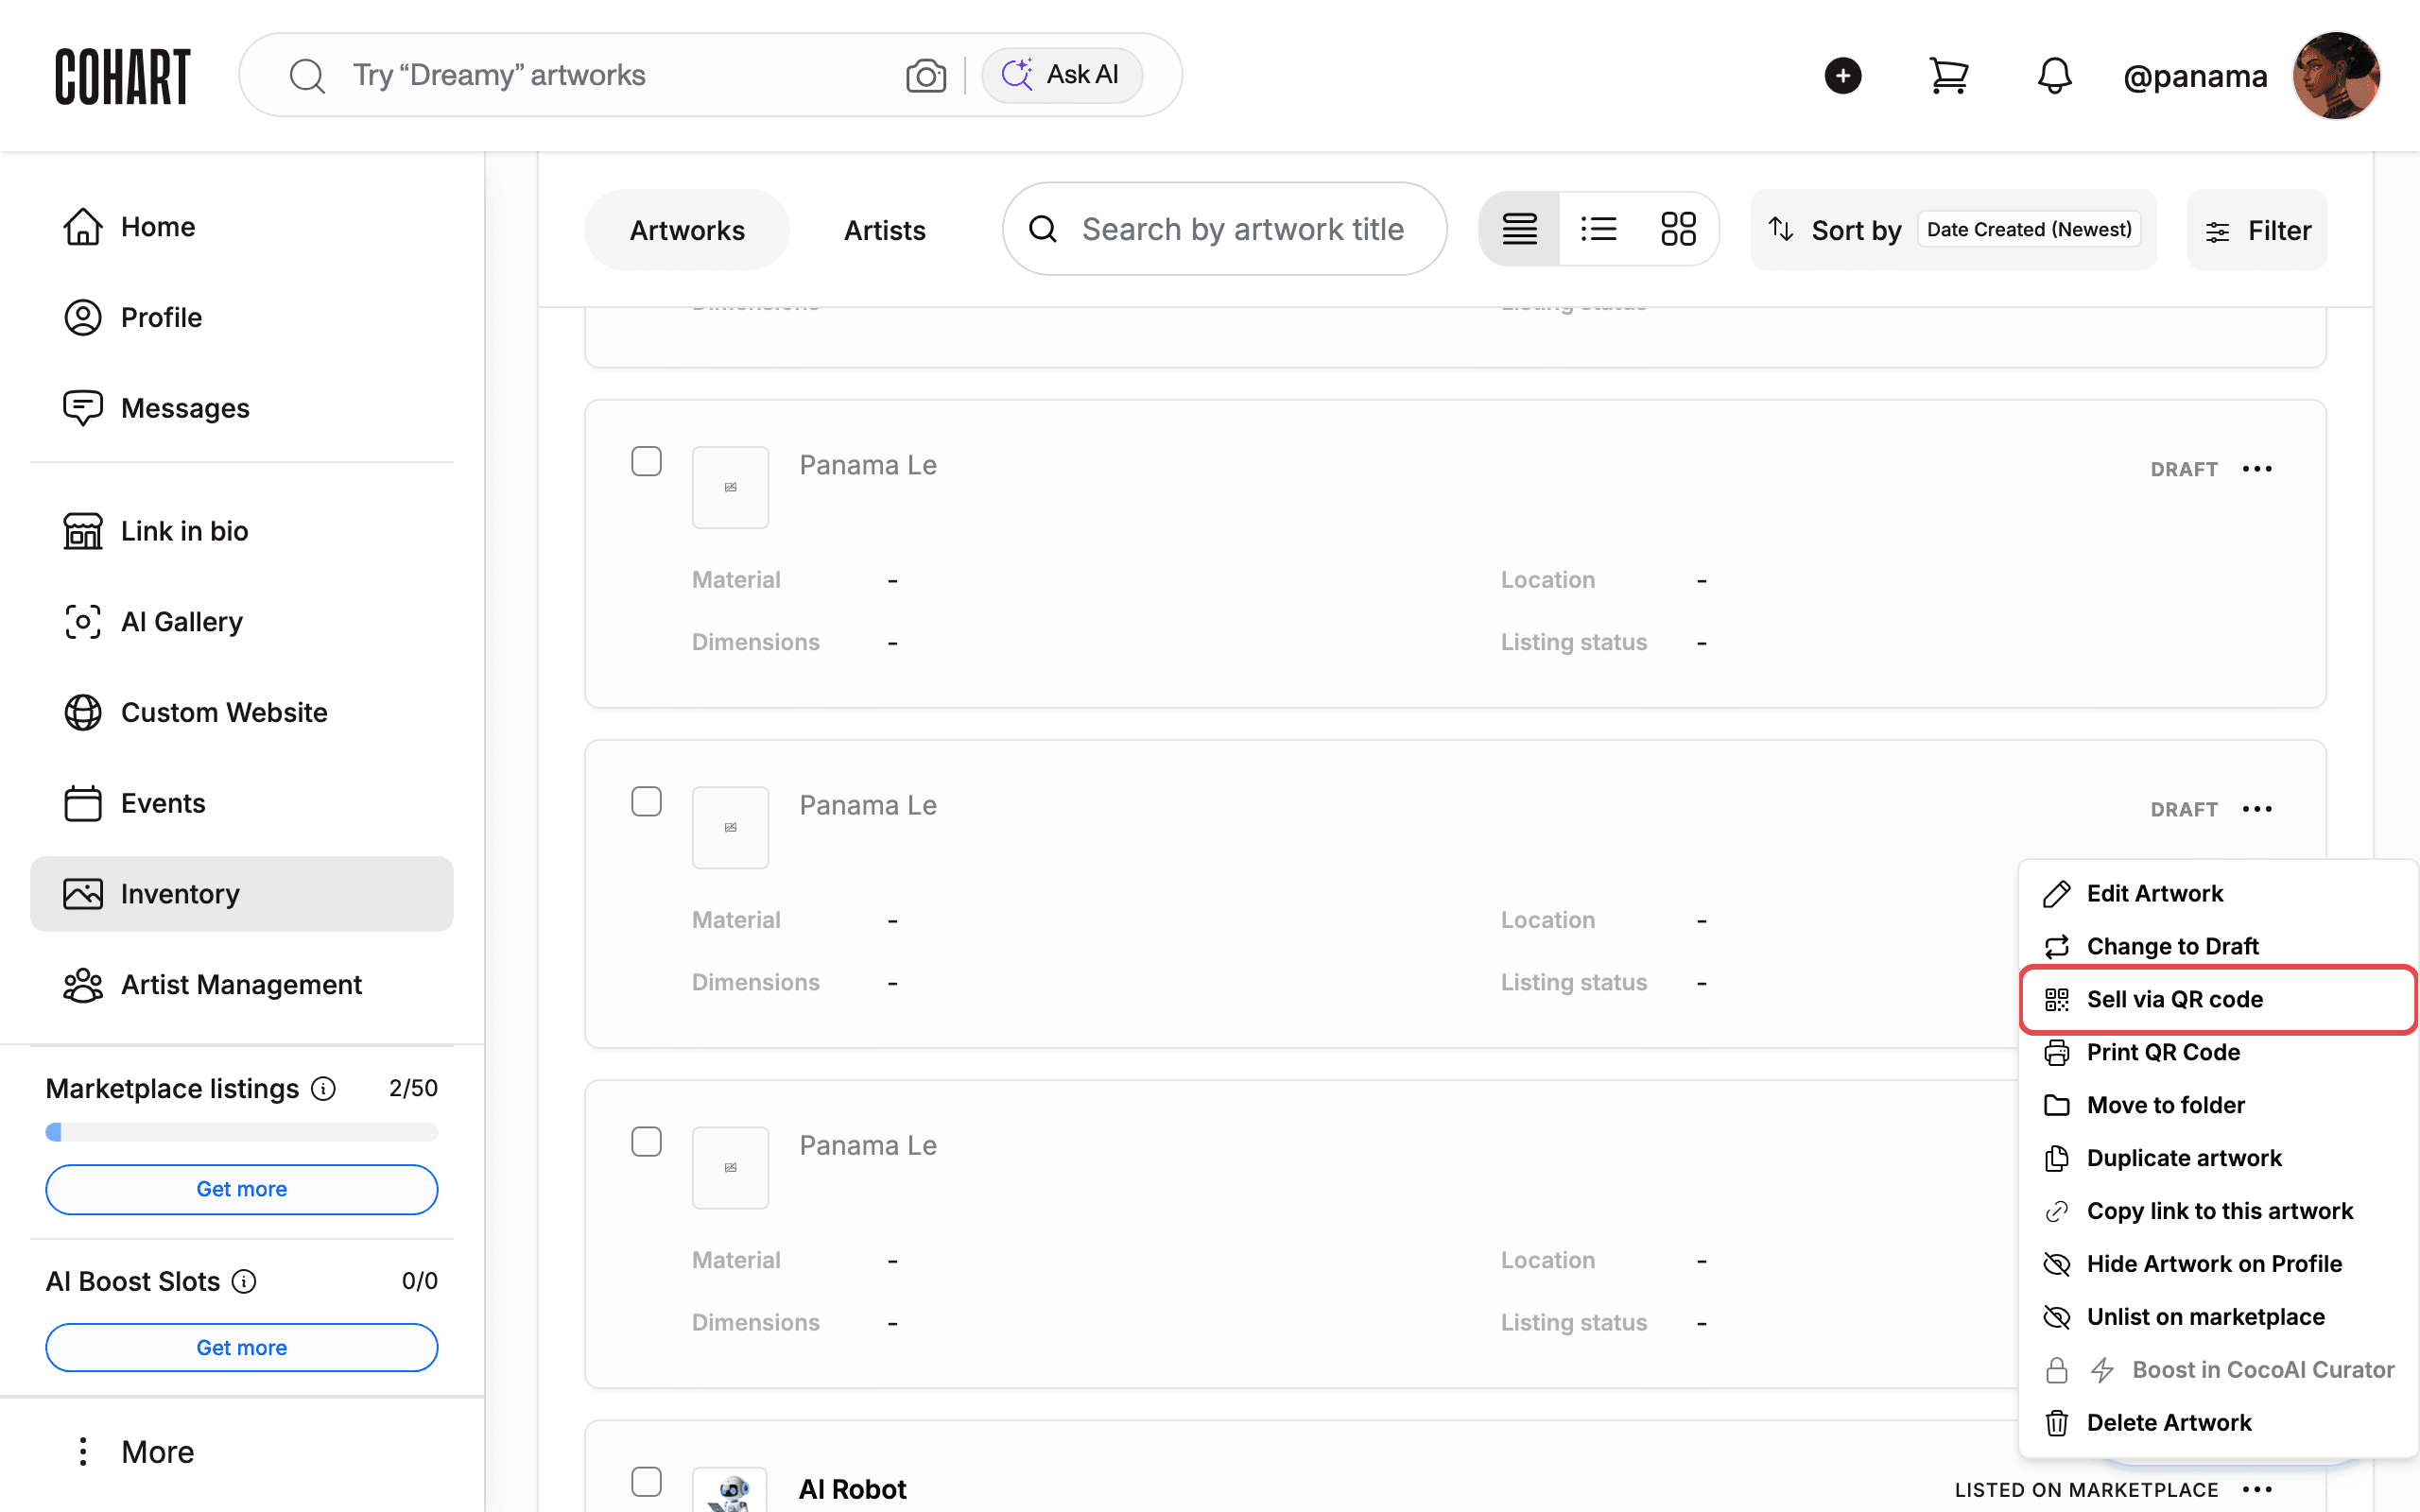
3. Open the artwork’s menu
Click the ”…” button on a published artwork card. The menu includes Sell via QR code and Print QR Code, alongside Edit Artwork, Change to Draft, Move to folder, Duplicate artwork, Copy link to this artwork, Hide Artwork on Profile, List on marketplace (or Unlist on marketplace), Boost in CocoAI Curator, and Delete Artwork.
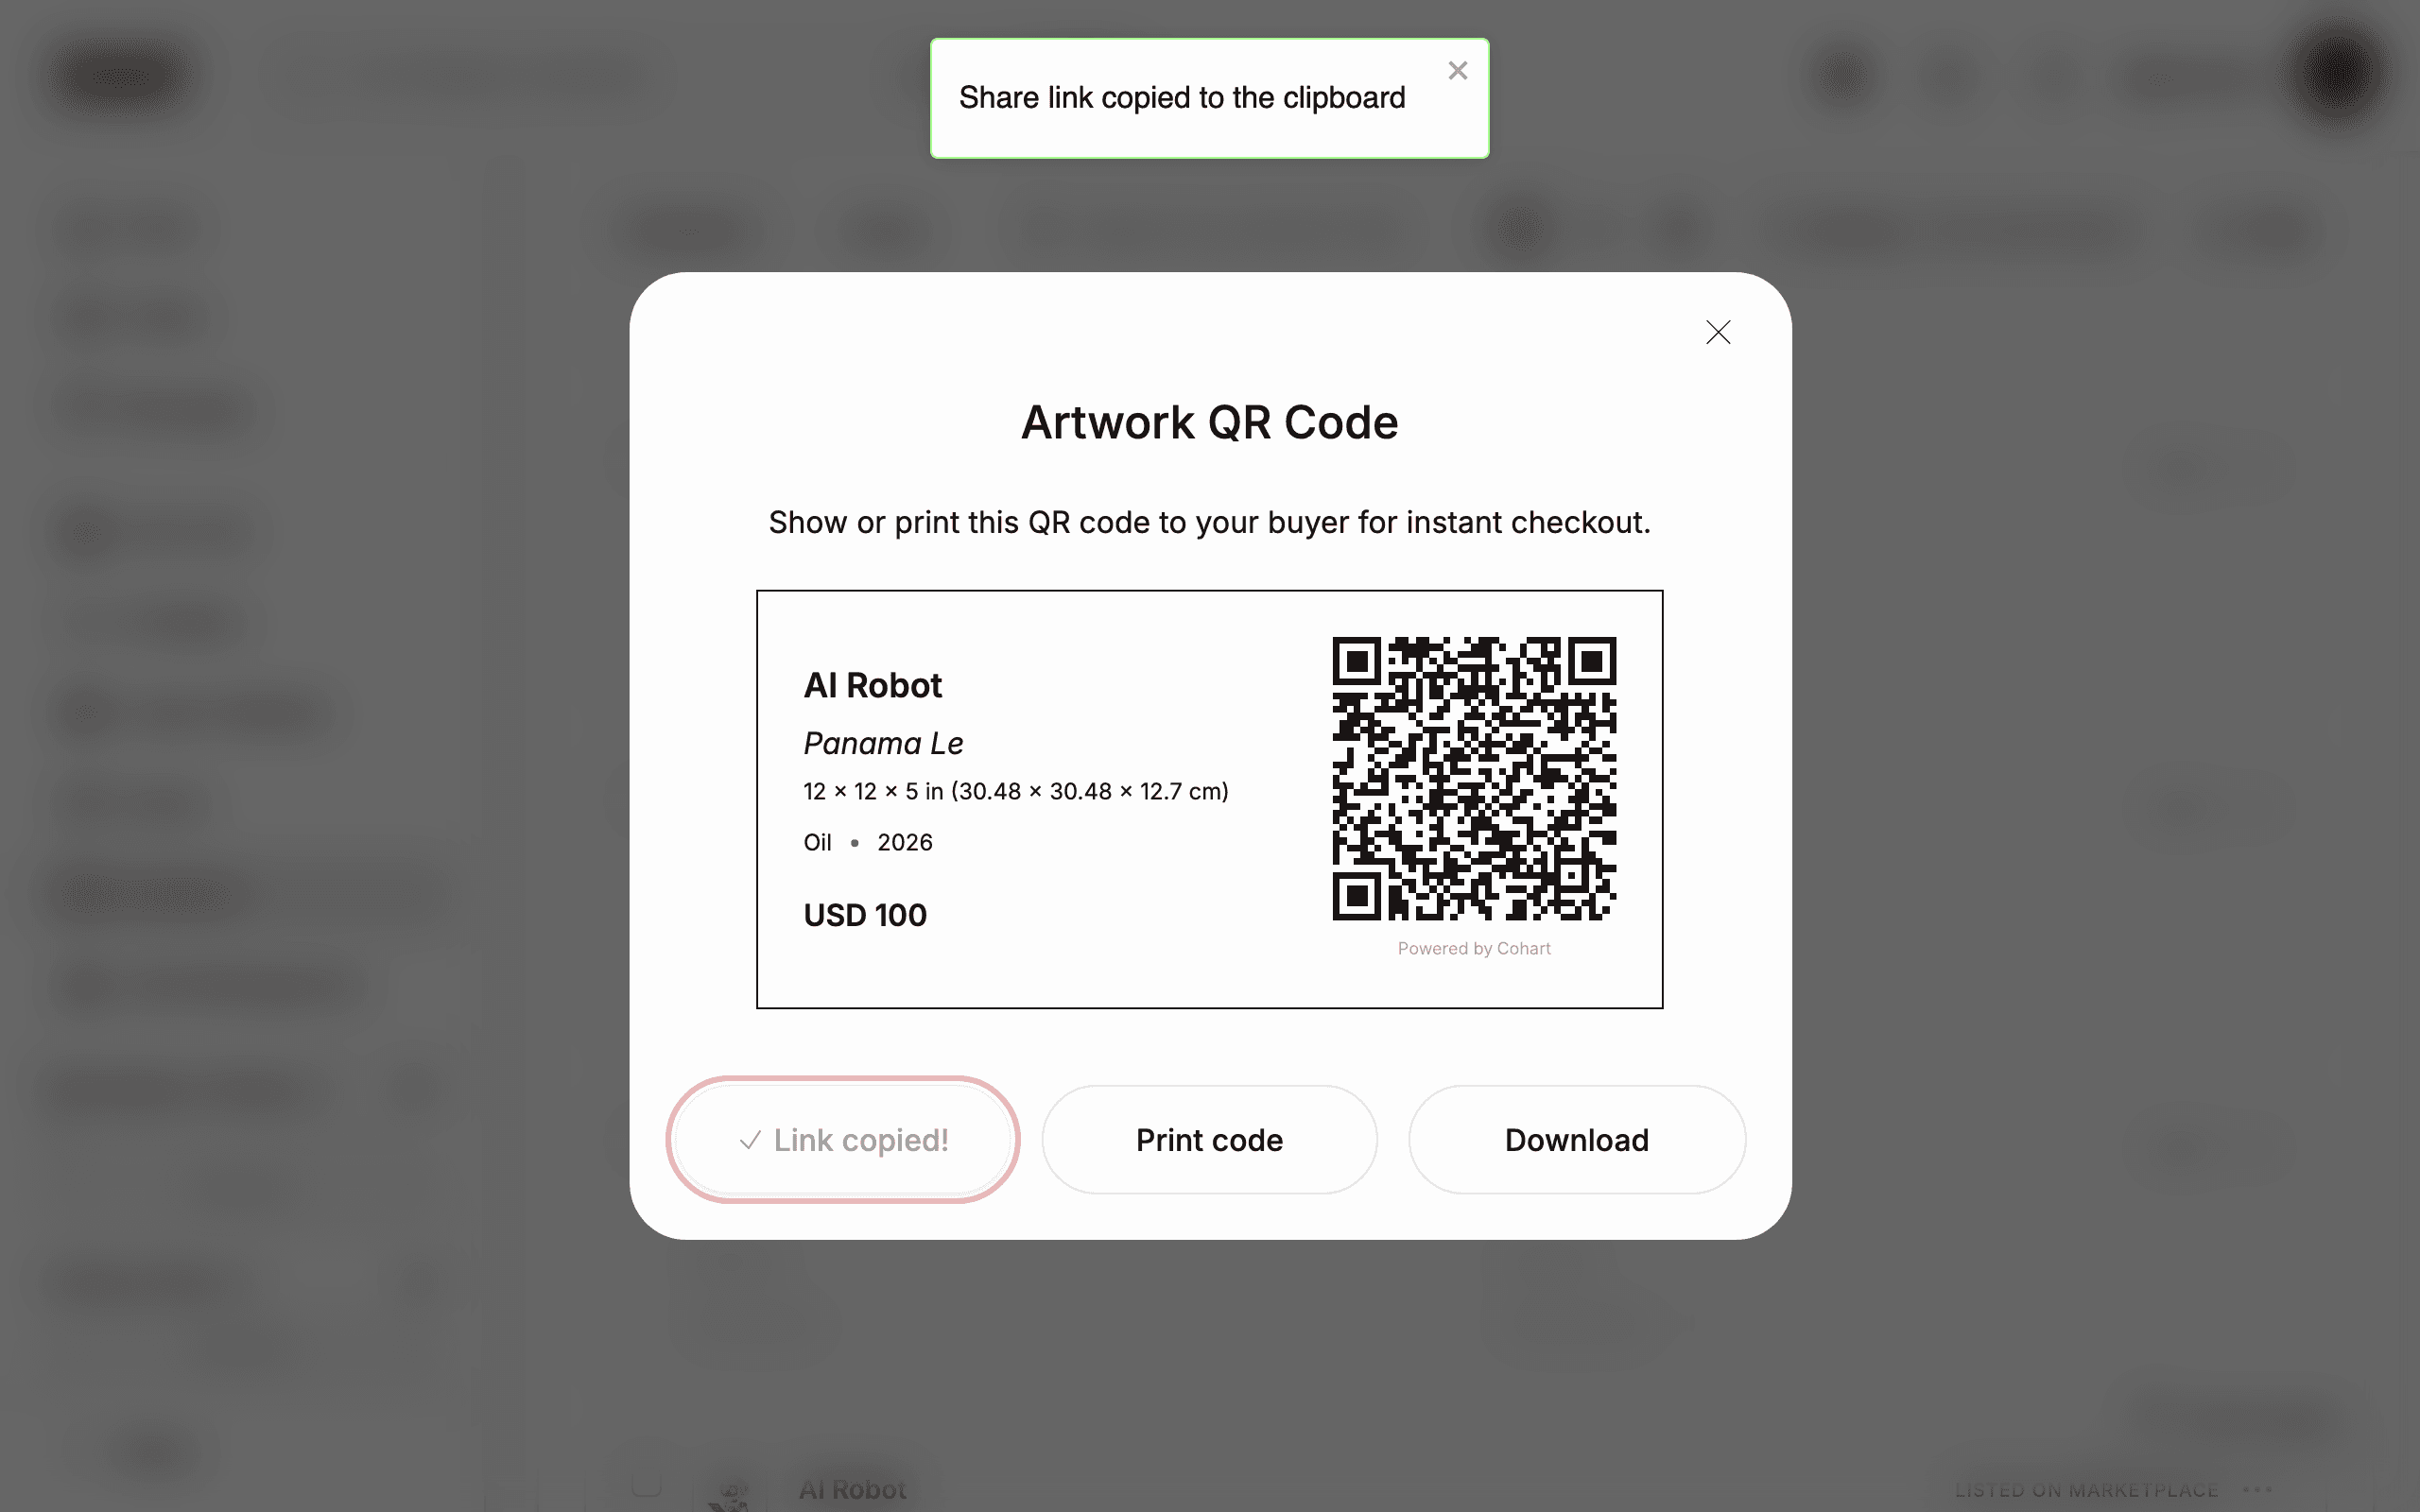
4. Generate the QR code
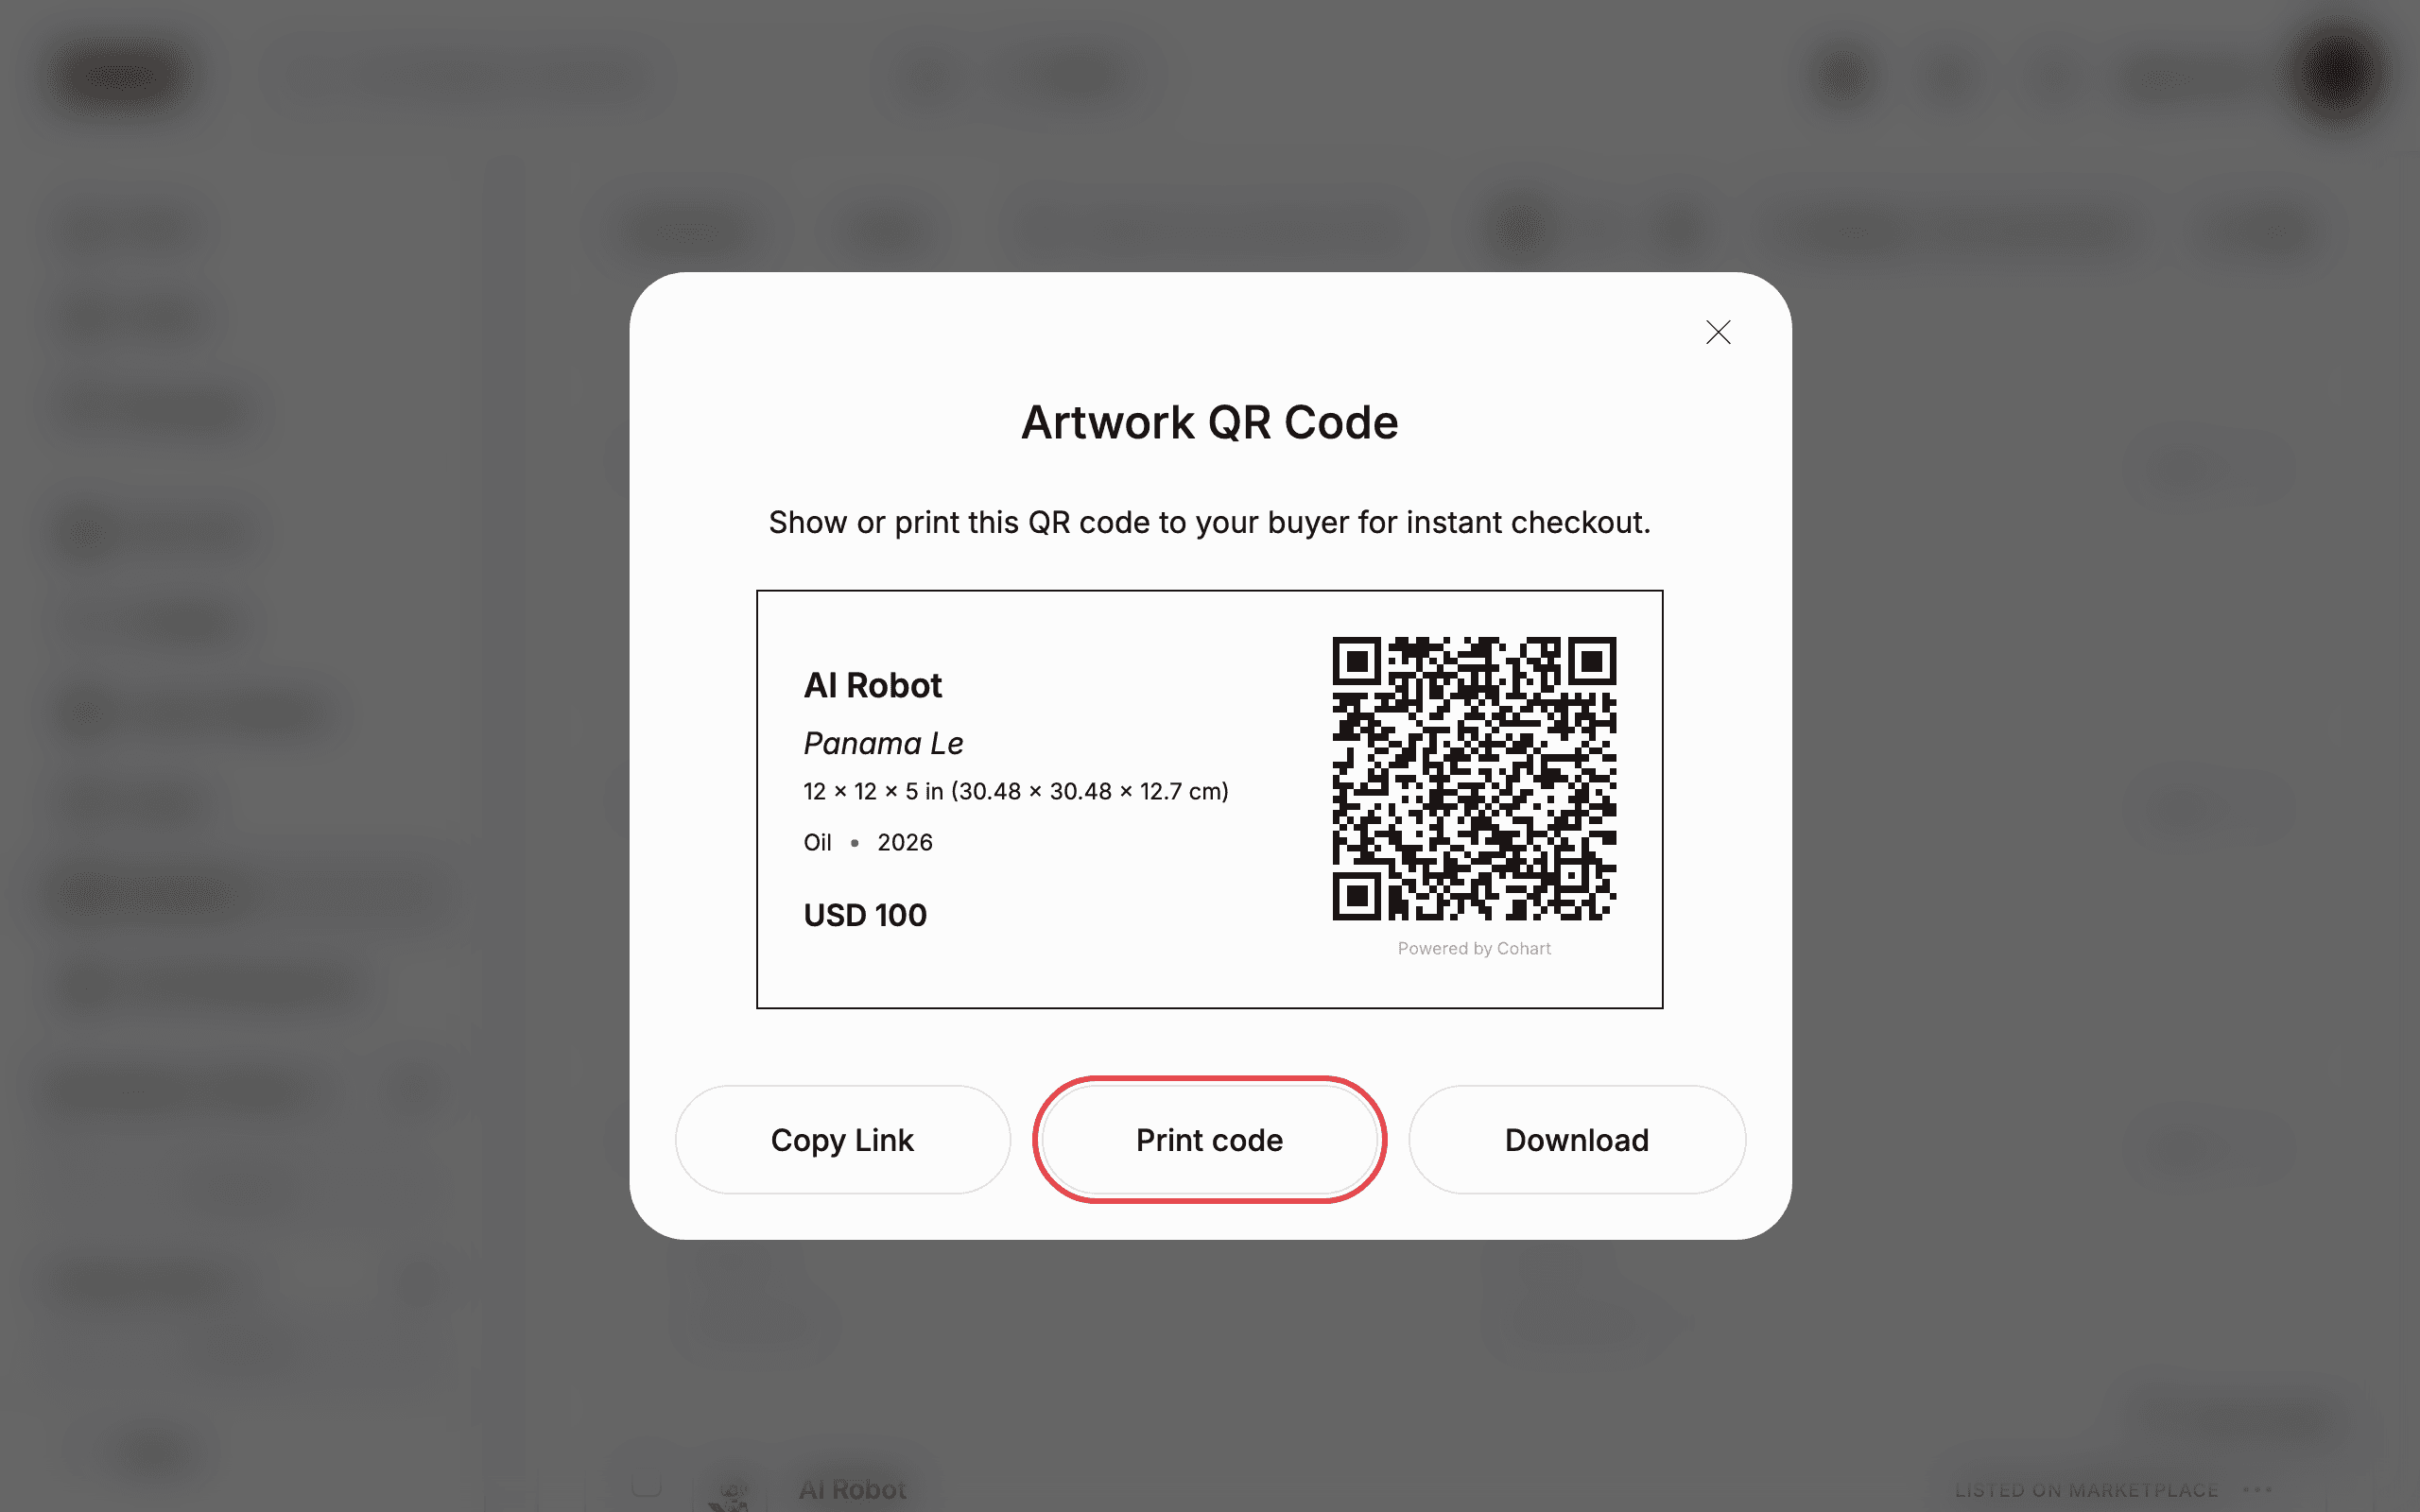
Click Sell via QR code. The Artwork QR Code dialog opens with the text “Show or print this QR code to your buyer for instant checkout.” It shows the artwork’s title, artist, dimensions, material, year, and price next to the QR code, with three buttons: Copy Link, Print code, and Download.
Click Copy Link to copy the checkout link so you can share it another way, or leave the dialog open to show or print the code directly.
5. See what the buyer sees after scanning
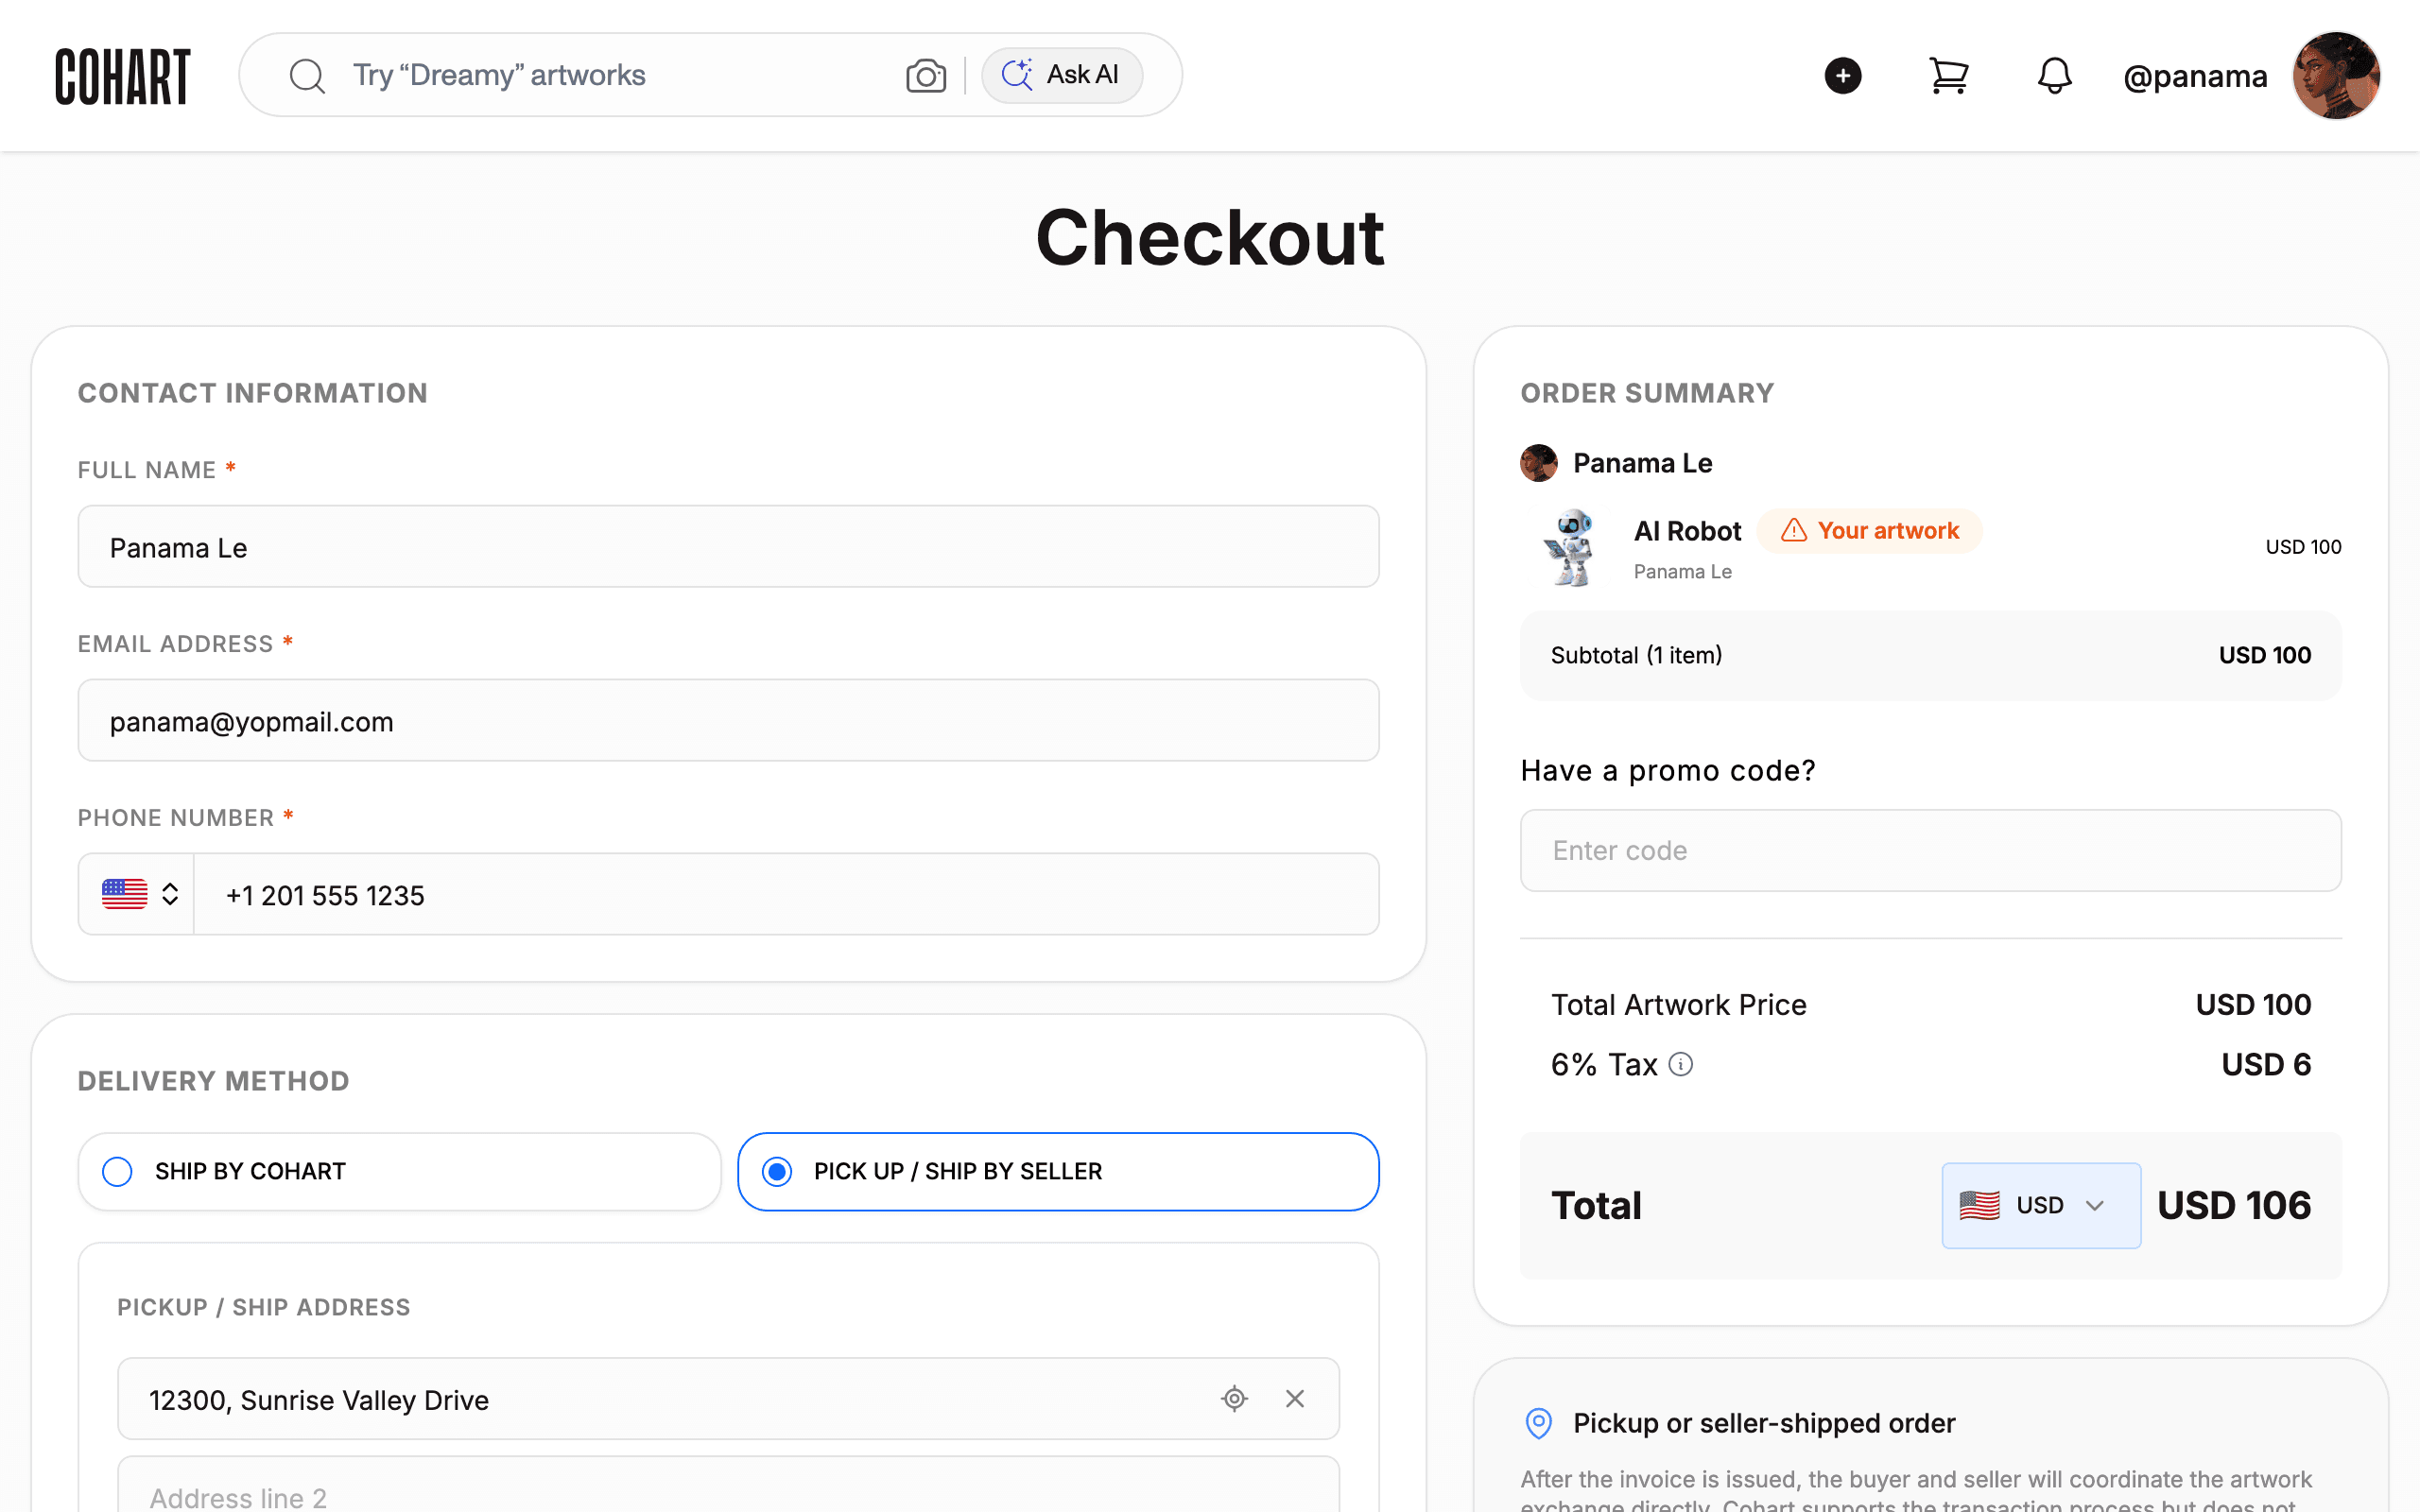
Scanning the QR code (or opening the copied link) takes the buyer straight to a Checkout page for that artwork: it asks for their full name, email address, and phone number, a delivery method (Ship by Cohart or Pick up / Ship by seller, with an address field), an optional promo code, and shows an order summary with the artwork price, sales tax, and total before they pay.
6. Print the QR code from the same dialog
Click Print QR Code in the artwork’s ”…” menu. It opens the same Artwork QR Code dialog. Click Print code to print the code for your booth or wall label, or Download to save it as an image.
7. Select artworks for a bulk label export
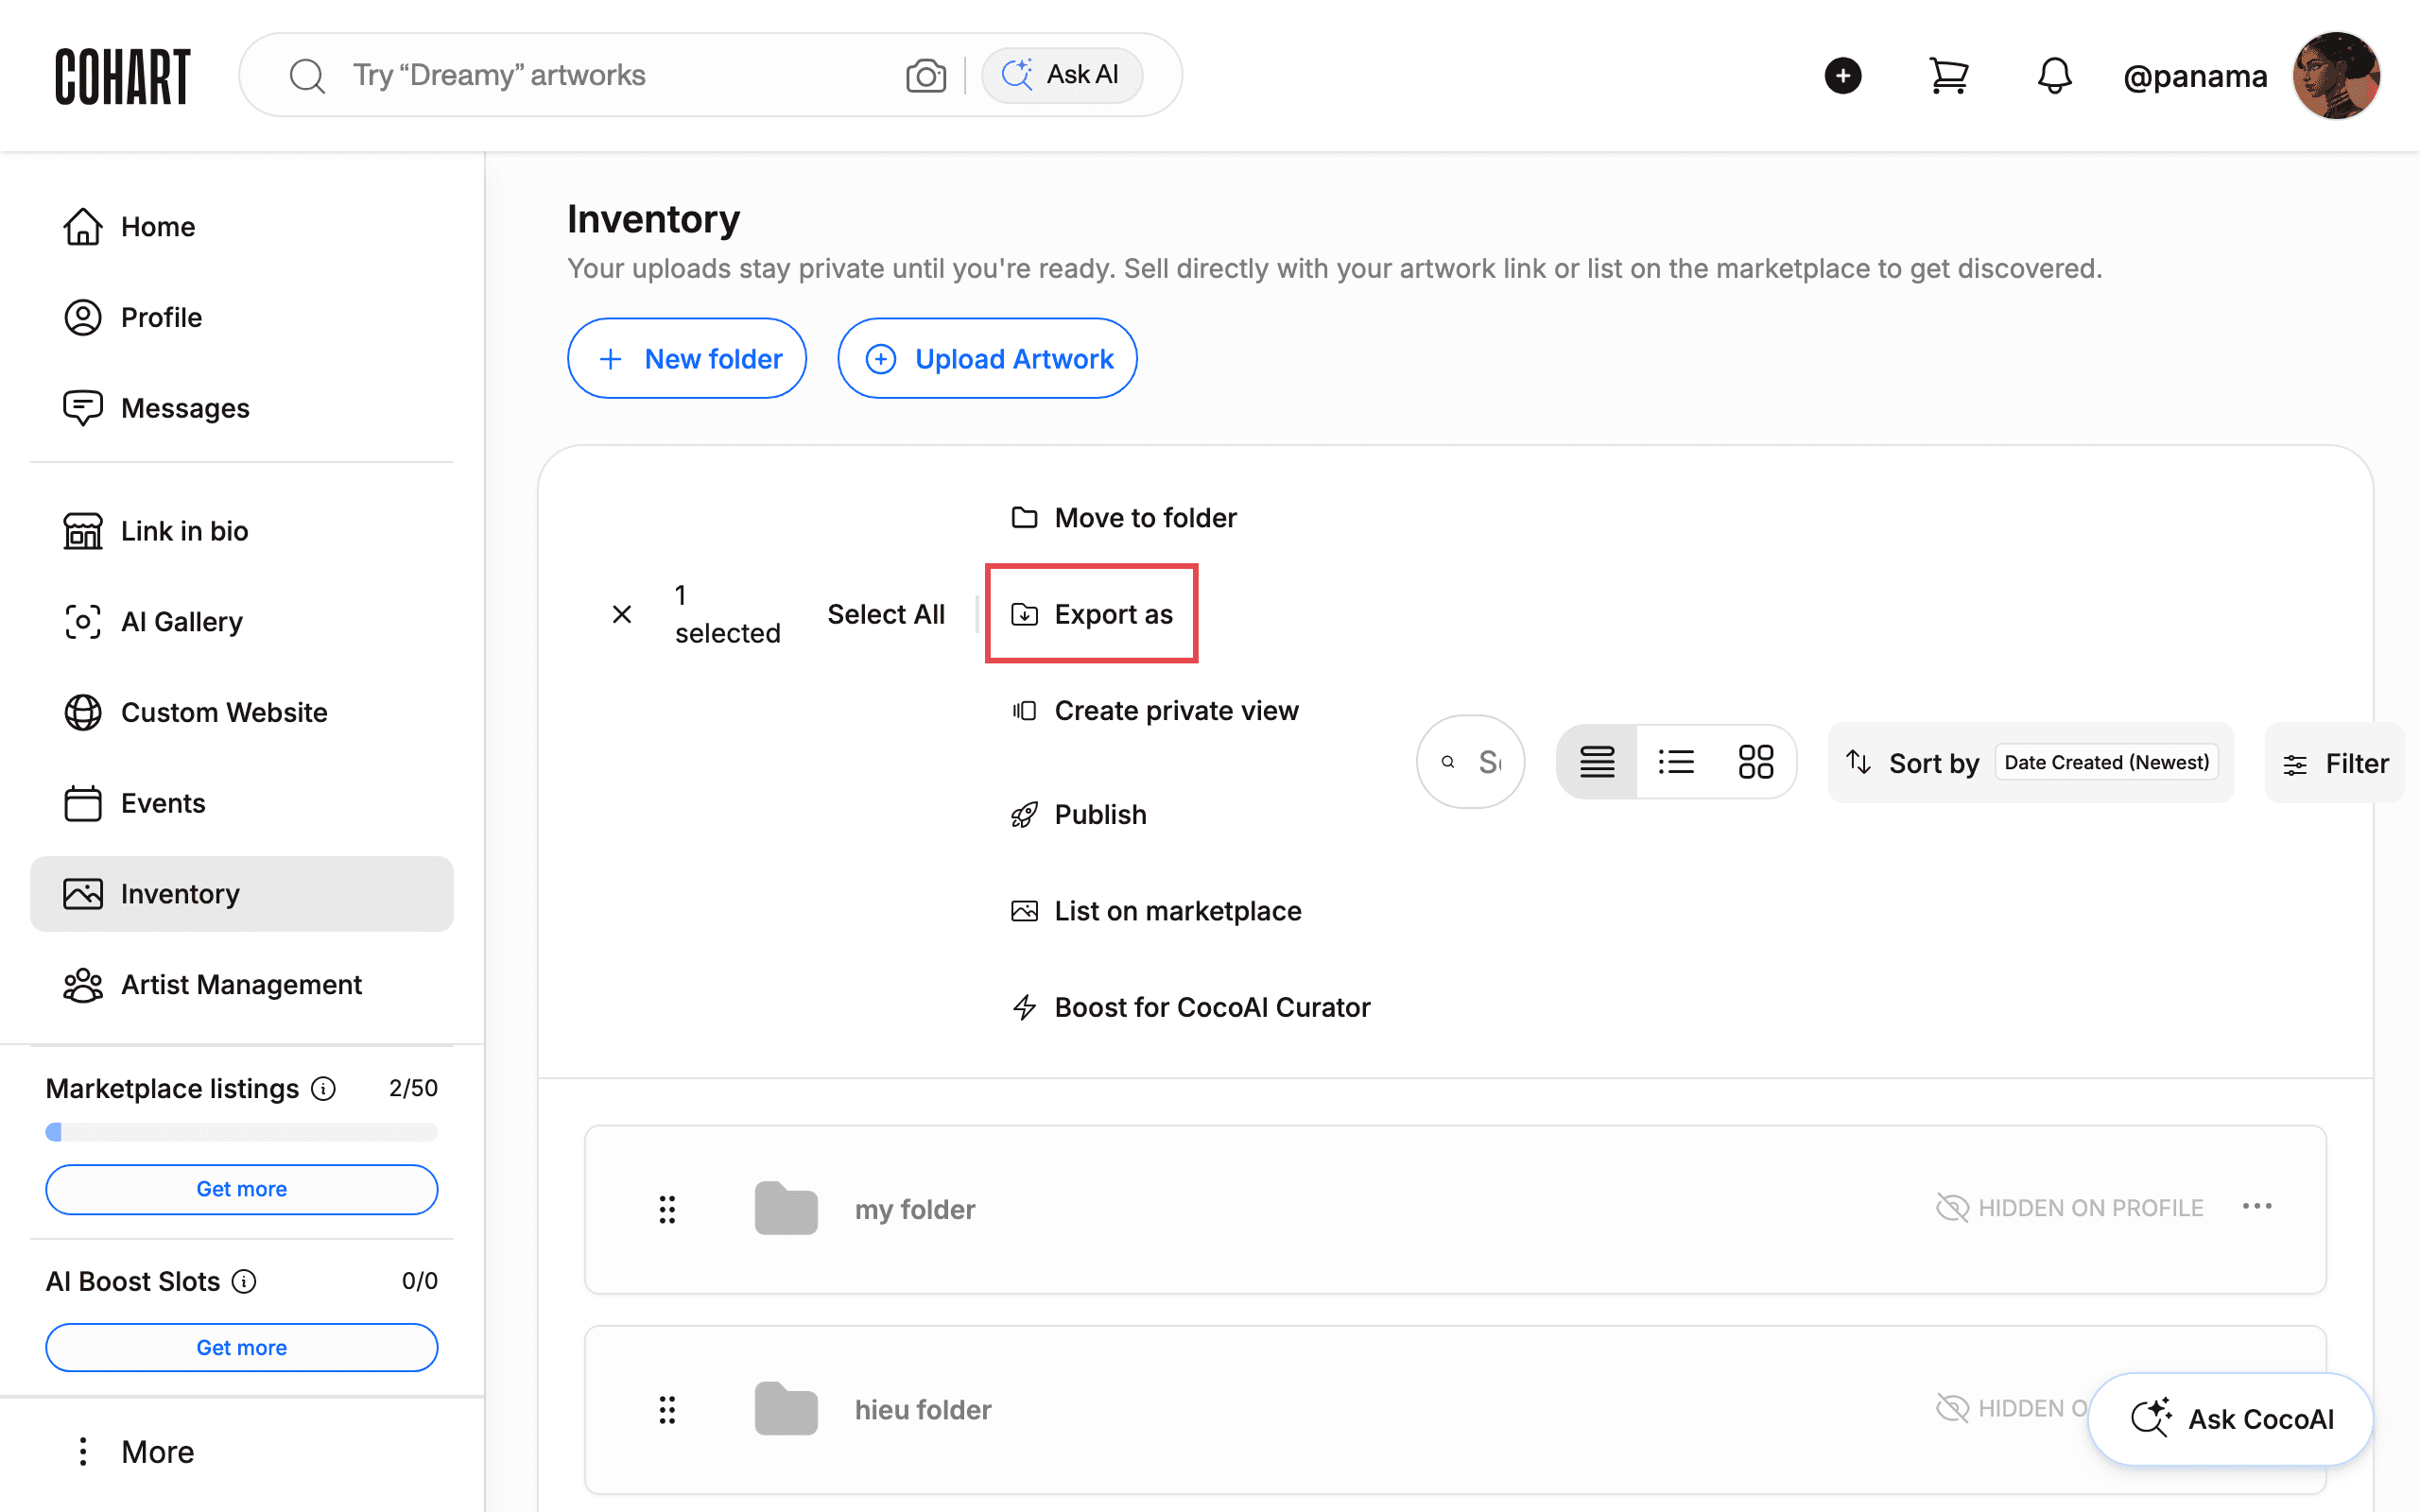
To make labels and QR codes for several artworks at once, tick the checkbox on each artwork card in Inventory. A toolbar appears with Move to folder, Export as, Create private view, Publish, List on marketplace, and Boost for CocoAI Curator. Click Export as.
8. Choose the QR code type and export
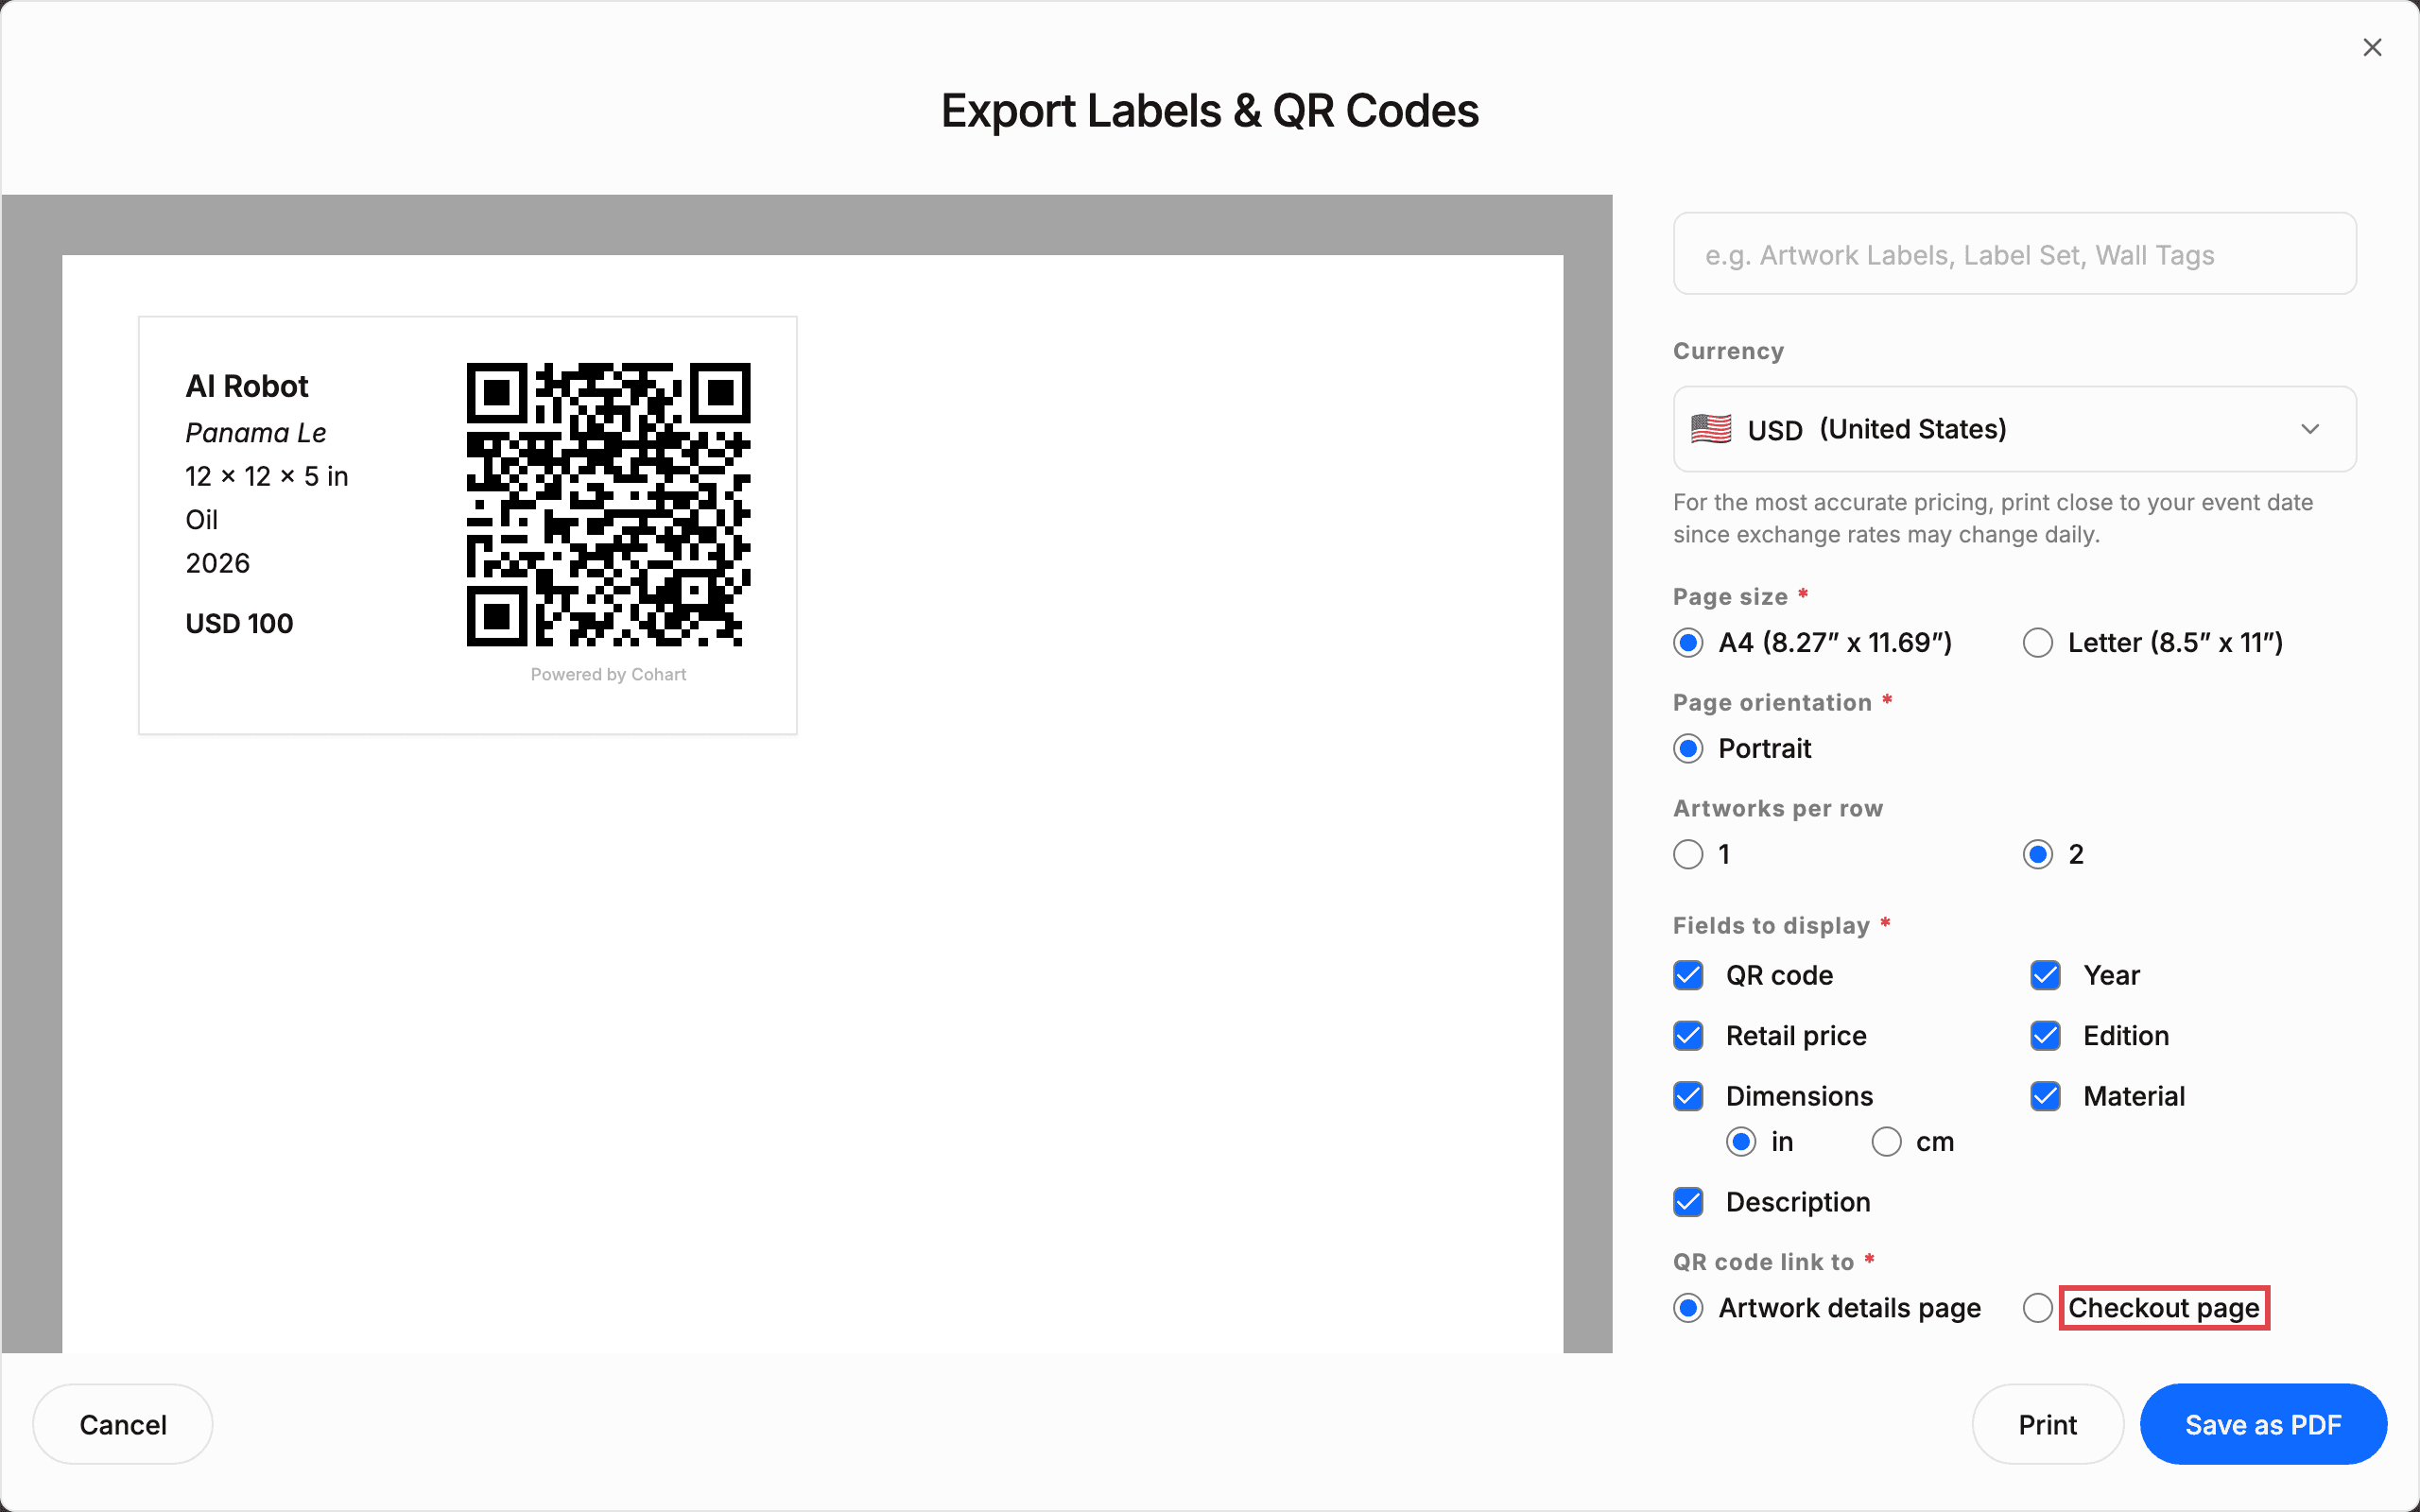
Click Labels & QR Codes. The Export Labels & QR Codes dialog shows a live preview of the label sheet next to export settings: Currency, Page size (A4 or Letter), Page orientation, Artworks per row, and which Fields to display (QR code, year, retail price, edition, dimensions, material, description).
Under QR code link to, choose Artwork details page to link to the live listing, or Checkout page to send buyers straight to checkout. Click Print or Save as PDF when ready, or Cancel to close without exporting.
Tips
- Artwork details vs. checkout link. An Artwork details page QR code always points to the live listing, so it stays accurate if you change the price later and can be reused indefinitely. A Checkout page QR code saves the price and details at the moment you generate it — regenerate it if you change the price, and treat it as best for a single event with a fixed price.
- Bulk export for events. Use Export as → Labels & QR Codes to print a full sheet of labels for several artworks at once, with the price, dimensions, material, and QR code all in one printable page.
- No inventory yet? If an artwork isn’t uploaded, QR checkout isn’t available for it yet — use a different in-person payment tool for those sales, such as Tap to Pay or a custom invoice, until you’ve added the listing.
- Currency at export time. The bulk export dialog lets you pick a display Currency so the printed price matches the currency you’re selling in at that event.
Troubleshooting
- Sell via QR code is missing from the menu → the artwork is a draft → publish it first, then reopen the menu.
- Copy Link shows no confirmation → your browser blocked clipboard access → allow copying for the site and try again, or use Download instead.
- Buyer can’t complete checkout → your payout account isn’t connected yet → connect your bank account before running the event.
- Printed QR code shows an old price → it’s a Checkout page code, which locks in the price at the time it was generated → generate and print a new one after changing the price, or switch to an Artwork details page code so it always reflects the current listing.
- Export dialog won’t let you continue → a required field like Page size, Page orientation, or QR code link to is unselected → choose one from each required group before printing or saving.